
Best Cameras for Food Bloggers 2026: Every Type Explained Side by Side
Disclosure: We may earn a commission when you buy through links on this page, at no extra cost to you. As an Amazon Associate I earn from qualifying purchases. Learn more

Compare camera types for food blogging by sensor, lens, screen and video, with a clear checklist for stills, overhead shots and restaurant light.
A camera that flatters a landscape can make a bowl of soup look flat and grey. Food needs true color, fine texture and a screen that works above the plate. The best cameras for food bloggers balance those needs with size and price, and the comparison table below sorts the main types for you.
Start with how you publish. A recipe site lives on sharp stills shot at home, a restaurant account shoots in dim rooms, and a video channel needs steady clips while hands stay busy.
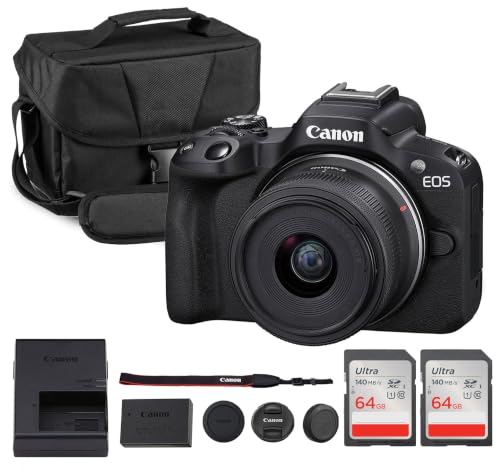


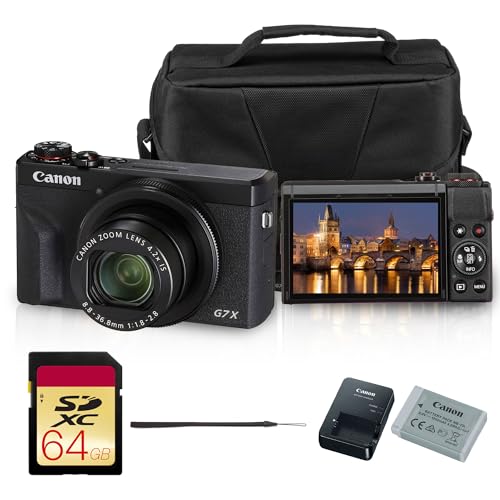


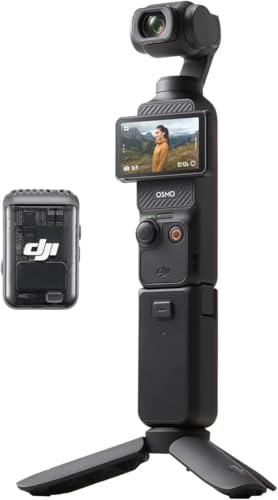


Who Should Buy Which Camera for Food Blogging?
Match the camera to the table you shoot at most often. Your light, your space and your posting pace matter more than a long spec list.
Home Recipe Creators Who Shoot on a Kitchen Counter
You control the light and can reshoot a dish, so a compact or entry mirrorless camera with a bright lens serves you well. Prioritize a screen that tilts up for overhead shots of prep bowls and finished plates.
Restaurant Bloggers Who Shoot at Small Tables
You get one visit, low light and no room for a large kit, so size and quiet operation come first. Choose a small body, a fast lens and strong high ISO results so flash stays off and nearby diners stay undisturbed. Fast app transfer matters too.
Video First Food Bloggers Who Film While They Cook
You need steady clips, clear sound input and a screen you can see from in front of the lens. Look for 4K video, image stabilization and a microphone socket before you pay for extra stills resolution. If short cooking clips are central to your posts, see our guide to the best cameras for food videos for a deeper look at video choices.
Camera Families That Suit Food Blogging
Three types cover nearly every food blog, and they trade size against control. If you want the wider market view first, see our guide to the best digital cameras before you narrow down to food work.
Pocket Compacts for Cafe and Market Shooting
Point and shoot compacts carry a fixed lens and a small body that slips into a coat pocket or a small bag. Better models use a 1 inch sensor, an optical zoom lens and simple auto modes that handle color well in daylight. Their limits show in dark rooms, where small sensors add grain. Expect to pay about $300 to $700.
Mirrorless Bodies and Swappable Lenses
Mirrorless cameras let you swap lenses, so one body can take a wide lens for a full table and a macro lens for crumb and steam detail. Larger sensors give cleaner low light files and softer background blur behind a dish. The cost is size and price. Bodies with one lens often run about $600 to $1,500.
Action Cameras for Overhead Cooking Clips
Action cameras are tiny, tough and easy to mount above a stove or a cutting board, which makes them handy for short hands free cooking clips. Their very wide view distorts plates at the edge of the frame, and their small sensors struggle with fine stills in dim kitchens. Treat one as a second camera, not as your only tool for stills. Most cost about $200 to $450.
Point and Shoot Compacts vs Mirrorless Cameras: Which Should You Choose?
Choose a compact if you value speed and discretion. It starts fast, needs no lens changes and draws little attention at a restaurant table, but you live with the lens it came with and with weaker results after dark.
Choose mirrorless if food is your main subject and you will learn manual settings. You gain lens choice, cleaner files and better blur, but you carry more and spend more. That balance is what separates the best cameras for food bloggers from a general camera bought for trips and family photos.
Key Features to Compare
Judge every model against the five factors below, in this order, so a headline feature cannot hide a weak lens or a fixed screen.
How Sensor Size Affects Food Photo Detail
Sensor size shapes how clean and detailed a food photo looks, especially indoors. A 1 inch sensor beats a phone sized sensor in dim light, APS C gives a clear step up for recipe stills, and full frame gives the cleanest files at the highest cost. Megapixels matter less than sensor size for this work, because blog images are viewed on screens and rarely printed large.
Lens, Aperture and Macro Detail
The lens, listed as the objective lens in some spec sheets, decides how close you can stand and how soft the background looks. A focal length near 35 mm to 50 mm in full frame terms suits a plate on a normal table without distortion. A wide aperture such as f1.8 to f2.8 gathers light and blurs clutter behind the dish. For garnish and texture shots, look for macro magnification near 1 to 2 or closer.
Screen Angle and Autofocus for Overhead Shots
Many signature food images are shot straight down, so the screen must tilt or swing out until you can frame the plate while standing beside the table. A fixed screen forces you to guess or climb for a clear view. Autofocus should lock on a tap and hold still dishes without hunting.
Low Light Performance in Restaurants
Restaurant light is warm, dim and mixed, so test how a camera handles ISO settings near 1600 to 3200 rather than trusting daylight samples. A bright lens and image stabilization let you keep shutter speeds safe for handheld shots without flash. A custom white balance setting gives you room to fix color later, since candlelight can turn cream sauces orange.
Color, 4K Video and Fast Sharing
Food sells on color, so look for accurate reds and greens and a picture profile you can tone down for a natural plate. 4K video gives room to crop vertical clips for social posts from one horizontal take. WiFi and Bluetooth transfer through a phone app should move a full size image in seconds, not minutes. Bloggers who also vlog can see our guide to the best cameras for bloggers and vloggers for mixed format needs.
Common Mistakes to Avoid
Most poor food photos trace back to a buying choice, not a lack of talent.
- Buying extra megapixels on a tiny sensor leaves you with large files that still look grainy in a dim restaurant.
- Choosing a fixed screen makes overhead shots a guess and leads to cropped plates and tilted tables.
- Picking an ultra wide lens for table shots stretches plates at the edges and makes portions look distorted.
- Ignoring the microphone socket forces video bloggers to record thin camera sound with no way to improve it.
- Spending the whole budget on a body leaves no money for the bright lens your indoor shots depend on.
- Using the built in flash as a low light plan flattens texture and turns glossy sauces into white glare.
Tips to Get the Most From Your Camera and Keep It Clean
Wipe the lens with a lens cloth, not your shirt, because kitchen grease smears easily and shirt fabric can carry grit. Carry a spare battery and a spare card, since a long shoot day at a market or a test kitchen drains both. Use window light from the side when you can, since side light shows texture in crusts and grilled surfaces.
Store the camera in a dry, padded bag away from flour dust and steam once shooting ends. Clean splashes off the body the same day with a slightly damp cloth, then dry it fully before storage. Readers who cover more than food can also see our guide to the best blogger cameras for general blogging setups.
FAQ
What lens focal length works best for food photos on a restaurant table?
A focal length near 35 mm to 50 mm in full frame terms works best for most table shots. It frames a plate and a drink without the edge stretch of a wide lens or the distance a long lens demands. In a tight booth, 35 mm gives you room when you cannot step back.
Which camera type is better for low light food photos in restaurants?
A mirrorless camera with an APS C or full frame sensor is better for low light food photos. Its larger sensor and bright interchangeable lens keep detail in sauces and grilled edges at high ISO settings. A compact can still work near a window at lunch. Ask the table for window seating first, because better light beats any setting change.
How much should food bloggers spend on a first dedicated camera?
Food bloggers should plan about $400 to $800 for a first dedicated camera and lens setup. That range covers a strong compact or an entry mirrorless kit with money left for a tripod and a spare battery. Spending less often means a sensor too small for indoor work. Keep about a fifth of the budget for light and support gear.
Is a smartphone enough instead of a dedicated camera for a food blog?
A smartphone is enough for bright daylight posts and quick social updates. It falls short when you need clean files in dim rooms, real background blur or a true overhead rig. Many bloggers start on a phone, then add a camera once low light posts become common.
Do food bloggers need 4K video in a camera bought mainly for stills?
No, food bloggers do not need 4K video if stills are the whole job. It earns its place once you film even short recipe clips, because one 4K take can supply both a wide view and a cropped vertical version. Check recording time limits and heat notes before a long cooking session. A camera that stops mid recipe costs you the dish and the shoot.
Final Thoughts
Decide by your table, your light and your format. Home cooks can thrive on a good compact, restaurant writers need low light strength, and video led blogs need stabilization, sound input and a screen that faces the cook.
Use the product table above to compare sensor, lens and screen side by side. When you judge best cameras for food bloggers by those points, the right type usually stands out fast.

