
Best Cameras for Insect Photography: A First Time Buyer's Guide for 2026
Disclosure: We may earn a commission when you buy through links on this page, at no extra cost to you. As an Amazon Associate I earn from qualifying purchases. Learn more

Shopping for the best cameras for insect photography for the first time? Learn the terms, compare options, and avoid rookie mistakes with this easy guide.
Buying your first camera for photographing insects can feel confusing, because the subjects are tiny, quick, and often hidden in grass or shade. This guide to the best cameras for insect photography starts with the plain basics, explains each key spec in simple language, and shows you how to judge any model with confidence.
Read the sections in order, then use the comparison table below to match the features that matter most to the way you plan to shoot. By the end, you will know which specs deserve your money and what to do on your first outing.




Cameras 101: The Basics
A camera records light that passes through a lens and lands on a sensor, turning that light into a digital image file. For insects, the challenge is scale. A ladybug may be only a quarter inch long, so the camera must focus very close and render fine detail like wing veins, antennae, and tiny hairs. That ability matters far more here than for family portraits or travel scenes.
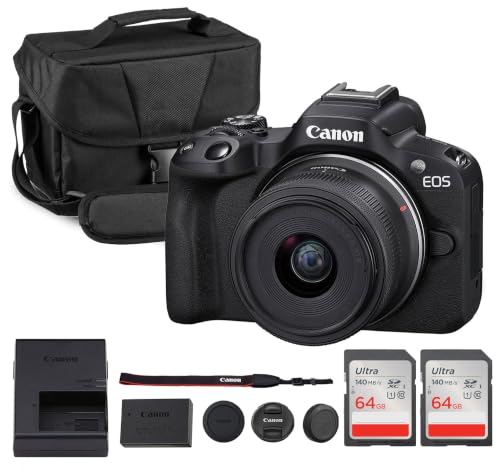
Most first time buyers choose between three broad styles. Point and shoot compacts are small, simple cameras with a fixed lens and often a dedicated macro mode. Bridge cameras add a long optical zoom lens that cannot be removed. Interchangeable lens cameras let you change the objective lens, so you can fit a true macro lens later as your skills grow.
None of these styles is automatically right for everyone. If you want broader context first, see our guide to the best cameras for photography. Readers comparing camera types in general may also review our overview of the best digital cameras.
Key Specs Explained in Plain English
The spec sheets in the product table above can look intimidating, but only a handful of numbers truly shape your results with insects. Shoppers comparing the best cameras for insect photography will see the same few terms again and again. Each topic below explains what the term means, why it matters at close range, and what level a beginner should look for.
Features That Matter for Insect Photography
Two numbers define close range work. Magnification tells you how large the subject appears on the sensor compared with its real size, and a rating of 1:1 means the image is life size, the traditional mark of a true macro lens. Minimum focus distance is the closest point where the camera can still focus, and working distance is the gap left between the lens front and the insect there.
A longer working distance is a quiet advantage, because your camera is less likely to cast a shadow on the subject or startle it. When you compare models, treat strong magnification and a comfortable working distance as the core requirement, and weigh these two numbers first.
Sensor Size and Image Quality
The sensor is the light gathering surface inside the camera. Common sizes include one inch sensors in advanced compacts, larger APS C sensors in many interchangeable lens cameras, and full frame sensors in bigger and pricier bodies. A larger sensor usually handles dim light and shadow detail better, which helps at dawn or under leaves, but it also produces a shallower depth of field.
Megapixels count the dots in the image, and they are only part of quality. A moderate count on a larger sensor often looks cleaner than a huge count squeezed onto a tiny sensor. Extra megapixels mainly help if you plan to crop a photo later, so treat them as editing flexibility rather than a quality score.
Durability and Weather Sealing
Insect photography happens outdoors at ground level, often in damp grass, light drizzle, or dusty field edges. Weather sealing means the maker has fitted gaskets around buttons, dials, and lens mounts to slow the entry of moisture and dust. A weatherproof rating on a compact states the conditions the body can handle, so read the exact rating rather than trusting the word alone.
Sealing is protection, not permission to soak the camera. Wipe the body dry after a damp session, and let the camera adjust to indoor air inside your bag before opening it, which reduces fogging from sudden temperature change. A sealed lens and body work as a pair, so one unsealed part limits the whole setup.
Ease of Use for Your Skill Level
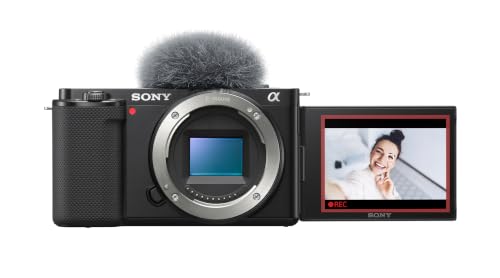
Good beginner cameras do the technical work while you learn. Look for a clear auto mode, a macro or close up scene mode, and menus written in plain words with on screen guidance. A tilting screen helps a lot, because many insects sit low on stems or stones and you can compose without lying flat on wet ground.
Phone transfer through WiFi or a maker app makes sharing simple, and many models can also record 4K video if you want short clips of insect behavior. If menus and controls are your main worry, see our guide to the best beginning photography cameras. Choose controls you understand now, not controls you hope to grow into someday.
Autofocus and Stabilization
Autofocus locks onto your subject and keeps it sharp, and at close range the depth of field can shrink to a sliver, so accuracy matters enormously. Helpful tools include a small movable focus point you can place on the insect eye, and focus aids that highlight the sharp area on screen for manual focusing. Slow and deliberate focusing often beats raw speed for still insects.
Image stabilization counters the shake from your hands, and it comes in lens based and in body forms, sometimes working together. It buys you sharper handheld shots at slower shutter speeds, which is useful in shade. It cannot freeze a moving insect, though, so a calm subject and a steady stance still matter just as much.
Battery Life and Charging
Battery life is usually listed as a number of shots per charge, and that figure drops when you use the screen often or shoot in cold weather. Insect sessions can involve long waits for one good moment, so a camera that sips power while idle is worth more than the headline count suggests.
Charging through USB C is a real convenience, because you can top up from a power bank between locations. Even so, carry a spare battery for any full morning outdoors, and store it in a warm pocket in cold weather. A camera that dies at sunrise, when insects are calm and the light is soft, teaches this lesson the hard way.
Rookie Mistakes to Avoid
Most beginner regrets come from judging a camera by the wrong numbers. Watch for these common errors before you buy and during your first weeks.
- Buying on megapixels alone, which can leave you with a camera that cannot focus close enough to fill the frame with a small beetle.
- Ignoring minimum focus distance, which can force you so close that your own shadow falls across the insect and ruins the light.
- Relying on digital zoom instead of optical zoom, which simply crops and enlarges the image and throws away the fine detail you need.
- Chasing an insect around the garden, which usually scares it off, instead of settling near one flower and letting subjects come to you.
- Skipping the spare battery and memory card, which can end a rare calm morning session right when the light turns perfect.
Getting Started: Setup and First Use
When your camera arrives, charge the battery fully, insert a memory card, and format the card inside the camera so the file system matches what the camera expects. Set the date, choose the largest image size and best quality setting, and turn on image stabilization. Then spend one relaxed session at home photographing coins or textured leaves to learn how close focus behaves before you chase anything alive.
Outdoors, move slowly and watch where your shadow falls, because insects read a sudden shadow as a threat. Some people scout a patch first with compact binoculars from a few steps back, which helps them spot basking butterflies without trampling the area. Work in soft morning light when many insects are still, focus on the eye, and take several frames at slightly different focus points.
Build two small habits from day one. Clean the front glass with a lens cloth, not your shirt, because shirt fabric can carry grit that scratches coatings. And carry that spare battery every time, even on short walks. If you are still comparing starter friendly options, see our guide to the best cameras for starter photography.
FAQs
What features matter most in cameras for insect photography?
Close focusing ability matters most in cameras for insect photography, followed by a comfortable working distance and accurate autofocus. If two models look equal on paper, use working distance as your tie breaker, because a few extra inches of space keeps your shadow off the subject and lowers the chance of scaring it. Treat extra megapixels and long zoom ranges as bonuses you consider only after those core needs are met.
What magnification do cameras for insect photography need?
A magnification of 1:1 is the ideal target for cameras used in insect photography, because it renders the insect at life size on the sensor. Lower ratios around 1:2 still suit butterflies, dragonflies, and other larger subjects. If your camera falls short, extension tubes or a close up add on lens can raise magnification later for modest cost, which gives a basic setup a useful growth path instead of forcing a full replacement.
Is a smartphone enough for insect photography instead of a dedicated camera?
A smartphone is enough for casual insect photography of larger and calmer subjects, such as butterflies resting with open wings in bright light. Phones struggle with very small beetles and ants because their close focusing range and detail fall short, and clip on macro lenses often soften the edges of the frame. Start with your phone if you like, and let its limits, rather than advertising, tell you when a dedicated camera is worthwhile.
How much should you spend on your first camera for insect photography?
Plan on about $300 to $600 for a capable first camera for insect photography, depending on whether you choose a compact or an interchangeable lens body. Set aside part of that budget for a memory card, a simple camera bag, and the spare battery mentioned earlier, because a camera without those basics is not ready for the field. Spending more mainly buys a larger sensor or a better macro lens, not a guarantee of better photographs.
Which camera features help most with insect photography in low light?
A larger sensor and image stabilization help most with insect photography in low light, because they keep images cleaner and sharper as light fades. Early morning is actually prime time, since cool insects move slowly and tolerate a closer approach. If you raise the sensitivity setting to gain shutter speed, expect more grain in the image, and consider a small continuous light or a diffuser for your flash rather than using bare flash at full power.
What camera specs matter most for beginners in insect photography?
Simple menus, a good auto mode, and strong close focusing matter most for beginners in insect photography. You can safely ignore headline digital zoom numbers, extreme video frame rates, and long lists of creative filters, because none of them improve a close portrait of a beetle. One overlooked plus is a quiet shutter option, since a loud click at close range can startle nervous subjects like grasshoppers before you get a second frame.
Final Thoughts
For a first purchase, keep your priorities in this order: magnification and working distance first, then sensor size and stabilization, then handling and battery convenience. The comparison table above pulls those details together so you can weigh them side by side. Choose the option that fits your budget and the insects you actually see near home.
The right best cameras for insect photography choice is simply the camera you understand, carry often, and can focus close with confidence. Start with patient practice on common subjects, and upgrade your lens or technique only when a clear limit shows up in your photos.


