
Best CO2 Pumps: Buying Guide and Checklist for 2026
Disclosure: We may earn a commission when you buy through links on this page, at no extra cost to you. As an Amazon Associate I earn from qualifying purchases. Learn more

Compare the best co2 pumps by valve fit, cartridge size, control, and build quality with this plain buying guide for faster, calmer flat repairs.
A flat tire far from home turns a good ride into a long walk unless you can add air fast. That is the whole case for carrying one of the best co2 pumps, a tiny inflator head plus a pressurized cartridge that fills a tire in seconds. The catch is that speed without control wastes gas and money.
This guide breaks down valve fit, cartridge size, flow control, and running costs so you can choose with confidence. Start with the comparison table below, then check the details that match your bike, your tire size, and how far you usually ride from help.
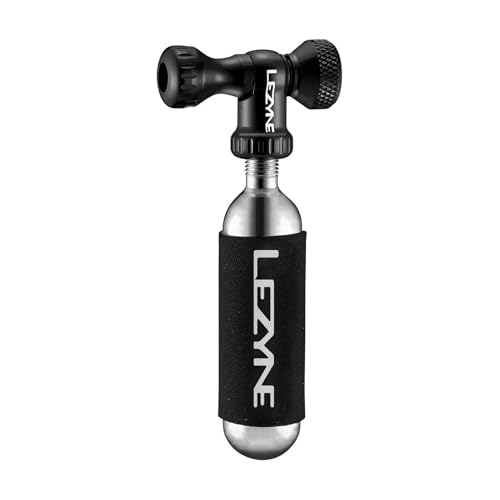


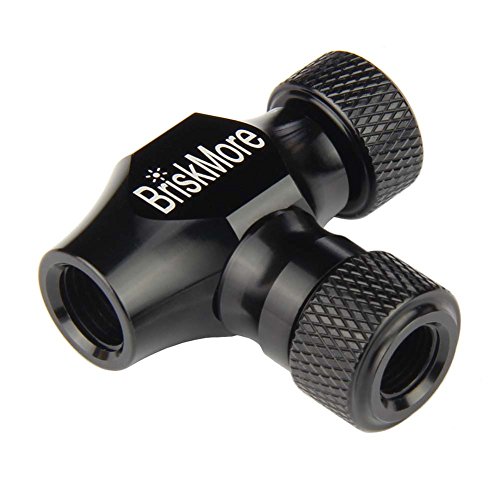
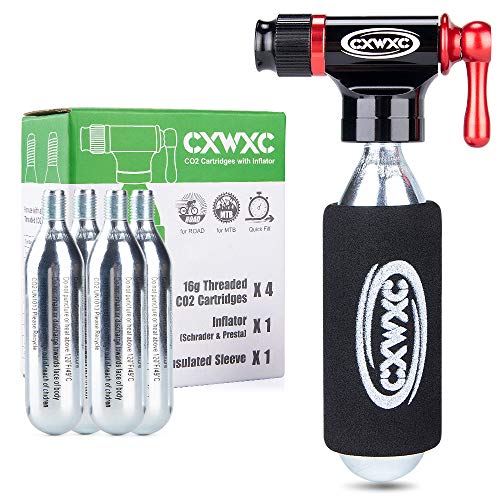


Price Tiers at a Glance
Entry Tier, Around $15 to $30
Entry tier inflators suit riders who flat rarely and stay near home or a car. You get a simple head that pierces the cartridge and releases gas when you push or thread it onto the valve. There is often no way to stop mid fill, so a mistake costs a full cartridge. The bodies are light and small, which is nice in a jersey pocket. Choose this tier if your rides are short, your tires are narrow, and you are willing to practice at home before you rely on it outside.
Mid Tier, Around $30 to $50
Mid tier inflators are where most riders should shop. A twist valve or trigger lets you release air in short bursts, pause to check firmness, and top off only as needed. Seals tend to be better and often replaceable, and an insulated sleeve protects your hand from the freezing cartridge. These heads handle both Presta and Schrader valves on many models. For weekly riders, the extra control quickly pays for itself in saved cartridges and calmer repairs.
Premium Tier, Around $50 to $80
Premium inflators add refined control, tougher metal bodies, and thoughtful storage such as a case that holds the head and spare cartridges together. A few include a small gauge or a design that seals especially well on tricky valve stems. This tier suits riders who travel for events, ride in remote areas, or keep one kit for many years. You are paying for reliability under stress, not for faster gas, since every system uses the same standard cartridges.
How to Choose the Best Co2 Pumps: Buying Guide
Intended Use and Who It Is For
Start with where and how you ride. Road riders with narrow tires need high pressure from a small volume of gas, so a 16 gram cartridge is often enough. Gravel and mountain bike riders need volume more than pressure, so larger cartridges matter more. Commuters need reliability in bad weather and a head that works with gloves. If you ride several bike types, choose a head with dual valve fit and stock two cartridge sizes. Matching the tool to your most common ride prevents most buying regrets.
Key Performance Specs
The spec that matters most is cartridge capacity relative to your tire. As a rough guide, a 16 gram cartridge fills a standard road tire to a firm pressure, a mid volume gravel tire to a moderate pressure, and a wide mountain bike tire only to a soft roll out pressure. A 25 gram cartridge shifts each of those results up a step. Also look at flow control range, seal design, and whether the head locks onto the valve or simply pushes on. A locking or threaded connection wastes less gas on crooked starts.
Ease of Use and Setup
An inflator should be simple enough to use when you are tired, cold, or rushed. Large knobs, clear open and close direction, and a sleeve you can grip all help. Practice is the real setup step: at home, fit the head to an old tube, release a short burst, stop it, and remove the head without a hiss. That five minute rehearsal teaches you more than any spec sheet. If a design feels fiddly on a workbench, it will feel worse beside a trail or a busy road.
Know how tip: keep the inflator head, cartridges, tire levers, and a plug or patch kit in one small pouch. A kit you can grab as one unit is a kit you will actually carry on every ride, including the short ones where flats still happen.
Build Quality and Materials
Most heads are machined aluminum, brass, steel, or reinforced composite. Metal costs more and handles drops, grit, and repeated cartridge changes with less wear. Composite keeps weight and price low and is fine for occasional use. Inside, the puncture pin and the rubber seal decide how cleanly each cartridge empties into the tire rather than into the air. Ask whether seals are replaceable. A maker that sells a tiny seal kit is telling you the head is meant to be serviced, not discarded.
Safety and Handling
CO2 expands fast and the cartridge becomes extremely cold during discharge, cold enough to stick to bare skin. Always hold the cartridge through the supplied sleeve or a glove, and keep your face away from the valve as you start the flow. Never leave cartridges in a hot car, where heat raises internal pressure. Point the valve away from others, add air in bursts, and check pressure before riding on, since an overfilled tire can feel harsh and a badly seated bead can shift under load.
Maintenance and Long Term Costs
The inflator head is a one time purchase, but cartridges are a running cost, often around $2 to $5 each depending on size and pack quantity. Buying multi packs lowers the cost per repair. Your real cost per flat rises sharply if poor seals waste cartridges, so a better head can be cheaper over two seasons than a bargain head. Store cartridges dry, keep grit out of the head, and replace seals when fills start to sound weak. Budget riders should also weigh a mini pump, which costs more at first but uses free air forever.
Warranty and Customer Support
Look for at least a one year warranty on the head and clear access to spare seals. Support matters because inflator problems are usually small and fixable, a worn seal, a bent pin, a lost sleeve. A brand that answers sizing and cartridge questions quickly saves you guesswork. Keep your receipt and register the product if the maker offers it. For riders comparing broader inflator styles, our guide to the best co2 bike pumps explains how CO2 heads compare with mini pumps and hybrid designs that combine both.
Types of CO2 Pumps
Budget Options
Budget inflators strip the design down to the essentials: pierce, release, fill. They are light, cheap, and perfectly workable for narrow tires and short rides. The trade off is control, since most cannot pause the flow. Choose one if you want a just in case tool for a saddle bag and you accept that your first real use may waste a cartridge while you learn its feel.
Compact Options
Compact inflators prize size above all, with short heads that disappear into a jersey pocket or a small storage canister on the frame. They suit racers and minimalist riders. The small knobs can be harder to turn with cold hands, and storage for a spare cartridge may be limited. If your rides are long, pair a compact head with a second cartridge carried in a separate pouch so one flat does not leave you unprotected for the ride home.
Premium Options
Premium inflators focus on control and durability, with precise valves, metal bodies, and cases that organize the whole repair kit. They suit frequent riders, event travelers, and anyone who has already wasted gas with a crude head. The performance gain is consistency: the same clean seal and the same measured fill, ride after ride. For trail riders in particular, our guide to the best co2 mountain bike pump setups covers large volume tires and tubeless repairs in more detail.
Mid Range Options
Mid range inflators balance control, weight, and price, and they are the default choice for most club and commuter riders. Expect a twist or trigger valve, dual valve compatibility on many models, and replaceable seals. This is also the tier where insulated sleeves and simple mounts become common. If you are unsure where to start, start here, and let cartridge size, not head price, be the variable you adjust for your tire width.
How to Make Your CO2 Pump Last Longer
- Read the manual before first use: each head opens and seals a little differently, and one wrong twist can vent a full cartridge.
- Clean and inspect regularly: brush grit from the threads and check the seal after any fill that hissed or felt weak.
- Store in a dry place: moisture corrodes cartridge threads and can foul the puncture pin over a winter in a damp garage.
- Use the sleeve every time: it protects your hand and gives you a firmer grip, which keeps the head seated squarely on the valve.
- Do not leave a pierced cartridge attached: leftover gas and moisture can corrode internal parts, so remove spent cartridges promptly.
- Register the product for warranty: a quick registration makes seal kits and warranty help much easier to claim later.
Quality also varies across simple bike tools, and riders building a full kit may find our notes on the best quality pumps useful when judging seals, gauges, and metal work across pump types.
Frequently Asked Questions
How much should I spend on a co2 pump?
Spend around $30 to $50 for the head if you ride weekly. That range buys real flow control and replaceable seals, which save cartridges and stress. Spend less if the tool is only emergency backup for short rides, and spend more if you travel or ride remotely. Remember to budget for cartridges as well, since a multi pack of the right size is part of the true starting cost.
How do I maintain a co2 pump?
Maintenance takes two minutes a few times a year. Wipe the head clean, check the rubber seal for cracks or flattening, and confirm the valve opens and closes smoothly. Replace the seal at the first sign of hissing during a fill. Keep cartridges in a dry pouch, and try the head on an old tube once a season so you trust it when a real flat happens far from home.
What features matter most when buying co2 pumps?
Valve fit, flow control, and cartridge size matter most. The head must seal on your valve type, the valve must let you pause mid fill, and the cartridge must hold enough gas for your tire volume. After those three, look at seal replaceability and a sleeve for cold protection. Weight differences between heads are small, because steel cartridges make up most of the kit weight anyway.
Are expensive co2 pumps worth it?
They are worth it if you ride often or far from help. A premium head does not fill a tire faster, but it wastes less gas, seals more reliably, and lasts longer, which lowers your cost and stress per flat. For a rider who flats once a year on short loops, a mid range head gives nearly all of that benefit for less money. Match the tier to your mileage, not to your aspirations.
How long does a co2 pump last?
The head can last for many years, while each cartridge is single use. Unopened cartridges keep their charge for a long time when stored cool and dry, so a spare from last season is usually fine. The parts that age are the seals, which harden or flatten with time and use. Plan on a seal check each season and a seal swap every few years, and the same head will serve through many bikes.
Wrapping Up
Choose valve fit first, cartridge size second, and flow control third, and the rest is detail. The product table above lines up those three points so you can compare heads without guessing. Whether you ride road, gravel, or trail, the best co2 pumps for you are the ones that seal cleanly, stop on command, and live in a kit you carry every ride, turning a flat from a crisis into a two minute pause.


