
Best CO2 Mountain Bike Pump of 2026: Complete Buying Guide
Disclosure: We may earn a commission when you buy through links on this page, at no extra cost to you. As an Amazon Associate I earn from qualifying purchases. Learn more

Use this guide to the best co2 mountain bike pump to compare cartridge size, valve fit, control, and storage so trail flats end fast and safely.
A flat tire deep on a trail is different from a flat near your car. You may be tired, the light may be fading, and a slow repair means a long walk out. Choosing a best co2 mountain bike pump setup means choosing speed you can control, not just speed on paper.
This guide explains cartridge size, valve fit, airflow control, and storage in plain terms. Use the comparison table below to narrow your short list, then use the sections that follow to check the details that decide whether an inflator works well with your tires, your valves, and your pack.



Price Tiers at a Glance
Price tiers for CO2 inflators are really about control and build quality. The gas itself comes from standard cartridges, so what you pay for is the head that meters that gas, the seals that keep it from leaking, and the case or mount that keeps everything together in a dirty pack.
Entry Tier Inflators
Entry tier inflators, often around $15 to $30 for the head alone, suit riders who flat rarely and ride close to home. Expect simple push on or thread on operation, basic metal or composite bodies, and little or no ability to pause the flow mid fill. They work, but a small mistake can waste a whole cartridge. If you choose this tier, practice once in your garage so the first real use is not on a cold trail with gloves on.
Mid Tier Inflators
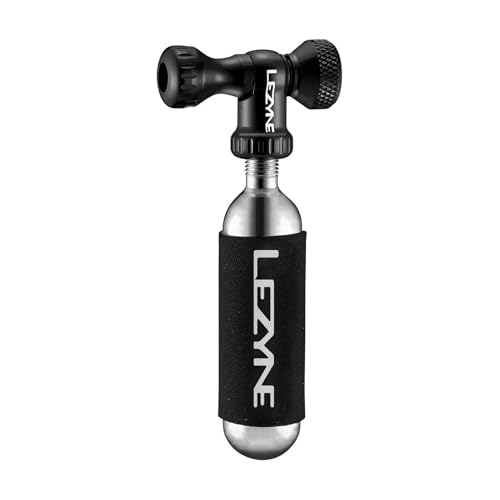
Mid tier inflators, often around $30 to $50, are the sweet spot for most trail riders. A trigger or twist valve lets you add air in short bursts, check pressure with your thumb, and add more only if you need it. Bodies are usually machined metal with replaceable seals, and many include a sleeve that protects your hand from the cartridge as it gets cold during discharge. For riders who carry two cartridges, this tier offers the best balance of control, weight, and cost.
Premium Tier Inflators
Premium inflators, often around $50 to $80, add finer control, tougher seals, and better storage. Some include a small pressure gauge, a protective case that holds the head and two cartridges together, or a design that works well with large volume tires that need careful seating of the bead. This tier makes sense if you ride far from trailheads, ride in winter when mistakes cost more, or simply want one kit that lasts for many seasons without loose parts rattling in your pack.
How to Choose the Best Co2 Mountain Bike Pumps: Buying Guide
Compatibility With Your Bike and Valves
Most mountain bike rims use Presta valves, while some older or budget wheels use Schrader valves. Check that the inflator head fits your valve type without an adapter you could lose on the trail. Threaded cartridges are the most common, but a few heads accept unthreaded cartridges as well, so match the head to the cartridges you can buy locally. Also check clearance around the valve. A bulky head can be hard to seat on a deep rim or on a wheel with closely spaced spokes.
Know how matters here: before a big ride, try the head on your spare tube or your actual wheel at home. Confirm it seals without hissing and releases without pulling the valve core loose. Two minutes at home prevents the most common trail failure, which is a poor seal that empties the cartridge into the air.
Cartridge Size and Tire Volume
Cartridge size should match tire volume, and mountain bike tires need far more air than road tires. A 16 gram cartridge can bring a narrower trail tire to a rideable pressure, but a wide tire on a plus size rim may need a 25 gram cartridge to reach the pressure you want. Riders with fat bike tires should plan on the largest cartridges or a backup pump. Carry at least one more cartridge than you expect to use, because a failed seal or a second flat can end your ride if your only cartridge is spent.
Control and Airflow
Control is the feature that separates a calm repair from a wasted cartridge. A good inflator lets you start the flow slowly, stop it fully, and restart it without removing the head. That matters most with tubeless tires, where a fast burst can help seat the bead, but too much air too fast can blow sealant out or overinflate a tire that seated sooner than you expected. Look for a valve you can operate with gloves on, since winter rides and cold cartridges both reduce finger dexterity.
If you run tubeless tires, pair the inflator with a plug kit and know its limits. CO2 can react with some sealants and can make sealant less effective over time, so many riders use CO2 to seat the tire, finish the ride at modest pressure, and then replace the sealant and refill with a regular pump at home.
Materials and Weight
Inflator heads are made from machined aluminum, brass, steel, or reinforced composite. Metal heads cost more and weigh a little more, but they tolerate drops on rock and repeated cartridge changes without cracking. Composite heads keep weight low for race day kits. Cartridges themselves are steel and dominate the weight of the kit, so shaving a few grams on the head matters less than most riders think. A full kit with two cartridges usually weighs about 100 to 180 grams, which is easy to forget in a hip pack.
For home inflation and pressure checks before you leave, a full size pump still earns its place, and our guide to the best mountain bike floor pump options explains gauges and chuck fit. A floor pump gives you accurate pressure without spending a cartridge.
Storage, Mounting, and Cold Protection
How you carry the kit shapes how fast you can use it. Frame mounts keep the inflator and one cartridge on the bike, which suits riders who dislike packs. Pack storage keeps parts cleaner but slower to reach. Either way, use an insulated sleeve or case. A discharging cartridge gets extremely cold and can stick to bare skin, and loose cartridges can puncture a spare tube if they rub together for miles. A small case that holds the head, two cartridges, a plug tool, and a tire lever turns a scattered kit into one grab and go bundle.
Value and Warranty
Judge value by cost per season, not cost per purchase. A cheap head with worn seals that wastes two cartridges a year can cost more than a better head that seals cleanly every time. Check whether seals are replaceable, whether the maker sells a small parts kit, and whether the warranty covers the valve mechanism. Cartridges are a running cost, so buying them in multi packs lowers the price per flat. If you ride often, compare your expected cartridge use with a good mini pump, which costs more at first but uses free air.
Riders who want a reusable backup should also see our guide to the best mini pump for mountain bike use, since a small pump pairs well with CO2. Use CO2 for the fast first fill and the mini pump for careful topping off.
CO2 Inflators vs Other Options
Mini Pumps and Hand Pumps
A mini pump never runs out of air, weighs about the same as a full CO2 kit, and lets you add pressure slowly and precisely. Its weakness is time and effort, since a large volume tire can take well over one hundred strokes. Many experienced riders carry both systems on remote rides. If you must pick one, pick CO2 for short rides near help and a pump for long rides where a second flat is a real risk. Our broader guide to the best mountain bike pump choices covers that trade off in more depth.
Floor Pumps and Shock Pumps at Home
Neither a floor pump nor a shock pump belongs on the trail, but both matter to the system. A floor pump sets your pressure accurately before the ride, which reduces pinch flats and burping. A shock pump is a different tool entirely, built for the very high pressures inside suspension forks and rear shocks, and it should never be used on a tire. If you are setting up suspension as well as tires, see our guide to the best mountain bike shock pumps for gauge ranges and bleed valve tips.
Standard CO2 Inflators for Other Bikes
Inflators sold for road or hybrid bikes often ship with smaller cartridges and heads tuned for higher pressure and lower volume. They can work on a mountain bike in a pinch, but you may need two cartridges for one wide tire. If your household has several bike types, a shared kit with 25 gram cartridges covers more situations. Our general guide to the best co2 bike pumps explains how cartridge size maps to different tire widths across bike styles.
Setup and Care Tips
- Practice at home first: use one cartridge on an old tube so you learn the flow rate, the cold cartridge feel, and the sound of a good seal before you need it outside.
- Carry a sleeve or glove: hold the cartridge through fabric during discharge, because the metal can get cold enough to hurt bare skin within seconds.
- Check seals twice a season: inspect the small rubber seal inside the head, and replace it if it looks flat, cracked, or stretched, since most leaks start there.
- Store cartridges dry: keep them in a sealed bag or case so grit and moisture do not corrode the threads or foul the puncture pin.
- Refill with air at home: after a ride finished on CO2, deflate the tire later, refresh sealant if you run tubeless, and refill with a floor pump for stable pressure.
- Never leave a spent cartridge on the trail: pack out every cartridge, full or empty, and recycle the steel where your area allows it.
FAQs
How many CO2 cartridges should I carry for a mountain bike ride?
Carry two cartridges for most rides and three for remote rides. One cartridge fills one tire if everything goes well, but a poor seal, a second puncture, or helping a riding partner can spend your spare quickly. Two 25 gram cartridges plus a plug kit cover the large majority of trail flats without adding much weight or bulk to a pack.
Which cartridge size is right for wide mountain bike tires?
Choose 25 gram cartridges for most modern trail tires. A 16 gram cartridge often leaves a wide tire soft, which raises the risk of rim damage on the ride out. Very wide plus and fat tires may need two cartridges or a backup pump. Check your tire width against the cartridge chart on the packaging, and remember that target pressure matters as much as tire size.
Can I use a CO2 inflator with tubeless tires and sealant?
Yes, you can, with one caution about sealant life. The rapid cold discharge can cause some sealants to pool or lose effectiveness, so treat a CO2 fill as a way to finish the ride rather than a permanent fix. At home, spin the wheel, check the repair, refresh the sealant, and refill with regular air. Always add a plug first if the hole is too large for sealant alone.
Can I take CO2 cartridges on a plane for a riding trip?
Usually you cannot carry standard cartridges in the cabin, and airline rules for checked bags vary and change. Check your airline and the aviation authority for your route before you pack, and plan to buy cartridges at your destination instead. Many bike shops near trail towns stock 16 gram and 25 gram threaded cartridges. Shipping cartridges ahead to a hotel or shop is another workable option for longer trips.
How long does a CO2 inflator head last?
A metal inflator head can last for many years if the seals stay healthy. The seal inside the head and the puncture pin do the hard work, so inspect them each season and replace seals when fills start to hiss or feel weak. Store the head clean and dry, and avoid leaving a punctured cartridge attached, since leftover moisture and pressure can corrode small internal parts over time.
Wrapping Up
Start with valve fit and cartridge size, then choose the level of airflow control you trust with gloves on, then pick storage that keeps the kit together and your hands safe from a cold cartridge. The product table above pulls those points together so you can compare control styles side by side. Pick the best co2 mountain bike pump kit for the rides you actually take, practice once at home, and a trail flat becomes a short pause instead of the end of your day.


