Best Cameras for Snowboarding 2026: Which One Fits the Way You Use It?
Disclosure: We may earn a commission when you buy through links on this page, at no extra cost to you. As an Amazon Associate I earn from qualifying purchases. Learn more

Not every camera suits a day on the slopes. Compare camera types, cold weather handling, mounts, and video features to find the setup that fits how you ride.
There is no single camera that suits every rider, because a resort rider filming short clips has very different needs from a backcountry rider who values light weight and long battery life. The right choice depends on how you ride, where you mount the camera, and how much footage you actually want to edit later. This guide explains best cameras for snowboarding by use case, so you can match features to your routine instead of paying for specs you will never use. Read on and see the comparison table below for a side by side view of the main types.
Cold air, falling snow, gloves, and bright glare all change how a camera performs on the mountain. A camera that feels simple at home can become awkward when your hands are cold and your goggles fog up. The sections below cover rider types, key features, common mistakes, and care tips, so you can choose with confidence before your next trip.
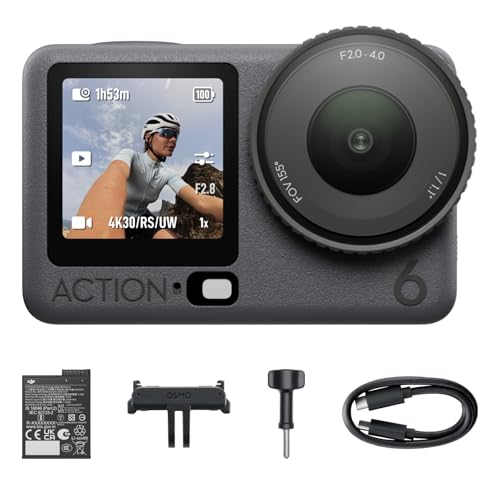


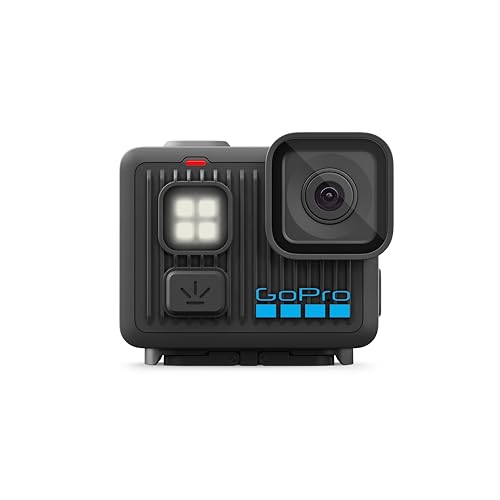
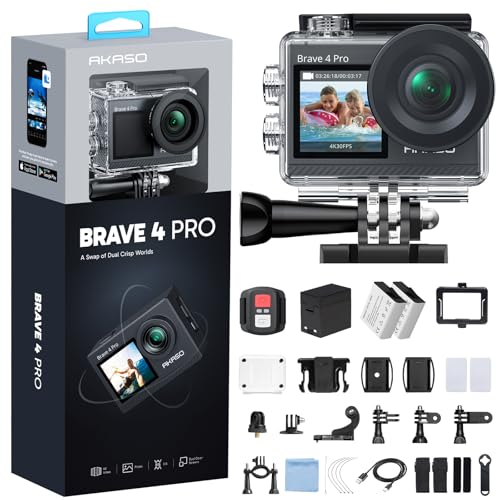


Who Should Buy Which Cameras?
Start with your riding routine, not with a spec sheet. The camera that works for a full day at a resort may be too heavy or too fiddly for a long tour, while a tiny action camera may not give a vlogger the audio and framing control they want.
For Resort Riders Who Film Their Runs
Resort riders usually want quick clips of friends, jumps, and scenic runs, plus an easy way to share them the same evening. A small, rugged camera with simple one button recording and good stabilization suits this routine, because you can start it without removing your gloves for long. Look for a wide field of view, reliable cold weather battery life, and a mount that stays put on a helmet or chest strap.
For Backcountry and Touring Riders
Backcountry riders carry everything uphill, so weight, pack size, and battery life matter more than extra video modes. A compact camera that fits in a jacket pocket and runs for several hours on one charge is often the better pick, even if it lacks some advanced settings. Check that controls are large enough to use with gloves and that the camera can handle snow and low temperatures without shutting down early. Keep a spare battery warm in an inside pocket, since cold air can drain a cold battery much faster than the same battery kept close to your body.
For Park Riders and Content Creators
Park riders and creators often plan shots in advance, repeat a feature several times, and edit the footage into a longer video. For them, framing control, audio quality, and smooth slow motion matter more than pure simplicity. A camera with a flip screen, a microphone input, and strong stabilization helps when you film yourself or direct a friend. See our guide to best action cameras for snowboarding if you want a rugged option for repeated falls and fast laps through the park.
Key Features to Compare
Compare features in the order that affects your footage most. Stabilization, cold weather performance, and ease of use usually matter more on snow than a headline resolution number.
Ease of Use for Your Skill Level
A beginner friendly camera should offer reliable automatic modes, clear menus, and fast transfer to a phone, so you can check clips on the lift without a long setup routine. More experienced riders may want manual exposure, custom buttons, and log video profiles, but those controls only help if you have time to learn them before the trip. Test the menu flow at home with gloves on, and set your usual mode before you leave the lodge. If a camera takes three menus to start recording, it will frustrate you on a cold, windy ridge.
Sensor Size and Image Quality
Sensor size affects low light detail, dynamic range, and how clean the image looks when you crop or slow it down. A larger sensor usually handles shadows and bright snow better, but it also tends to mean a larger and heavier camera. Megapixel count alone does not decide quality, since lens quality, processing, and stabilization shape the final clip just as much. For most riders, a mid size sensor with good stabilization gives a better result than a high megapixel camera that shakes on every turn.
Low Light Performance
Low light performance matters on overcast days, in tree runs, and during late afternoon laps when the sun drops behind the peaks. A camera with a wider aperture, a larger sensor, and clean high ISO performance will keep tree detail visible instead of turning shadows into flat black areas. Check sample footage shot in flat light, not only bright sunshine, because snow scenes can fool exposure meters and wash out detail. Use exposure compensation when the snow looks too bright or too gray, and keep the lens clean, since a wet or fogged front element hurts low light footage more than a small sensor difference.
Features That Matter for Snowboarding
Snowboarding creates specific demands that a general camera guide can miss. The camera must survive falls, resist snow and moisture, and keep working when temperatures drop well below freezing. Look for a sealed body or a simple waterproof case, a mount system that fits your helmet or board, and a battery that you can swap quickly without tools. See our guide to best helmet cameras for snowboarding if a helmet mount is your main setup, since mount angle and weight balance affect comfort all day.
Video Capabilities
Video options should match how you edit. Smooth 4K at 60 frames per second suits slow motion replays of jumps, while a lower resolution with a higher frame rate can work well for quick social clips. A microphone input helps if you narrate runs or record natural sound, and a flip screen helps when you film yourself at the top of a feature. Choose the simplest video setting that still looks good for your audience, and leave the most complex modes for planned shoots.
Common Mistakes to Avoid When Buying Cameras
- Choosing only by price and ignoring cold weather battery life, which can cut a day of filming short.
- Ignoring ease of use and buying a camera whose menus are hard to use with gloves on.
- Buying a camera that is too large or too heavy for your mount, which can pull on your helmet all day.
- Skipping warranty and support checks, which matter when a mount breaks or a seal fails mid season.
- Forgetting spare batteries, memory cards, and a lens cloth, which are small items that decide whether you film at all.
How to Make Your Camera Last Longer
Simple habits protect a camera through a full season on snow. Use a lens cloth, not your shirt, to clean the front element, since jacket fabric can drag grit across the glass and leave fine scratches. Carry a spare battery in a warm pocket and swap it before the camera shuts down in the cold, rather than waiting for a warning. Store the camera in a dry, padded bag between trips, and dry mounts and cases fully before you pack them away.
Follow local mountain rules for filming, helmets, and restricted areas, and never adjust a camera while you are riding at speed. A quick stop at the side of a run is safer than reaching for a mount mid turn. See our guide to best digital cameras if you also want a stills focused camera for travel days off the slopes, since its buying factors differ from a rugged video setup. Keep firmware and apps updated at home, where you have stable power and a good connection, rather than on a chairlift.
Cameras: Your Questions Answered
What features matter most in cameras for snowboarding?
Stabilization, cold weather battery life, weather sealing, and glove friendly controls matter most, because they decide whether you get usable footage on a real mountain day. A wide field of view helps capture the run, while a secure mount keeps the camera steady and safe during falls. Resolution matters less than those basics, since shaky or dead battery footage cannot be fixed later.
Is a smartphone enough instead of a snowboarding camera?
A smartphone can work for short, sunny resort clips, especially when you already carry it for maps and lift passes. It struggles in deep cold, wet snow, and fast action, and a phone mount can be awkward with gloves and a helmet. A dedicated camera usually offers better stabilization, longer recording in the cold, and a mount that stays secure during falls.
How much should I spend on my first snowboarding camera?
First time buyers can find a capable rugged camera for about $150 to $350, which usually covers stabilization, weather resistance, and decent 4K video. Spending about $350 to $600 often adds better low light performance, a larger sensor, and more mounting or audio options. Above that range, you are usually paying for creator focused controls and higher frame rates rather than basic reliability.
Which camera type is better for low light on the slopes?
A camera with a larger sensor and a wider aperture usually performs better in flat light, tree runs, and late day laps. Good processing also matters, since it reduces noise without turning snow texture into a smooth blur. Compare sample clips shot on overcast days rather than trusting a single ISO number on a spec sheet.
What specs matter most for beginner snowboarders?
Beginners should focus on automatic modes, stabilization, battery life, and simple file transfer, since those features affect every clip you shoot. A clear menu, a one button record start, and a rugged body matter more than manual controls you may not use yet. See our guide to best cameras for photography if stills become your main interest later, since stills cameras reward different skills and specs.
Wrapping Up
Match the camera to your riding routine first, then check stabilization, cold weather battery life, weather sealing, and mount comfort. A simple rugged camera suits most resort and backcountry riders, while creators should add framing control, audio options, and slow motion to that same foundation. When you review the product table above, compare how each type handles snow, cold, and falls, not only how it looks on paper. That approach will leave you with best cameras for snowboarding guidance you can actually use, and footage you will want to watch again.