Best Cameras for Real Estate: A First Time Buyer's Guide for 2026
Disclosure: We may earn a commission when you buy through links on this page, at no extra cost to you. As an Amazon Associate I earn from qualifying purchases. Learn more

Learn how to choose the best cameras for real estate with plain English explanations of sensors, lenses, video, and lighting, plus a first time buyer checklist.
Buying your first camera for property work can feel confusing, because listings use terms that sound technical and every option claims to be the right one. This guide explains best cameras for real estate in plain language, starting with the basics and moving toward the choices that matter for rooms, exteriors, and walk through video. The comparison table below can help you weigh the main types side by side as you read.
A good property camera is not the most expensive camera on the shelf. It is the one that shows a room honestly, keeps straight lines straight, handles mixed window light, and is easy to carry from room to room. Keep that test in mind and the rest of the buying process becomes much simpler.
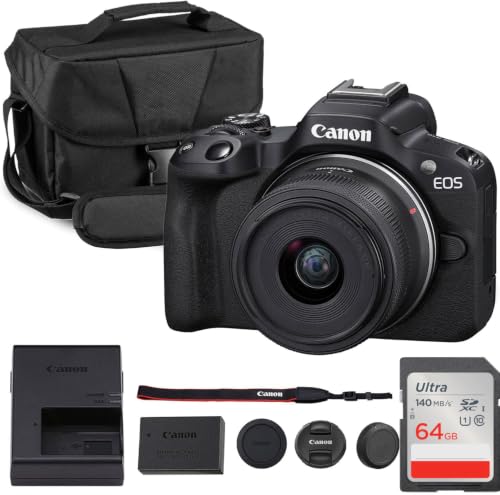


Cameras 101: The Basics
A camera records light through a lens onto a sensor, and the sensor turns that light into a digital image file. A larger sensor usually gathers more light, which helps in dim rooms, while a smaller sensor can still work well in bright daylight. The lens controls how much of a room fits in the frame and how close or far a subject looks.
For property work, three habits matter more than any single specification. First, hold the camera steady or use support so lines stay sharp. Second, check the whole frame before you press the shutter, including corners and ceilings. Third, review images on a larger screen when you can, because a small preview can hide soft focus and tilted lines.
File handling is part of the basics too, and it is easy to overlook until a deadline arrives. Learn how your camera names files, how to move them to a computer or phone, and how much space a shoot usually needs. A simple folder per property, with stills and video kept apart, makes editing faster and reduces the chance of sending the wrong file to a listing page.
Key Specs Explained in Plain English
The specifications below are the ones that change property images most. Read each one for what it does in a room, not for the number alone, and remember that a balanced camera usually beats a camera that is strong in one area and weak in another.
Support matters as much as any electronic specification, because even a strong sensor produces soft images if the camera moves during a slow exposure. A small tripod or a stable surface helps in dim rooms, and it also keeps your framing consistent from one room to the next. If you shoot handheld video, practice slow smooth movement first, since jerky pans distract viewers more than a slightly lower resolution ever will.
Features That Matter for Real Estate
Property images need a wide enough view for small rooms, accurate color for paint and flooring, and enough detail for a buyer to see finishes clearly. Look for a lens that covers a room without heavy distortion, a sensor that handles window light, and controls that let you adjust brightness when a room has both lamps and daylight. A flip screen helps for high or low angles, and a mic input helps if you record spoken walk throughs.
Sensor Size and Image Quality
Sensor sizes are often described as 1 inch, APS C, and full frame, with larger sizes generally gathering more light. Megapixels alone do not decide quality, because a well designed sensor with good lenses and good light often produces a cleaner image than a crowded sensor in poor light. For listings, prioritize clean files at normal viewing sizes, accurate color, and low noise in dim rooms over the highest megapixel count on the box.
Lens and Zoom Range
Optical zoom changes the view by moving lens elements, while digital zoom simply crops the image and can reduce detail. For interiors, a wide view matters most, so check the widest setting and how straight walls look at the edges of the frame. The f stop number describes how much light the lens lets in, with a lower number letting in more light, which can help in dim rooms.
Video Capabilities
Video for listings should look smooth, steady, and natural, not flashy. A 4K option gives you room to crop and still keep a sharp file, while a steady frame rate keeps movement from looking jumpy. A mic input matters if you narrate, because built in audio can pick up room echo and handling noise. A flip screen helps you frame yourself or check a shot from an awkward angle without guessing.
Low Light Performance
Low light performance depends on the sensor, the lens, and how the camera handles ISO, which is the setting that makes the sensor more sensitive to light. Raising ISO can brighten a dim room, but pushing it too far can add grain and soften detail. In practice, open curtains, turn on room lights, and use a slower shutter speed with support before you rely on very high ISO.
Choosing Cameras for Your Situation
Different property jobs reward different strengths, so match the camera type to the work you do most. The sections below cover common starting points, each with its own tradeoffs, and none of them requires you to buy the most costly option to get a usable listing set.
Think about your weekly workflow as well as any single shoot, because a camera that is quick to pack, charge, and empty will get used far more than a powerful camera that feels like a chore. Count how many properties you visit in a typical week, how long each visit lasts, and whether you edit on the same day. Those answers point toward the right balance of size, battery life, and file handling for your routine.
Best Flash Cameras for Real Estate: Tips for First Time Buyers
Flash helps when a room has bright windows and dark corners, because it can lift shadows without washing out the whole scene. Look for a camera that accepts an external flash or offers bounce flash control, so light can be aimed at a ceiling for a softer result. Check that flash sync and power controls are easy to reach, because fiddling with menus in a dark hallway wastes time on a shoot.
Best Point and Shoot Cameras for Real Estate: Tips for First Time Buyers
A point and shoot style camera suits a first time buyer who wants a simple carry everywhere option with a fixed lens. Look for a wide starting focal length, reliable autofocus in mixed light, and a screen that stays readable indoors. The tradeoff is less control over lenses and depth of field, so this type fits quick listings and social clips better than large print work or complex lighting setups.
Best Nikon DSLR Cameras for Real Estate: Tips for First Time Buyers
A DSLR style camera suits a buyer who wants interchangeable lenses and direct control over aperture, shutter speed, and ISO. Look for a wide angle lens option, a bright viewfinder or screen for composing in sunlight, and a sensor that stays clean in dim interiors. The tradeoff is size and weight, plus a learning curve, so plan time to practice before a paid shoot.
Cameras for Appraisers: Tips for First Time Buyers
Appraisal work values accuracy and consistency over dramatic style, because images support a record of condition and layout. Look for reliable color, a lens that keeps lines straight, and a simple workflow for naming and storing files by property. A camera that starts quickly, focuses reliably, and keeps the same settings from room to room will save more time than one with extra creative modes you never use.
Best Vr360 Cameras for Real Estate
A vr360 style camera captures a full view around the camera in one shot, which can support virtual tours and room overviews. Look for stitching that keeps doorways and straight edges clean, good dynamic range for windows, and a simple way to export tours for listing pages. The tradeoff is lower detail in any single direction compared with a standard still, so use this type for tours and overviews rather than as a replacement for detailed still images.
| Type | Best for | Watch out for |
|---|---|---|
| Point and shoot style | Quick listings and simple shoots | Limited lens choice |
| Interchangeable lens style | Full control and wide interiors | Size, weight, and learning time |
| 360 style | Tours and room overviews | Lower detail in one direction |
Rookie Mistakes to Avoid
- Choosing by megapixels alone, which can hide weak lenses and poor low light files.
- Shooting every room from a corner without checking tilted lines and cluttered edges.
- Ignoring window light, which can leave a bright window and a dark room in the same frame.
- Skipping a test shoot at home, which is where you learn menus and settings without pressure.
- Forgetting a spare battery and memory space, which can end a shoot early.
When you compare options for still images, see our guide to best cameras for real estate photos for a closer look at still image choices. When video is the priority, see our guide to best cameras for real estate videography for video focused tradeoffs.
Getting Started: Setup and First Use
Start by charging the battery fully, setting the date and time, and choosing a file format you can edit easily. Set the camera to a wide view for interiors, turn on any grid lines that help you keep walls level, and take test shots in a bright room and a dim room. Use a lens cloth, not your shirt, to clean the front element, and carry a spare battery so a long shoot does not stop early. Store the camera in a dry, padded bag between shoots.
After the test shots, review them on a larger screen and note which settings produced the cleanest rooms. Write down a short starting setup for bright rooms and another for dim rooms, so you do not have to rediscover them at a client property. Keep that note in your camera bag for the first few shoots, and update it as you learn which settings you trust most.
Frequently Asked Questions
What features matter most in cameras for real estate?
A wide lens, accurate color, and good handling of mixed light matter most for property images. A wide lens helps small rooms feel open without heavy edge distortion, while accurate color keeps paint, wood, and flooring honest for online viewers. Add reliable autofocus, a readable screen, and enough battery life for a full property walk, and you have the core of a useful listing camera.
Is a smartphone enough instead?
A smartphone can be enough for quick social clips and simple listings in good light, especially when you use a steady hand and clean framing. A dedicated camera usually offers a wider true lens view, better low light files, and more control over focus and exposure for larger listings. If you shoot often, in dim homes, or for print sized images, the extra control and file quality are worth considering.
How much should I spend on my first one?
For a first camera, plan a budget in tiers rather than a single number, and include a wide lens, a spare battery, and a memory card in the total. About $300 to $600 can cover a simple capable setup for basic listings, while about $600 to $1,200 opens up interchangeable lens options and better low light files. Above that range, you are usually paying for speed, durability, or video features that matter more for heavy professional use.
What specs matter most for beginners?
Beginners should focus on a wide lens, dependable autofocus, and simple exposure controls before chasing advanced video modes. A camera that lets you adjust brightness quickly, review shots clearly, and keep settings consistent from room to room will produce better listings than a complex camera you avoid using. Add good battery life and a comfortable grip, and practice in your own home until the controls feel familiar.
Final Thoughts
The right first camera is the one that fits your rooms, your light, and your workflow, not the one with the longest specification list. Prioritize a wide honest view, clean low light files, and controls you will actually use, then test the camera in real rooms before a client shoot. The product table above is a useful place to compare types once you know which strengths matter most to you.
Start simple, practice in varied light, and upgrade only when a specific limit keeps showing up in your work. With that approach, best cameras for real estate becomes a practical choice rather than a guessing game, and your listings will look clearer and more consistent from the first shoot onward.