
Best Cameras for Northern Lights: What Actually Matters Before You Buy 2026
Disclosure: We may earn a commission when you buy through links on this page, at no extra cost to you. As an Amazon Associate I earn from qualifying purchases. Learn more

Use a clear checklist for aurora cameras: sensor size, wide bright lenses, cold weather battery life, tripod friendly controls, and focus tools for dark skies.
Aurora photography is a special kind of night shooting, because the subject is faint, moving, and often far from warm shelter. Choosing best cameras for northern lights therefore means weighing clean high ISO files, a wide and bright lens, battery life in cold air, and controls you can use with gloves on. This guide turns those needs into a checklist you can use in a shop or while comparing listings online.
The checklist below avoids ranking individual products and instead helps you judge any camera by the same measures: sensor, lens, focus, stabilization, battery, and handling in the cold. Use it before you spend, because a camera that works well for daylight travel may still struggle with faint green curtains, fast moving arcs, and long exposures on a windy ridge. The comparison table below shows how common camera types compare on those aurora measures.
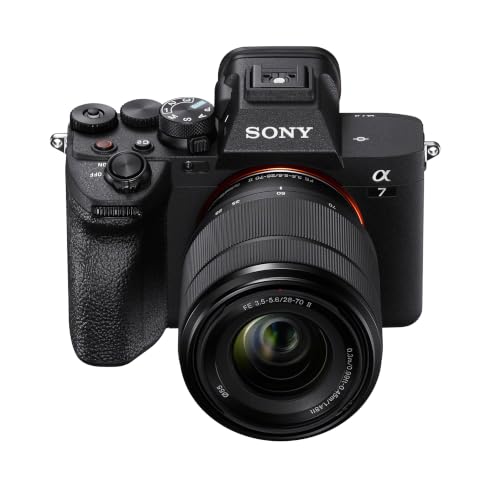


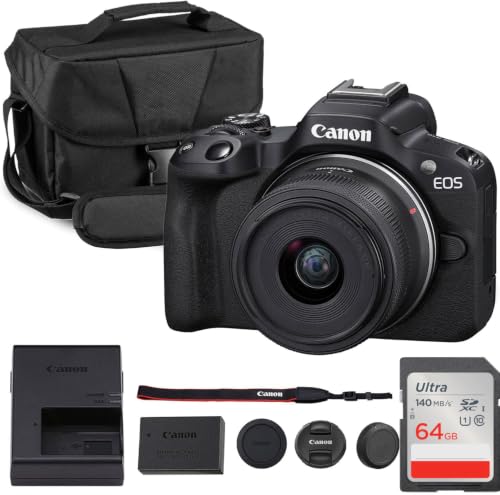

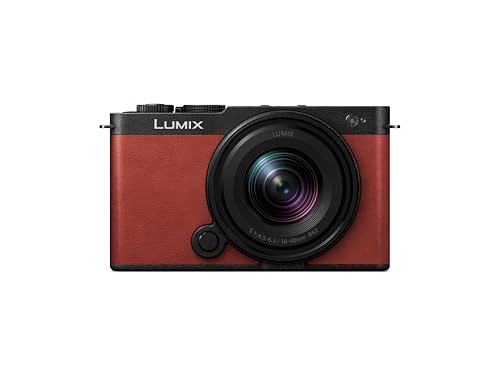
Key Features to Compare
Use the same questions for every camera you consider, and write down the answers side by side. A strong aurora camera will answer well on sensor cleanliness, lens brightness, focus in darkness, and cold weather endurance, not just on megapixels or video resolution. The sections below explain each measure in plain language.
| Type | Aurora strength | Limit to check |
|---|---|---|
| Compact cameras | Light to carry on a cold night walk | Lens brightness and sensor size vary widely |
| Mirrorless cameras | Wide bright lenses and clean high ISO files | Total cost rises with lenses and spare batteries |
| Bridge cameras | Long zoom in one body for distant scenes | Smaller sensors may add noise in faint light |
Features That Matter for Northern Lights
Aurora displays are dim and change shape quickly, so a camera needs to record faint light without turning the sky into noise. A wide lens captures broad curtains across the sky, a bright aperture gathers more light in each second of exposure, and a stable tripod mount keeps stars sharp during long exposures. Manual focus help matters greatly, because autofocus often hunts in darkness and can miss the display. Look also for a quiet shutter option, a remote or delayed shutter release, and a screen that stays readable without ruining your night vision.
Sensor Size and Image Quality
Sensor size shapes how clean an aurora image looks when you brighten shadows or print it large. A 1 inch sensor can work for casual aurora snapshots, while an APS C sensor usually gives cleaner files and more room to recover faint detail. A full frame sensor generally gives the cleanest result, but it also means larger lenses, heavier bags, and a higher total cost.
Megapixels alone do not decide aurora quality, because a high pixel count on a small sensor can add noise in faint light. Compare sensor size with lens brightness and sample aurora images together.
Ease of Use for Your Skill Level
Aurora shooting happens in the dark, in cold air, and often under time pressure as the display changes. A camera with clear dials, a simple manual mode, and an easy way to set ISO, aperture, and shutter speed will serve you better than a body buried in menus. Look for a customizable button for ISO, a quick way to magnify focus, and a screen brightness control that does not dazzle your eyes. If you are new to manual exposure, practice at home with a dark room and a distant light so the controls feel familiar before a real aurora night.
Battery Life and Charging
Cold air drains batteries faster, and aurora outings often last for hours with long exposures and repeated screen checks. Check the rated shot count per charge as a rough guide only, because cold, long exposures, and image review can reduce it sharply. USB C charging helps on the road, since you can top up from a power bank in a car or a warm room.
Carry at least one spare battery, keep spares warm in an inside pocket, and rotate them so a cold battery can recover some charge indoors. A camera with no spare battery plan is a risk on an aurora trip.
Low Light Performance
Low light performance for aurora work comes from sensor cleanliness, lens brightness, and careful exposure, not from a single marketing number. A camera that stays clean at ISO 3200 or ISO 6400 will usually record faint curtains better than one that turns noisy much earlier. A wide lens with an aperture such as f2.8 or wider gathers more light per second, which lets you shorten exposures and keep moving aurora shapes sharper.
Autofocus and Stabilization
Autofocus can struggle under a dark sky, so manual focus tools matter more for aurora work than eye tracking or subject detection. Focus magnification, focus peaking, and a clear focus distance scale help you set sharp focus on a bright star before the display peaks. Stabilization helps handheld shots in town, but on a tripod it should be switched off if the manual advises that step, because it can add blur during long exposures. For a broad look at everyday camera options, see our guide to best digital cameras, and for dim scene strengths in general, see our guide to best cameras low light.
Spending Levels to Compare
Budget groups below describe what to expect at different spending levels, not specific products. Use them to decide where extra spending helps aurora work and where it mainly adds features you may not need on a cold night. Remember to include a tripod, a spare battery, a memory card, and a suitable lens in the total cost.
A Sensible Starting Budget
At a starting budget, look for a camera with a reasonably large sensor, a kit lens that stays usable in dim light, and a solid tripod mount. A compact camera with a large sensor can be a good travel choice, while an entry interchangeable lens body leaves room to add a wide bright lens later. Spend the remaining budget on a sturdy tripod and a spare battery, because those two items improve aurora images more than a second lens you rarely use. Check that the body offers full manual exposure and manual focus magnification before you buy.
A Mid Level Budget
At a mid level budget, a wide bright prime lens becomes the most valuable upgrade for aurora work. Pair it with a body that stays clean at higher ISO settings and offers reliable manual focus tools, and you will capture fainter curtains with less noise. This level also allows a better tripod head for smooth framing, a remote shutter release, and extra batteries for long cold nights. Avoid spending the whole budget on a body while keeping a slow kit lens, because the lens limits how much aurora light reaches the sensor.
A Higher Budget
At a higher budget, a larger sensor body and a fast wide lens give the cleanest aurora files and the most room to crop or print large. This level also brings better weather sealing, stronger battery life, and controls that stay usable with gloves on. Even here, the same checklist applies: check sensor cleanliness, lens brightness, focus tools, and cold weather handling before paying for video features or burst speed you may not use. A costly body without a suitable wide lens will still disappoint under faint aurora light.
Quick Buyer Checklist
- Does the sensor stay clean at ISO 3200 or higher in real dark sky samples?
- Can you fit a wide lens with an aperture of f2.8 or wider within your total budget?
- Does the camera offer manual focus magnification and a clear manual exposure mode?
- Can you operate the main dials and buttons while wearing thin gloves?
- Do you have a sturdy tripod, a remote or delayed shutter, and at least one spare battery?
- Is the battery easy to swap in the dark, and can you charge it by USB C on the road?
- Does the body offer weather sealing and a screen brightness control for night use?
Red Flags to Watch For
- Vague specs that hide sensor size, lens aperture, or ISO performance behind marketing words alone.
- A camera with no manual focus help, which makes sharp focus on stars hard to confirm in darkness.
- A slow kit lens presented as an aurora lens, even though it gathers little light per second.
- Short warranty terms or unclear support, which matter more when you travel far for aurora viewing.
- Claims of guaranteed aurora results, since displays vary in brightness, speed, and cloud cover.
Care and Maintenance Tips
Aurora trips expose a camera to cold, moisture, and wind, so simple care protects both body and lens. Use a lens cloth, not your shirt, to clean the front element, because clothing fabric can smear coatings or leave grit behind. Carry a spare battery in a warm pocket, keep the camera in a dry padded bag when moving between cold air and warm rooms, and let condensation dry naturally before changing lenses. For light travel on foot, see our guide to best light weight cameras before you choose a bag and body combination.
Frequently Asked Questions
What features matter most in cameras for northern lights?
The most useful features are a clean high ISO sensor, a wide bright lens, manual focus help, and a stable tripod mount. A wide lens captures broad aurora curtains, a bright aperture gathers faint light quickly, and manual focus tools let you lock sharp focus on stars. Battery life in cold air also matters, because aurora outings can last for hours. A camera that combines those strengths will usually record faint displays better than a body chosen on megapixels or video resolution alone.
Is a smartphone enough instead?
A phone can be enough for casual aurora snapshots and quick sharing, especially when the display is bright and you use a small tripod or a stable surface. A dedicated camera usually gives cleaner files, wider lens choices, and more control over long exposures for faint displays. If you travel far for aurora viewing and want large prints or heavy editing, a dedicated camera gives more room to grow. If you mainly share small images online, a phone with a night mode may meet your needs.
Which camera type is better for low light photography?
Mirrorless cameras usually give the most flexibility for aurora work, because you can pair a larger sensor body with a fast wide prime lens made for dark skies. Compact cameras with large sensors can be excellent for walking trips, since they stay light and simple to carry in cold weather. Bridge cameras offer long zoom reach, but their smaller sensors may add noise in faint aurora light. Choose the type that fits your travel style, then spend on lens brightness and a sturdy tripod before extra features.
How much should I spend on my first one?
A first aurora setup often costs about $600 to $1200 in total, including a body, a suitable lens, a tripod, a spare battery, and a memory card. A lower total can still work if you already own a tripod and choose a compact camera with a large sensor. A higher total mainly buys cleaner high ISO files, a faster wide lens, and better weather sealing. Run the checklist above against the product table, and put lens brightness and tripod stability ahead of video features you may not use under the aurora.
Final Thoughts
Aurora photography rewards a simple checklist applied with discipline: clean sensor, wide bright lens, sharp manual focus, stable tripod, and enough battery for cold hours. A larger sensor and a fast wide lens will improve faint displays more than a long feature list, and a sturdy tripod will keep stars sharp during long exposures. Use the product table above as a final check, and include tripod, spare battery, and lens costs in your total before you decide.
For most first time aurora buyers, a camera with clear manual controls, a wide bright lens option, and a spare battery plan is a better starting point than a complex body that feels confusing in the dark. Practice focus on stars in a familiar place, test ISO levels before your trip, and adjust one setting at a time as the display changes. With that approach, best cameras for northern lights becomes a practical choice based on light gathering and cold weather handling, not a guess based on megapixels alone.

