
Best Camera Bag for Multiple Cameras: Every Type Explained Side by Side for 2026
Disclosure: We may earn a commission when you buy through links on this page, at no extra cost to you. As an Amazon Associate I earn from qualifying purchases. Learn more

Compare types to find the best camera bag for multiple cameras, with guidance on padding, access, dividers, sizing for two bodies, and daily comfort.
Shoulder bag, sling, backpack, roller. When you carry more than one camera body, each style solves a different problem, and picking the wrong one means sore shoulders, slow access, or gear stacked where it can rub.
This guide compares the main types so you can find the best camera bag for multiple cameras for the way you move through a day. It covers fit, padding, and price ranges for each style, and the comparison table below puts the core options side by side.


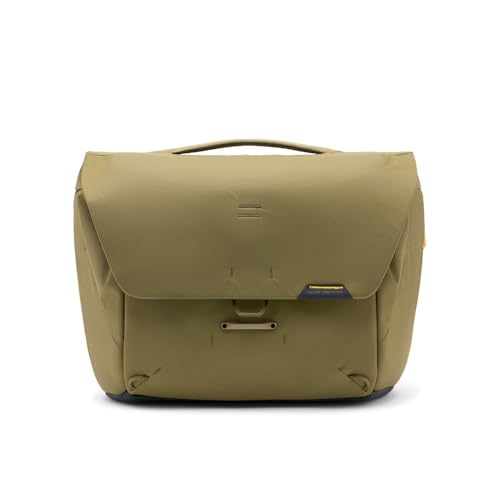
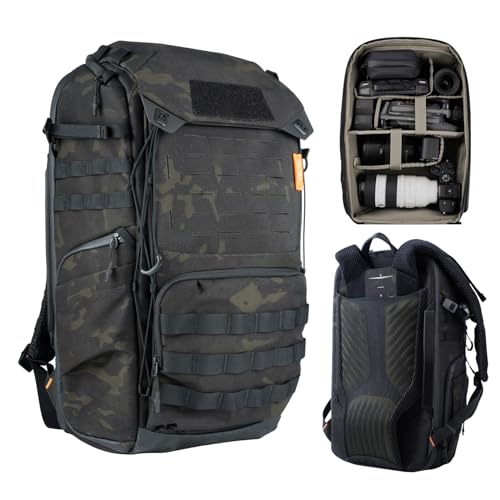

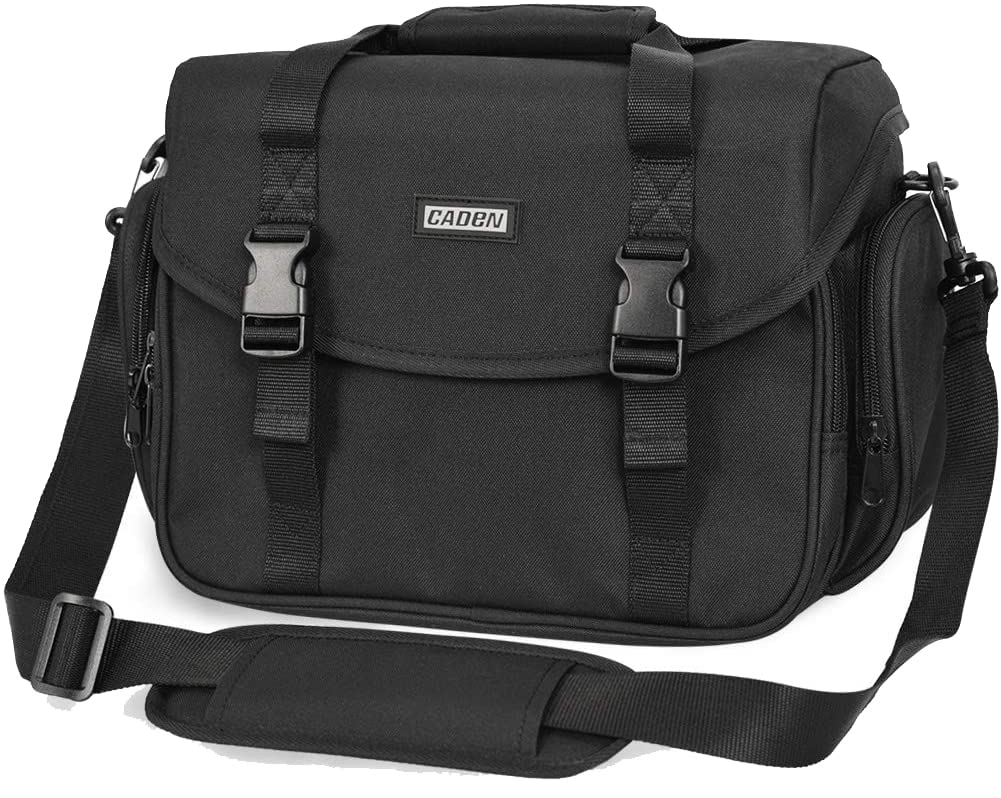


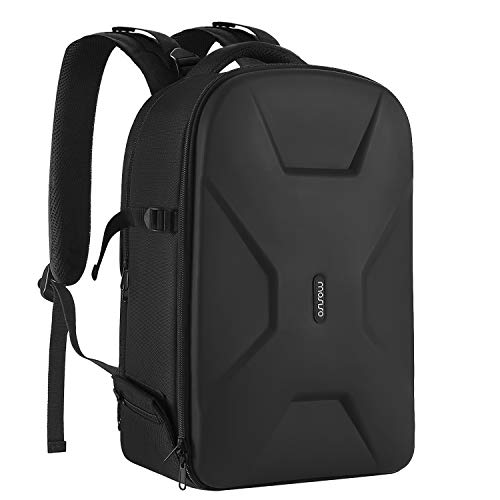

Types of Camera Bags Compared
Start with how you travel to a shoot. Walking all day, driving between stops, and flying with gear each favour a different shape, and that choice matters more than any single feature on a spec list.
Backpack Style Bags
Backpacks spread a multi body load across both shoulders and a hip belt, which makes them the comfortable choice for long walks and travel days. Most hold two bodies with lenses attached plus several spare lenses in a divider grid. Access is slower than a shoulder bag, although side openings and back panel openings narrow the gap. Typical prices run from about $100 to $350 depending on harness quality and weather protection. Choose a backpack when total weight passes about 12 lb or your route involves stairs, trails, or long airport walks.
Shoulder and Messenger Style Bags
Shoulder bags keep every body within reach without taking the bag off, which is why event and street photographers favour them. A good multi body design has a wide padded strap, a flap or zip top you can open with one hand, and dividers that hold two bodies upright. The load sits on one shoulder, so comfort fades on long walks with heavy glass. Prices commonly run from about $80 to $300. Our guide to the best messenger bags for cameras covers strap and flap designs in more depth.
Sling and Compact Style Bags
Slings swing from your back to your front in one motion, giving fast access to one body while the second stays stored lower in the bag. They suit lighter mirrorless pairs and city days where you stop often. Capacity is the limit, because a sling that fits two gripped bodies becomes bulky and loses its quick handling. Prices often sit around $60 to $180. Choose a sling when speed matters more than spare lenses, and when your second body is a backup rather than a camera you swap every few minutes.
Shoulder Bags vs Backpacks: Which Should You Choose?
Compare these two most popular styles on five points. First, access: a shoulder bag wins, because both bodies sit under one flap. Second, comfort over distance: a backpack wins once the load feels heavy, thanks to two straps and a hip belt. Third, appearance: a messenger style blends into weddings and offices where a backpack looks out of place. Fourth, storage: backpacks usually fit a laptop and personal items more easily. Fifth, security: a backpack panel that opens against your back resists wandering hands in crowds, while a shoulder bag stays in front of you where you can watch it.
Your deciding question is simple. If you mostly work from one spot or move short distances between stops, choose the shoulder style. If you walk to your locations or travel with the full kit, choose the backpack. Many photographers eventually own one of each and pick per assignment, which is a sensible path if your work varies a lot.
How to Choose the Right Camera Bag
Features That Matter for Multiple Cameras
Multiple bodies need separate padded cells, not one large open space. Measure the divider area and confirm that two bodies fit with lenses attached and screens protected. Zippers should close without pressure, because forced zips fail early and signal a bag that is too small. Also check strap anchor points and handle stitching, since a two body load stresses every seam more than a single camera kit. If you are still choosing the cameras themselves, our guide to the best digital cameras can help you settle body sizes before you size a bag.
Padding and Protection in Low Light Venues
Event work often means setting a bag down on hard floors in dark rooms. A structured base and firm side walls protect bodies when the bag is nudged or knocked. Bright interior lining helps you tell a black lens cap from a black divider in dim light, and a rain cover or weatherproof fabric guards the walk back to the car. Avoid very soft bags for multi body kits, because padding that collapses lets bodies lean together exactly when you are distracted.
Divider Layout and Body Size
Divider layout decides how image making gear of different sizes shares space. A full frame body with a grip needs a taller cell than a small mirrorless body, and mixing both in one bag calls for dividers you can move in small steps. Count the dividers included, because some bags ship with too few to build two proper body bays. Readers with smaller bodies may find the narrower layouts in our guide to the best camera bags for mirrorless cameras a closer fit than general purpose designs.
Keeping Gear Still With Stabilization in Mind
Cameras with in body stabilization still dislike hard knocks, and lenses dislike rubbing even more. A good bag holds each item snugly so nothing slides when you bend, climb steps, or lift the bag into a car. Test the fit at home by loading the bag, closing it, and tilting it slowly in each direction. Any item that shifts needs a tighter cell or a soft wrap. This simple check prevents most of the small scuffs that appear on screens and lens barrels over a season of use.
Setup and Care Tips
- Build your layout on a table first. Arrange bodies and lenses outside the bag, then place dividers to match that plan instead of guessing inside a dark compartment.
- Use a lens cloth, not your shirt. A dedicated cloth kept in an outer pocket avoids grit and keeps front elements clean between stops.
- Carry a spare battery for each body. Different bodies often use different batteries, so label spares clearly and store them in separate small pockets.
- Store the bag in a dry, padded place. Keep it off cold floors, partly open for airflow, and away from direct heat that can age foam padding.
- Clean zippers with a soft brush. Grit in zipper teeth is a common cause of stiff, failing closures on bags used outdoors.
For a broader look at shapes beyond these three styles, our roundup of the best bags for cameras explains how hard cases and rollers fit into the picture.
Camera Bags: Your Questions Answered
What features matter most in camera bags for multiple cameras?
Separate padded cells for each body, honest internal dimensions, and a carry system matched to your walking distance matter most. Each body should fit with a lens attached so you can work without building the camera first. After fit, judge zipper quality and divider thickness, because those parts take daily abuse. A bag that forces you to stack bodies or remove grips to close the lid is the wrong size, whatever its rating says.
How many dividers should a bag for two or three cameras include?
Look for at least six to eight movable dividers for a two body kit, and more for three bodies. That count lets you build two upright body bays, lens wells, and a small channel for cables or a charger. Bags that ship with only three or four dividers usually expect one camera, and buying extra divider sets later can be awkward because sizes differ between brands. Check that spare dividers are sold for the model you choose.
What specs matter most for beginners buying a multi camera bag?
Internal measurements, empty weight, and strap padding matter more than litre numbers or long feature lists. Measure your largest body and lens combination and compare all three internal dimensions before ordering. Beginners also do better with simple layouts and wide openings, because a bag that is easy to pack correctly gets packed correctly every time. Leave a little growing room for one extra lens, but avoid sizing up so far that gear slides around.
How much should I spend on my first camera bag for several cameras?
Most buyers find the sensible range is about $100 to $250 for a first serious bag. Below that range, straps and dividers often feel thin under two bodies, while premium prices mostly buy lighter materials and refined hardware. Spend toward the top of the range if you walk long distances, because harness comfort is where extra money shows. If you mostly drive to shoots, a mid priced shoulder bag usually serves just as well.
Which camera bag type is better for working in low light?
A shoulder bag with a wide top opening is usually better in low light because you can see and reach every item without setting the bag down or turning it around. Bright lining improves visibility further, and keeping items in fixed positions lets you work by touch. Backpacks with full panel openings also work well at a base station, since the open panel displays the whole kit at once like a case.
Is a smartphone enough instead of carrying a second camera?
A smartphone covers casual backup shots, but it cannot stand in for a second body during paid work or rare events. A spare body guards against mechanical failure and lets you keep two focal lengths ready without swapping lenses in dust or rain. If your outings are relaxed and repeatable, a phone backup is a reasonable way to travel lighter. For anything you cannot reshoot, carry the second body and a bag that protects it properly.
Our Verdict
Choose the style by how you move, size it by real measurements, and insist on separate padded cells for every body. Access speed and carry comfort will shape your day far more than small spec differences. When you settle on the best camera bag for multiple cameras for your kit, check the product table above to compare internal dimensions, weight, and price across styles before you order.


