Best Bread Machines for Home Use: Our 2026 Checklist
Disclosure: We may earn a commission when you buy through links on this page, at no extra cost to you. As an Amazon Associate I earn from qualifying purchases. Learn more

Use this checklist for best bread machines for home use to compare loaf size, presets, power, cleaning, and footprint, and buy the right fit for your kitchen.
A home bread machine should fit your counter, match the amount of bread your household eats, and turn simple ingredients into a loaf you are proud to slice. This checklist helps you judge the best bread machines for home use by capacity, controls, heating, and cleaning before you buy. Start with the comparison table below, then score each option with the points that follow.
Most disappointment comes from a size mismatch. A loaf that is too small disappears in a day, while a bulky machine that crowds your counter will be stored away and forgotten.





How We Evaluate Bread Machines
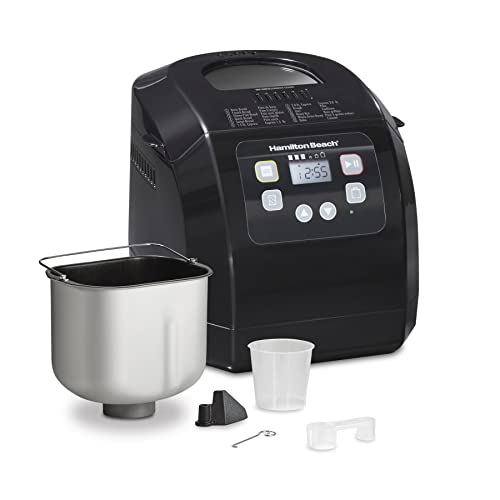
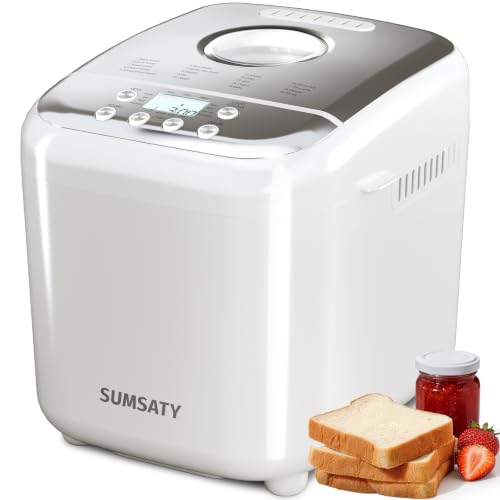
The product table above shows loaf sizes, programs, and power at a glance. Use this section to understand what each score means in daily baking. A strong home machine kneads evenly, bakes with a consistent crust, and cleans up without a long scrub, week after week.
Capacity and Batch Size
Loaf size is usually stated by weight, such as 1 lb, 1.5 lb, or 2 lb loaves, and some larger family size models reach 2.5 lb. A 1 lb loaf suits one or two people who bake often and like fresh bread. A 1.5 lb to 2 lb range suits most families and gives enough for sandwiches plus toast the next day.
Think in slices, not just pounds. A small household that bakes twice a week may waste less with a mid size loaf than a large one that goes stale. Also check the pan shape, because tall narrow loaves slice differently than wide loaves. A practical know how point is to match loaf size to your most common recipe, not to holiday baking you do once a year.
Controls and Ease of Use
Clear digital controls with a readable display make daily baking easier than a dial with tiny labels. Look for presets for basic, whole wheat, gluten free, dough only, and quick breads if you will use them. A delay timer lets you load ingredients at night and wake to fresh bread, while keep warm holds a finished loaf for a short time without drying it out.
Crust shade settings and loaf size buttons should be simple to set in order. A viewing window helps you check dough early without opening the lid and losing heat. If older family members will use the machine, larger buttons and a clear manual matter more than a long list of rarely used programs.
Power and Heating Performance
Wattage often falls around 450 to 850 watts for home models, with higher power usually supporting larger loaves and faster preheat. Power alone does not guarantee even baking, so look for comments about even crust color and a well baked center. Dual kneading paddles on larger pans can mix heavy whole grain dough more evenly than a single paddle.
Convection features on some models circulate hot air for a more even crust. For most homes, steady temperature control beats raw wattage. If your kitchen circuit is shared with other large appliances, avoid running the bread machine and a high draw appliance on the same circuit at the same time.
Cleaning and Dishwasher Safe Parts
A nonstick basket or pan that removes in one motion is the core of easy cleaning. Many pans and paddles are listed as dishwasher safe, but hand washing often protects nonstick coatings longer. The paddle can bake into the loaf, so a paddle removal tool or a program pause for removal is a useful detail.
Wipe the interior chamber and heating element area only when the machine is unplugged and fully cool, using a damp cloth for crumbs and flour. Never immerse the main body in water. Score cleaning higher when the lid or inner cover removes, because flour dust collects there during kneading.
Countertop Footprint and Storage
Measure width, depth, and height with the lid open before you buy, not just the closed footprint. Many machines need clearance above for steam and for lifting the pan out. Weight matters if you plan to store the machine in a cabinet, since heavier family size models can be awkward to lift weekly.
Plan where the machine will live beside your other counter appliances. If counter space is shared, our guide to the best coffee machines for home use can help you think through a morning counter layout. Leave a few inches behind the machine for cord space and heat, and store the pan inside the machine to save cabinet room.
Materials and Non Toxic Coatings
Pan coatings vary, including standard nonstick, ceramic style coatings, and stainless steel pans on some models. Ask what the coating is and how the maker recommends cleaning it, rather than assuming any label means the same thing. If you prefer to avoid certain coatings, choose a pan material you are comfortable with and follow care guidance to prevent damage.
Use plastic or silicone tools in the pan, never metal, to protect the surface. Replace a pan when coating is deeply scratched or peeling, and contact the maker for the correct part. The body should feel stable during kneading, with feet that grip the counter so the machine does not walk during heavy dough cycles.
What Each Buying Tier Should Deliver
Around $80 to $150, expect core presets, a single paddle, and loaf sizes up to about 2 lb, with basic crust control. This tier suits first time bakers who bake weekly and want simple cleanup. About $150 to $250 should add better kneading, more presets such as gluten free and dough, a clearer display, and stronger pan quality.
Above about $250, expect larger or more flexible loaf options, dual paddles on wide pans, fruit and nut dispensers on some models, and quieter operation. At every tier, insist on clear capacity limits and a delay timer that fits your schedule. For an overall choice, prioritize pan quality and loaf size fit. For value, prioritize core presets done well over a long program list.
A compact choice should still knead a full small loaf without flour pockets in the corners. Test a new machine first with a basic white loaf at your usual size, because that result tells you more about heating and kneading than any specialty program. If you also plan a coffee corner nearby, our guide to the best espresso machines for home use covers another countertop footprint to plan around.
Quick Buyer Checklist
- Does the largest loaf size match what your household eats in two days?
- Will the machine fit your counter with the lid fully open and steam clearance?
- Are the presets you need, such as whole wheat or gluten free, included and easy to set?
- Is the pan removable, with a coating and cleaning method you accept?
- Does the delay timer and keep warm timing fit your morning or evening routine?
- Is wattage suited to your loaf size without overloading a shared kitchen circuit?
- Are replacement pans and paddles available from the maker at a fair cost?
- Is the warranty at least one year, with clear support in the United States?
Red Flags to Watch For
Be cautious with vague capacity claims that list volume without loaf weight, because quart capacity alone does not tell you finished loaf size. Missing wattage, missing pan material, and manuals with no maximum flour amount are warning signs. Very short warranties and unavailable replacement paddles can turn a small loss into a useless machine.
Review patterns that mention raw centers, severe vibration, or pans that leak at the paddle shaft deserve weight, because those faults affect every bake. A know how check is to confirm the maximum flour weight for your chosen program before your first whole grain loaf, since heavy dough overload is a common cause of poor rise and motor strain.
Care and Maintenance Tips
Read the manual for minimum and maximum fill lines and ingredient order, because most machines want liquids first and yeast kept dry on top until mixing starts. Preheat only when the recipe or program calls for it, since many cycles manage temperature on their own. Unplug and cool fully before cleaning, and dry the pan and paddle before storing them.
Level the machine on a stable surface so kneading stays quiet and even. Store the cord loosely coiled, not tightly wrapped around warm parts. If a loaf sticks, let the pan cool briefly, then use a plastic tool to release the sides rather than prying with metal.
Frequently Asked Questions
Are bread machines safe to leave unattended?
Bread machines are designed to run a full cycle without constant watching, but you should stay home while one runs. Keep the area around it clear, use a stable counter away from water, and never cover vents. A delay timer is meant for timing a bake in a home that is occupied, not for leaving a heating appliance alone all day.
How long do bread machines usually last?
A home bread machine often lasts about five to ten years with weekly use and gentle pan care. The pan coating and paddle usually wear before the motor does. Storing the paddle separately after cleaning and avoiding metal tools can extend pan life, and replacement pans can add years to a sound machine body.
Does a bread machine use a lot of electricity?
No, a bread machine uses modest electricity for a home appliance, because its heating element cycles on and off during a bake of several hours. Total use for a typical loaf is often less than running a full size oven for the same bread. Larger loaves and longer whole grain cycles use more than small quick loaves.
Is a bread machine worth buying?
It is worth buying if you eat bread several times a week and value control over ingredients, salt, and freshness. It is less worth it if counter space is scarce or you bake only on holidays. Estimate your store bought bread spending for three months and compare it with the machine tier you are considering.
What size bread machine do I need?
Most families do well with a machine that makes 1.5 lb to 2 lb loaves. One or two people who bake often can choose 1 lb to 1.5 lb for fresher turnover. Choose a size that also offers a smaller loaf setting, because flexibility helps when guests arrive or when you want a test loaf.
How do I clean a bread machine?
Unplug the machine, let it cool, remove the pan and paddle, and wash them in warm soapy water unless the manual allows a dishwasher cycle. Wipe the chamber and lid with a damp cloth to remove flour and crumbs. Dry every part fully before reassembling, and never pour water into the main body or onto the heating element.
The Bottom Line
Match loaf size to your household, choose a pan and controls you will clean and use without friction, and confirm the footprint with the lid open. Those three checks decide daily satisfaction more than a long preset list. Review the product table above for capacity and power, and keep best bread machines for home use as your standard for a machine that earns its counter space.