Best Birding Binoculars under $300: A First Time Buyer's Guide for 2026
Disclosure: We may earn a commission when you buy through links on this page, at no extra cost to you. As an Amazon Associate I earn from qualifying purchases. Learn more

Shopping for the best birding binoculars under $300 for the first time? Learn the terms, compare options, and avoid rookie mistakes with this easy guide.
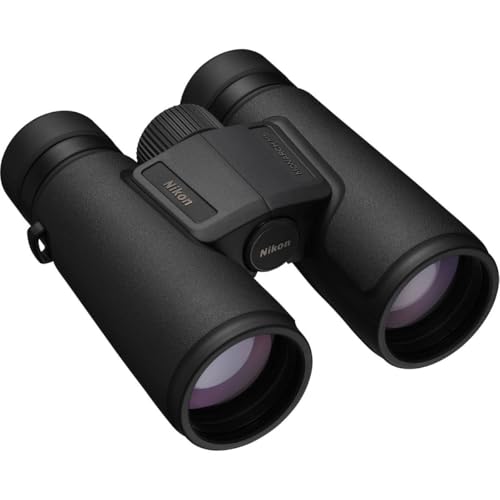
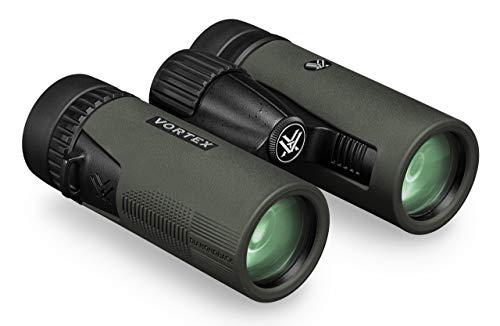
Buying your first pair for birdwatching can feel confusing, because the numbers on the box say a lot in very little space. The best birding binoculars under $300 should show birds brightly and clearly, focus fast on moving birds, and stay comfortable during a full morning outdoors. This guide explains the basic terms in plain English, then helps you match each spec to the places you bird. Start with the comparison table below.
You do not need the most powerful model or the highest price in this range to enjoy clear views. A balanced 8x42 or 10x42 pair, good glass, and a fit that suits your eyes and hands matter far more than extra magnification.




Who Should Buy Birding Binoculars in This Price Range?
Backyard and Local Park Birders
If most of your birding happens at feeders, ponds, and park paths, this budget covers everything you truly need. Choose a full size binoculars model in 8x42 with a wide view, so a bird that hops between branches stays in frame while you focus. Bright glass helps on cloudy mornings, and a moderate weight feels fine for short walks.
Beginners Who Walk Woodland Trails and Wetlands
Trail birders need a balance of reach, brightness, and steady handling in changing light. An 8x42 pair is often easier to hold still under tree cover, where warblers move quickly. Look for a sealed body that shrugs off drizzle and damp air near marshes. If your budget is tighter at the start, see our guide to the best birding binoculars under $200.
Travelers and Casual Birders Who Pack Light
If you bird on trips or during family walks, a compact 8x32 or 10x32 pair may suit you better than a full size model. Smaller objective lenses weigh less in a day pack, though they gather less light at dawn. Choose this route only if portability matters more to you than the brightest early morning view.
Birding Binoculars 101: The Basics for New Buyers
A pair of binoculars is two small telescopes joined side by side, one for each eye, so you judge depth more naturally than with one eye alone. Light enters through the large objective lens at the front, prisms inside fold the light path and flip the image upright, and the eyepieces magnify what you see. A center wheel sharpens both sides, while a diopter dial adjusts one side for differences between your eyes.
The two numbers on most models sum up the design, such as 8x42. The first is magnification, and the second is the objective lens diameter in millimeters. If you want a broader look at general use models in this budget, see our guide to the best binoculars under $300.
Key Features to Compare
What You Can Realistically Get Under $300
At this price you can expect clear glass, useful coatings, a sealed body, and solid mechanics. What you give up is the very finest edge sharpness and premium glass that pushes color and contrast a little further. That balance is why the best birding binoculars under $300 often feel like the point where spending stops buying basic competence and starts buying refinement. If you are curious about that next step, see our guide to the best birding binoculars under $500.
Magnification and Objective Lens Size for Birding
Magnification decides how large a distant bird appears, and 8x suits most beginners because the view stays steadier and wider. A 10x model helps with shorebirds and raptors across open water, but it narrows the view and shows more shake. A 42 millimeter lens gathers more light than a 32 millimeter lens of similar quality. Divide objective size by magnification to get exit pupil, so an 8x42 pair gives about 5.3 millimeters, a comfortable figure at dawn.
Field of View, Close Focus and Eye Relief
Field of view tells you how wide an area you can see at 1,000 yards, and a wider view makes it far easier to find a bird. Close focus, often about 6 to 8 feet in this class, lets you enjoy butterflies and nearby warblers without stepping back. Eye relief is how far your eye can sit from the eyepiece and still see the full view, so glasses wearers should look for about 16 millimeters or more and use the twist up eyecups at their lowest setting.
Glass Quality, Coatings and Prism Design
Glass and coatings shape the clarity and color you actually see, often more than a small jump in magnification does. Extra low dispersion glass, often shortened to ED glass, reduces color fringing around high contrast edges like a white egret against dark reeds. Fully multi coated lenses cut reflections and raise contrast, while phase coated roof prisms sharpen the image further. Roof prism models are slimmer and common at this price, while Porro prism models are wider but can cost less.
Focus Wheel, Weatherproof Build and Weight
A good center focus wheel turns smoothly with one finger and reaches sharp focus in about one full turn, so you can follow a bird moving toward you. Look for a sealed, waterproof and weatherproof body with internal fog protection for cool mornings and sudden showers. Most full size pairs in this range weigh about 22 to 28 ounces. Rubber armor improves grip with gloves and softens small bumps against railings.
Getting Started: Setup and First Use for Birding Binoculars
A few minutes of setup at home will save you frustration at your first feeder or trailhead.
- Set the distance between the barrels so both eyes see one round, even circle with no dark edges at the sides.
- Cover one lens, focus on a distant sign with the center wheel, then use the diopter dial to sharpen the other eye.
- Adjust the eyecups out if you do not wear glasses, and leave them down if you do.
- Attach the neck strap or a harness, and practice raising and focusing the pair on still birds first.
In the field, clean lenses only with a soft lens cloth, never your shirt, since grit on fabric can scratch the coatings. Readers who also scan open country for game can see our guide to the best hunting binoculars under $300.
Rookie Mistakes to Avoid With Birding Binoculars
- Choosing 12x magnification for your first pair, which makes the view shake and causes you to lose fast moving birds.
- Ignoring eye relief when you wear glasses, which cuts off the edges of the view and makes long sessions tiring.
- Buying by objective size alone, which can leave you with a heavy pair that has dull glass and a narrow view.
- Skipping the diopter setup, which leaves one eye slightly soft and leads to headaches after an hour outdoors.
- Storing binoculars in a hot car trunk, which stresses seals and lubricants and shortens the life of the pair.
Care and Maintenance for Birding Binoculars
Blow loose dust off the lenses first, then wipe gently in small circles with a clean lens cloth and a drop of lens fluid if needed. Keep the caps on when the pair rides in a bag, and store it in a cool, dry place away from direct sun. A silica gel pack in the case helps in humid climates.
Check the strap anchors, hinge tension, and eyecup movement every few months, and never force a part that feels stuck. If the view stays cloudy after careful cleaning, or the two sides no longer align and you see double images, contact the maker for service instead of opening the body yourself. Sealed binoculars need workshop tools to be closed again, so home repairs usually do more harm than good.
Frequently Asked Questions
Can you get a good pair of birding binoculars under $300 for regular birding?
Yes, a good pair in this range is realistic for regular birding, and many birders use one pair like this for years. The key limit is not basic clarity but the finest edge detail found at higher prices. A useful check many buyers miss is the warranty, since longer coverage on the optics and mechanics protects a first purchase you plan to carry weekly.
What does 8x42 or 10x42 mean on birding binoculars?
The first number is magnification and the second is the front lens size in millimeters, so both examples share the same light gathering lens. What changes in practice is your working distance, since 10x suits open lakes and fields where birds stay farther away. For mixed habitats, the wider and steadier 8x view is usually the safer learning tool.
Which birding binoculars are better for low light at dawn and dusk?
Binoculars with larger exit pupils and strong coatings are better for low light at dawn and dusk, so an 8x42 usually looks brighter than a 10x42 as light fades. A practical test is to watch a shaded fence line at last light, where weak coatings turn detail gray quickly. Arriving earlier also helps, since good glass cannot create light that has already gone.
How much should a first time buyer spend on a first pair of birding binoculars?
A first time buyer should plan on about $150 to $300 for a first pair, since pairs below that range often cut corners on coatings and focus feel. Spending within this band buys room to grow, so you learn birds instead of fighting your gear. Keep a small part of the budget for a harness and a field guide.
What specs matter most for beginners choosing birding binoculars?
For beginners, magnification, field of view, eye relief, and close focus matter most, because together they decide how easily you find and follow a bird. Check the stated distance range between the eyepieces if your eyes sit close together or far apart, since a pair outside that range will never show one clean circle.
Final Thoughts
Start with an 8x42 or 10x42 size, a wide view, enough eye relief, and glass with modern coatings, and this budget will reward you. Match the size to your habitats, set the diopter before your first outing, and handle a few pairs if you can to judge weight and focus feel. Chosen with care, the best birding binoculars under $300 can be the pair you learn on and keep for years, so compare your shortlist in the product table above before you decide.