
Best Binoculars for Survival in 2026: Matching the Right Model to Your Routine
Disclosure: We may earn a commission when you buy through links on this page, at no extra cost to you. As an Amazon Associate I earn from qualifying purchases. Learn more

Compare survival binoculars by magnification, weather sealing, low light clarity and pack weight, so you can choose optics that hold up off grid.
No single optic suits every emergency kit, route or property. The best binoculars for survival are the ones that still give you a clear, steady view after rain, dust, cold and rough carry in a pack. This guide matches format and features to how you will actually use them, so you can read the comparison table below.
Start with your most likely job for the glass. You may need to scan a ridge, check a fence line at dusk, or read distant movement before you choose a path. Each job favors a different balance of magnification, size and brightness.


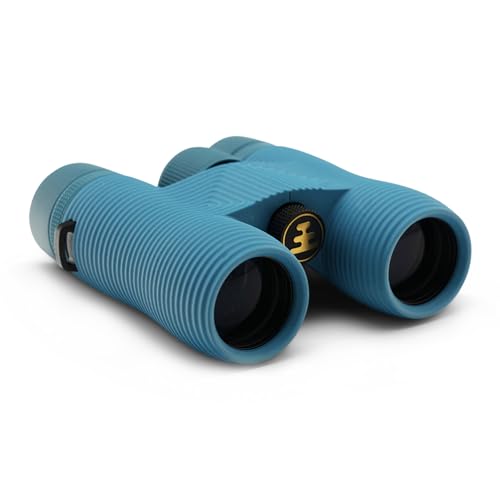


Who Should Buy Which Binoculars?
Buy for the routine you repeat, not for a rare extreme case. Your carry distance, light conditions and need for detail will point you to a compact, midsize or full size format.
Bug Out Bag and Vehicle Kit Builders
You need optics that earn their space and still work after months of storage. Choose a compact or midsize model around 8 by 32 or 8 by 42, sealed against water and fog, with a tough rubber armor coating. A closed case matters, since loose carry can knock the barrels out of alignment.
Backcountry Hikers and Hunters Scanning Terrain
You glass for longer periods and care about detail at distance. Choose 10 by 42 if you often scan open ground, but stay with 8 by 42 if you walk while you look or work in thick cover. For route finding in broken country, see our guide to the best rated binoculars for hunting alongside this survival focused checklist.
Homesteaders and Rural Property Watchers
You check gates, livestock, weather damage and unfamiliar vehicles from a porch or barn door. Choose a full size 8 by 42 or 10 by 50 with strong low light clarity, since your viewing is often at dawn or dusk and weight matters less. Most daily checks need only a steady two hand hold.
Key Features to Compare
Compare these factors in the same order each time. Sealing and brightness protect the view when conditions turn poor, while size decides whether you carry them at all.
Magnification and Objective Lens Size for Survival Scanning
The first number is magnification and the second is the front lens diameter in millimeters, so 8 by 42 magnifies eight times through 42 millimeter lenses. Higher magnification brings detail closer but narrows the view and magnifies hand shake. For most survival use, 8 by 42 is the steady all purpose choice, and 10 by 42 suits open terrain. A 12 power model is rarely worth the shake, weight and narrow view for general emergency use.
Durability and Weather Sealing That Keeps Optics Clear
Look for waterproof construction with sealed rings and internal fog protection from nitrogen purging. That sealing keeps rain and stream crossings out and stops internal fog when you move from a cold night into warm morning air. Rubber armor helps absorb drops onto rock and gives wet or gloved hands a firmer grip. Treat sealing as a core feature, since a pair that fogs inside has failed. Check that the focus wheel turns smoothly, since grit in a rough wheel often signals weak sealing.
Low Light Performance at Dawn and Dusk
Brightness depends largely on exit pupil, found by dividing the front lens size by magnification, so an 8 by 42 gives about 5.3 millimeters. A larger exit pupil generally looks brighter in shade and twilight, which helps you judge a trail or a shoreline at last light. If your routine centers on early starts and late returns, favor brightness over extra magnification. Hold the pair toward a shaded tree line at dusk to judge real clarity.
Field of View, Eye Relief and Close Focus
A wide field of view lets you follow movement and scan a slope without constant panning, and it is listed in feet at 1000 yards or in degrees. Eye relief is the distance your eye can sit from the rear lens and still see the full image, and glasses wearers should look for about 15 millimeters or more. Close focus around 6 to 8 feet helps you inspect gear and tracks nearby. For wildlife scanning, see our guide to the best binoculars for birdwatching.
Size, Weight and Carry for a Pack
Compact models near 8 by 25 weigh about 10 to 13 ounces and fit a jacket pocket, but their small front lenses look dim at dusk. Midsize 8 by 32 models often weigh about 16 to 20 ounces, while full size 8 by 42 models often weigh about 22 to 28 ounces. Carry the pair on a chest harness, since a neck strap swings and snags. If pack space is tight, see our guide to the best rated compact binoculars.
Prism, Glass and Lens Coatings
Roof prism models are straight and compact for pack carry, while porro prism models are wider and can offer strong depth perception at a lower price. BaK 4 prisms generally give a cleaner, rounder exit pupil than BK 7 prisms, and extra low dispersion glass can reduce color fringing on bright edges like snow or water. Multiple coatings on all air to glass surfaces improve light transmission.
How to Match Binocular Format to Your Survival Routine
Use this decision sequence before you look at price. First name the longest distance you must judge clearly, then name the darkest light you will work in, and then set the most weight you will carry. Those three answers narrow the field to one format for most buyers, and they explain why the best binoculars for survival for a vehicle kit differ from the right pair for a mountain route.
Next, try a simple check at home within the return window. Focus on a distant sign, move slowly across a tree line, and check for even focus and a wheel you can turn with gloves on. Binoculars help you spot water and shelter, but they do not replace a map, a compass or emergency communication, and if someone is injured or lost you should contact emergency services promptly.
If you want a broader shortlist before you narrow by routine, see our guide to the best rated binoculars and then return to the survival checklist here.
Common Mistakes to Avoid
These errors waste money and can leave you with glass you stop carrying.
- Choosing the highest magnification makes the view shake and narrows your field, so you miss movement at the edge of a slope.
- Buying a compact pair for dusk use gives you a dim image, so you cannot judge a trail or shoreline at last light.
- Ignoring waterproof and fogproof sealing lets moisture enter, so the lenses fog inside when you need them most.
- Skipping the weight check adds ounces you resent on a long carry, so the binoculars stay in camp or in the truck.
- Using a loose neck strap without a case lets the barrels swing and strike rock, so alignment can shift after one drop.
- Judging only by price overlooks coatings and prism quality, so a cheap pair strains your eyes during long scans.
Care and Maintenance for Survival Binoculars
Clean lenses only with a soft lens cloth or lens brush, never with a shirt or paper towel that can drag grit across the coating. Blow off dust first and wipe in small circles from the center outward. Keep lens caps on during carry, and store the binoculars dry in a padded case.
After rain, dry the outside with a clean cloth and leave the case open indoors until all moisture is gone. Check the hinge and eyecups each season. If the two images no longer merge into one, the pair needs professional service for collimation. Store away from heat in a vehicle, since heat can damage seals.
FAQ
What features matter most in binoculars for survival?
Waterproof and fogproof sealing, steady magnification and a bright front lens matter most in binoculars for survival. Start with 8 by 42 for balance. One point many buyers miss is hinge firmness, since a hinge that drifts changes your eye spacing mid scan and forces constant readjustment during every long session outdoors.
How much should you spend on your first pair of survival binoculars?
Plan on about $80 to $250 for a first pair of survival binoculars that will hold up outdoors. Below that range, sealing and coatings are often uneven. Put any leftover budget toward a chest harness and a hard case, since protected carry extends the life of basic optics far more than small extras do.
Which binocular format is better for low light survival use?
An 8 by 42 format is better for low light survival use than a 10 by 42 of similar quality. Its larger exit pupil looks brighter and its wider view is easier to hold steady as light fades. A larger 10 by 50 can add brightness at a fixed watch point, but its bulk makes it a poor choice for a pack carried all day.
Is a smartphone enough instead of survival binoculars?
No, a smartphone is not enough instead of survival binoculars for distance viewing. Phone zoom is mostly digital cropping, so distant detail softens, and the battery is shared with navigation, light and calls. Binoculars work with no charge and no signal, and they leave your phone saved for emergencies. They also work instantly, with no screen unlock or app delay.
What does 8x42 or 10x42 mean on survival binoculars?
On survival binoculars, 8x42 means eight times magnification through 42 millimeter front lenses, and 10x42 means ten times magnification through the same size lenses. The numbers are stamped on the focus wheel housing, so you can confirm a listing before you buy. Compare both on a distant road sign, since legibility under hand shake tells you more than numbers alone.
Final Thoughts
Match format to routine first, then check sealing, brightness and carry weight in that order. An 8 by 42 pair you actually bring will serve you better than a stronger, heavier pair left behind. Use the product table above to compare those points before you decide.
When you judge best binoculars for survival by routine rather than by headline magnification, the right choice becomes clear. Pick the sealed, steady pair that fits your pack and your light, keep it protected, and it will be ready when you need distance information most.


