
Best Audio Interface for Studio Monitors: Our 2026 Checklist and Buying Guide
Disclosure: We may earn a commission when you buy through links on this page, at no extra cost to you. As an Amazon Associate I earn from qualifying purchases. Learn more

Use this checklist to choose the best audio interface for studio monitors, covering balanced outputs, preamps, latency, and controls for accurate mixing.
Studio monitors are honest speakers. They will show you hiss from a noisy output, a loose stereo image from a poor volume control, and clicks from unstable drivers just as clearly as they show you a good mix. This guide scores interfaces with a checklist built for that job, so you can find the best audio interface for studio monitors for your room without paying for features your sessions never use.
The product table below gathers the short list in one view. Read the criteria first, then use the table to confirm which tier and input count fit the way you track and mix each week.

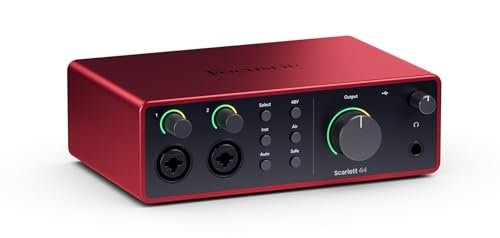
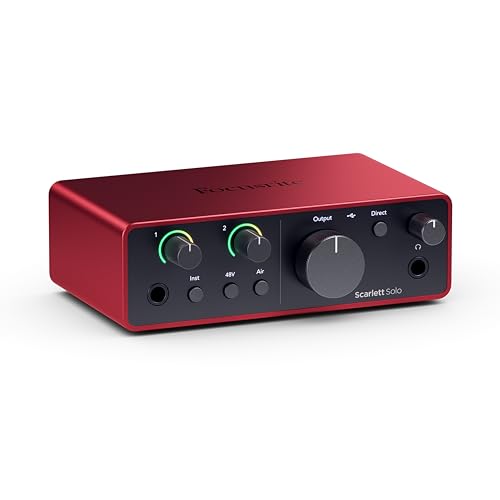


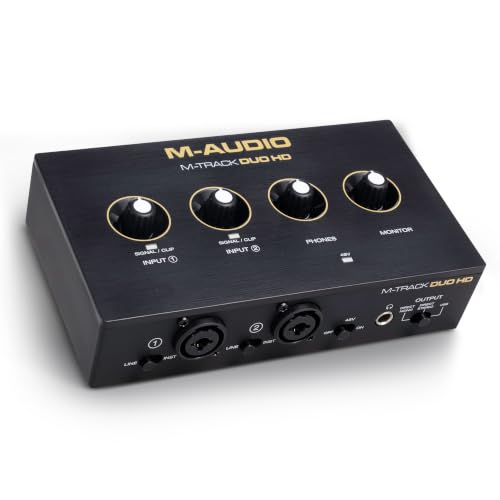
How We Evaluate Audio Interfaces
Evaluation for studio work starts at the outputs, because your monitors are the last thing the sound touches before your ears. From there we look at preamps, conversion, drivers, and controls, in that order. Each heading below gives a practical threshold, plus the symptom you will hear when a unit falls short. Keep notes as you read, since your own weak point, perhaps headphone power or extra inputs, should steer the final choice more than any single score.
Features That Matter for Studio Monitors
Balanced outputs are the foundation. TRS or XLR monitor outputs reject hum over the cable runs common in studios, and an output level around plus 10 dBu or higher gives powered monitors healthy headroom. A large main knob with smooth travel keeps left and right levels matched at low volume, which protects your stereo image. Direct monitoring matters for tracking, and a mono check button is a quiet bonus for testing how a mix holds up on small speakers. Rank these above bundled software, which rarely changes what your monitors reveal.
Monitor Outputs and Multiple Speaker Sets
Many project studios grow into a second pair of speakers, often a small set used to check mixes the way listeners hear them. Two pairs of outputs with simple switching make that check fast, and fast checks actually happen. If you own one pair today, a single output pair is fine, but confirm the unit offers a mute control for phone calls and unexpected feedback. Readers comparing closely related setups may also find our guide to the best interface for studio monitors useful for a narrower view of output features.
Conversion and Headroom
Converters decide how gracefully loud peaks and quiet details survive the trip to your speakers. Look for output dynamic range around 110 dB or better and low stated distortion, then focus on headroom in use. Leave a few decibels of space in your software master level rather than running every track near full scale, because inter sample peaks can clip conversion even when meters look safe. Clean conversion will not rescue a harsh room, yet poor conversion adds a grain to everything, and you may wrongly chase that grain with equalizer moves in every mix.
Connectivity and Ports
USB remains the standard connection for project studios, and current USB units handle more channels than most home sessions need. Thunderbolt models can offer very low latency, but they tie you to compatible computers and cost more. Count analog inputs honestly, including line inputs for synths and outboard gear, and check for digital expansion if you plan to record a drum kit later. MIDI ports still matter if you own older keyboards. For a simpler desk aimed at playback and light recording, the criteria in our guide to the best audio interface for monitors overlap heavily with this one.
Latency and Driver Stability
Latency shapes how natural tracking feels. With direct monitoring switched on, you hear your input without a trip through the computer, so latency stops mattering for the performer. For virtual instruments played through software, stable drivers at a moderate buffer feel better than fragile drivers at the smallest buffer. Judge stability by recent driver updates and support for your operating system, not by marketing claims. A unit that runs a full day of editing without a dropout protects your concentration, and concentration is a real mixing tool in a small studio.
Preamps and Input Quality
Microphone preamps should be quiet at the gain settings you actually use. Around 55 dB of gain or more covers quiet dynamic microphones on spoken voice and soft instruments, while low self noise keeps acoustic guitar parts clean. Phantom power per channel or in pairs is standard, and a pad helps with loud sources such as drums and guitar cabinets. Instrument inputs should preserve top end detail on guitar and bass. If you record the same source often, consistent preamp behavior from session to session helps your monitor choices translate into predictable results.
Price Tiers That Pass Our Checklist
Tiers describe what your money generally buys, without naming models. Studio buyers should match the tier to monitor value and session size. Overspending on conversion while neglecting cables and room treatment gives a smaller return than a balanced budget across the whole chain.
The Balanced Tier for Most Project Studios
Around $200 to $400 usually buys the strongest mix of quiet outputs, two solid preamps, dependable drivers, and a proper monitor control section. This tier suits singer songwriters, electronic producers who track vocals, and mixers working on one or two sets of monitors. You give up extensive expansion and the very lowest noise figures, but the daily experience is calm and predictable. For most readers, start your search in this tier in the product table above and move only when a named need, such as eight drum inputs, pushes you elsewhere.
The Value Tier for Focused Setups
Under about $200, careful choices still serve studio monitors well. Expect one or two inputs, one pair of balanced outputs, and direct monitoring. The compromises tend to appear in headphone output power, meter detail, and long term driver support. Check the maker record on updates before buying, because a value unit abandoned by its maker becomes costly later. This tier pairs sensibly with entry level monitors, leaving budget for the best audio cables for studio monitors, which protect that clean output on its way to each speaker.
The Compact Tier for Small Rooms
Compact units trade expansion for a footprint that fits dorm rooms, spare bedrooms, and shared spaces. The best of them keep balanced outputs and a real volume knob despite the small case. Watch heat and jack spacing, since tightly packed sockets can strain cables. A compact interface also travels well between a desk and a rehearsal space. Choose this tier when space is the hard limit, and accept that adding a second speaker pair or a full band session will likely mean an upgrade rather than an add on.
Quick Buyer Checklist
- Are the monitor outputs balanced, with level figures clearly stated?
- Can you mute or dim the monitors from the front panel?
- Do the preamps offer enough quiet gain for your quietest microphone?
- Are drivers current for your operating system, with recent updates?
- Does direct monitoring cover the inputs you record most?
- Is there a path to a second speaker pair or more inputs later?
- Will the unit fit without forcing your monitors wider apart?
Red Flags to Watch For
Unbalanced monitor outputs on a unit sold for studio use are a clear warning. So are missing dynamic range figures, since honest makers publish them. Be cautious with interfaces that bundle huge software collections to distract from modest hardware, and with warranties under one year. Another flag is a control app required for basic volume or monitoring choices, because an app failure then silences your speakers. Finally, treat claims of dramatic sound transformation with skepticism. A good interface should sound like nothing at all, simply passing your mix to the monitors without adding color or noise.
Choosing Audio Interfaces for Your Situation
Best Computer Audio Interface for Studio Monitors
When people search for the best computer audio interface for studio monitors, the deciding points are driver support and connection type. Confirm the unit works with your operating system version today, not in a promised update. USB offers the widest compatibility across laptops and desktops, while faster connections reward owners of matching computers with lower latency for virtual instruments. Also check how the unit behaves when the computer sleeps, because a studio interface that needs constant replugging after every break quickly becomes irritating.
Best USB Audio Interface for Studio Monitors: What to Check
The best usb audio interface for studio monitors should draw power cleanly or use its own supply, since bus power alone can limit headphone volume and output level on some designs. Check the USB connector type and cable length in the box, because a short cable can force awkward placement near noisy computer fans. USB also makes the unit easy to move between a studio desk and a laptop setup, which suits producers who track in one room and mix in another.
How to Make Your Audio Interface Last Longer
Keep the unit where air can move around it, and avoid stacking hot gear directly on top. Support heavy cables so their weight does not pull on the jacks, and plug monitor cables in before powering the speakers to avoid loud pops. A practical habit is to turn monitor volume down at the end of each session and raise it after everything has started cleanly the next day. Wipe dust with a dry cloth, keep drinks away from the desk edge, and save your control settings after a good session so a reset never costs you an hour.
Speaker choice interacts with every point above. Our look at the best studio audio monitors covers the speaker side of the pairing in more depth.
FAQs
What features matter most in audio interfaces for studio monitors?
Balanced outputs, low noise, and dependable monitor control matter most. They decide whether quiet mix details reach your speakers cleanly and whether your listening level stays consistent between sessions. Next come driver stability and preamp quality for tracking. One extra point many buyers miss is meter clarity. Readable meters help you repeat good gain settings, and repeatable settings make your monitor judgments more trustworthy over time.
Do I need balanced outputs for studio monitors?
Balanced TRS or XLR outputs are strongly recommended. They reject hum and radio noise over the cable run to your speakers. Unbalanced RCA outputs can work on a very short run in a quiet room, but they are the first thing to check when you hear buzz.
What size should I get for my room or desk?
Choose the smallest interface that covers your input count and monitor pairs, so your speakers keep their ideal spacing. In a small room, nearfield monitors sit close, and a compact unit preserves that geometry. Measure your desk between speakers before ordering, and remember that cable bend space behind the unit adds several inches to its real footprint.
Does the interface or the monitors matter more for sound?
Both matter, but the room and the speakers shape what you hear more than the converters do. A clean interface keeps noise out of the chain, and good monitors and a treated room show you the mix honestly. If your budget is tight, balance it across interface, cables, and acoustic treatment. Our notes on the best m audio studio monitors may help if you are also weighing a speaker upgrade.
How long do they last?
Quality interfaces commonly last many years, and software support usually ends their useful life before the hardware fails. Makers with a record of updating drivers across several operating system versions are the safer long term bet. You can extend life with gentle cable handling, steady ventilation, and surge protection for the whole desk. When a unit finally stops receiving support, it often still works on an older dedicated machine.
Final Thoughts
Put balanced outputs, quiet conversion, and stable drivers at the top of your list, and let input count and expansion follow your real session habits. The right tier then becomes obvious, and the product table above can confirm the details. Judged by that checklist, the best audio interface for studio monitors is the unit that disappears into your workflow and lets your speakers tell you the truth about every mix.


