
Best Cases for a PC: A First Time Buyer's Guide for 2026
Disclosure: We may earn a commission when you buy through links on this page, at no extra cost to you. As an Amazon Associate I earn from qualifying purchases. Learn more

New to buying cases? Our simple guide to the best cases for a pc explains the basics, key specs, and smart tips so your first purchase is the right one.
Buying your first PC case feels confusing because listings mix sizes, fan counts and panel names with little context. The best cases for a pc are simply the ones that fit your parts, cool them well and leave room to build without stress. This guide starts with the basics and uses the comparison table below to show what matters.
Think first about the computer you plan to build and where it will sit. A quiet office build, a compact desk build and a build you hope to upgrade later each point to a different size and layout. The sections below match those needs to airflow, clearance, materials and price.


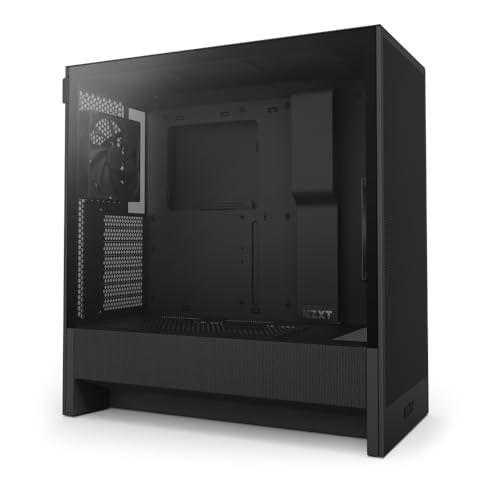
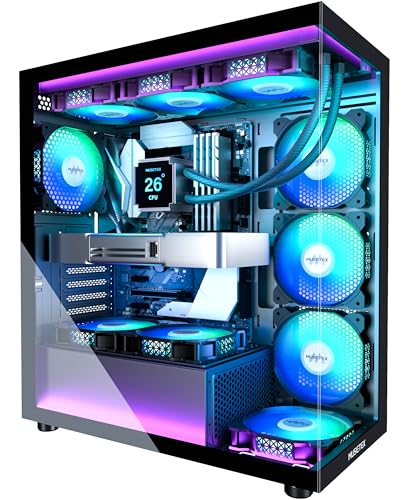


Cases 101: The Basics for First Time Buyers
A PC case is the metal and glass enclosure that holds your motherboard, graphics card, storage drives and power supply in one protected frame. It does more than look tidy. Its panels, vents and fan mounts control how air moves around warm parts, and its openings decide which parts fit at all.
Builders describe cases by the motherboard sizes they accept and by tower size. A mid tower is the common middle choice for a standard home build. Smaller cases save space but limit part choices and working room. Larger cases add room for extra drives and cooling, but cost more and take more space.
Who Should Buy Which PC Case?
Start with your parts list and your room, not with looks alone. Your build type will narrow the size and airflow you need.
First Time Builders With a Standard Home PC
Choose a mid tower with a mesh front and two or more included fans for a general home or office computer. You get room for your hands, clear cable paths and space for one graphics card and a few drives. This size is forgiving while you learn, and parts for it are easy to find.
Builders With a Small Desk or Shared Room
Choose a compact case only after you confirm that your motherboard and graphics card fit inside it. Measure the desk depth and leave room behind the case for cables and exhaust air. If space is tight, see our guide to the best itx pc cases for the smallest layouts and their trade offs.
Builders Who Plan Upgrades or Gaming Later
Choose a roomier case with strong airflow, extra fan mounts and long graphics card clearance if you expect a more powerful card later. You will pay a little more now, but you avoid buying a second case for your next upgrade. If gaming is already your main goal, see our guide to the best cases for a gaming pc for builds shaped around that use.
Key Features to Compare
Compare these factors in order, because fit comes before style. A case that fails on size or airflow will frustrate you no matter how good it looks, and the best cases for a pc pass the basic fit checks first.
Airflow, Mesh Panels and Fan Mounts
Airflow is how easily cool air enters and warm air leaves. A mesh front panel lets intake fans pull air in with less effort than a solid front does, so parts usually run cooler and quieter. Look for mounts for 120 mm or 140 mm fans at the front and top, plus one rear exhaust mount. If you want to add fans later, see our guide to the best pc case fans for sizes and placement.
Motherboard Size and Case Form Factor
The case must match your motherboard size, listed as ATX, micro ATX or mini ITX in order from larger to smaller. A standard ATX board needs a case that states ATX support, while a smaller board can often fit in a larger case. If you prefer a board and case one step smaller, see our guide to the best matx pc cases for that balance of size and room.
Graphics Card Length and Cooler Height Clearance
Check two numbers before you order. Graphics card clearance is the longest card the case accepts, often about 300 to 400 mm in a mid tower. Cooler height clearance is the tallest air cooler that fits under the side panel, often about 150 to 170 mm. Leave a small margin beyond your part lengths, because cables and front fans can use space the headline number assumes is empty.
Build Quality, Materials and Dust Filters
Most cases use steel for the frame, with side panels in steel or tempered glass and fronts in mesh or plastic. Thicker steel feels more solid and rattles less, while glass shows your parts but adds weight and needs careful handling. Removable dust filters over the intakes slow dust buildup inside. A filter you can slide out and rinse is a real quality and durability plus.
Cable Space, Drive Mounts and Front Panel Ports
Good cable space behind the motherboard tray lets you route wires neatly and close the side panel without force. Look for two or three mounts for solid state drives and room for a hard drive if you still use one. Front panel ports should include USB ports you will use and a headphone jack within easy reach. These points decide how easy to use the case feels each day.
Price and Value for a First Case
Budget options at about $50 to $90 usually cover a basic build if airflow and clearance are sound. Cases at about $90 to $150 often add more included fans, better filters and cleaner cable space, which is strong value for most first builds. Premium options at around $150 and above add thicker materials and more cooling room. Check the warranty length too, and pay extra only for gains you will notice.
Getting Started: Setup and First Checks
Read the manual before your first build, because it shows where each screw, standoff and cable belongs in that case. Open both side panels, lay out your parts and confirm every part fits before you fasten anything. Work on a flat surface with good light.
Install the power supply and route its cables early, while the case is empty and easy to turn. Fit the motherboard next, then add the graphics card last. Before you close the panels, power the build on once, check that every fan spins and confirm that no cable touches a fan blade.
Common Mistakes to Avoid
These errors are common on a first build and easy to prevent.
- Buying a case before checking motherboard size leaves you with a board that cannot mount inside it.
- Ignoring graphics card length means a new card can block drive cages or front fans.
- Choosing a solid front panel for a warm build raises noise because fans must work harder for air.
- Forcing the side panel closed over thick cables can bend the panel and pinch wires.
- Placing the case tight against a wall chokes exhaust air and lets heat build during long use.
- Spending most of the budget on glass and lighting leaves too little for airflow and basic fit.
Care and Maintenance for Your PC Case
Clean and inspect the case regularly so airflow stays close to how it felt on day one. Every month or two, switch the computer off, remove the intake filters and rinse or brush them clean, then let them dry fully before refitting. Wipe outside panels with a soft dry cloth.
Every few months, open the side panel and blow loose dust out with short bursts of canned air, holding each fan still while you clean near it. Check that panel and fan screws stay snug, and look for cables that have shifted into a fan path. Store spare screws in one labeled bag.
FAQ
What features matter most in a PC case for a first build?
Fit and airflow matter most in a PC case for a first build. Confirm motherboard size, card length and cooler height first, then choose a mesh front and at least two fan positions. One point new builders miss is the power supply length limit, which sits in the case specs and can block a bottom cable route if the unit is long.
How much should a first time buyer spend on a PC case?
A first time buyer should plan on about $90 to $150 for a PC case in most home builds. That range usually buys included fans and filters you would otherwise add later. Spend less only if your parts are modest and short, and keep some budget aside for one extra fan if your room runs warm in summer.
What PC case size should a first time buyer choose for a small desk?
A first time buyer with a small desk should choose a compact mid tower or a smaller case that still lists clear part limits. Measure the full footprint, including room at the back for cables to bend safely. A case placed on the floor beside the desk can be a smarter pick than a tiny case that makes your first build cramped and hard to service.
Are expensive PC cases worth it for a basic home PC?
Expensive PC cases are rarely worth it for a basic home PC with modest parts. The extra cost mainly buys thicker panels, more cooling mounts and finish details a light build does not need. One case where paying more helps is a shared living space, where quieter panels and larger fans make the computer less noticeable during calls.
How long does a PC case last and when should a PC case be replaced?
A PC case can last through two or three full rebuilds, often eight years or more, because it has no parts that wear out quickly. Replace a PC case when its front ports no longer match your devices, its clearance blocks a planned card, or a panel is damaged. Filters and fans can be replaced on their own long before the frame needs to go.
Wrapping Up
For your first build, put fit first, airflow second and looks third. Confirm motherboard size, card length and cooler height, choose a front panel that breathes and leave cable room behind the tray. The product table above can help you compare sizes and prices.
When you judge best cases for a pc by those checks, the right choice is usually the plain case that fits well and cools quietly. Buy it with confidence.
