Best Cameras for Raspberry Pi in 2026: Which Type Is Right for You?
Disclosure: We may earn a commission when you buy through links on this page, at no extra cost to you. As an Amazon Associate I earn from qualifying purchases. Learn more

Compare camera types for your board projects, from CSI modules to USB and night vision options, with interface, sensor, lens, and budget guidance.
Board cameras look confusing at first because they are sold as bare modules, webcams, and infrared boards that all promise sharp pictures. The best cameras for raspberry pi depend on how your project captures images, since a bird box, a 3D printer monitor, and a robot each need a different kind of camera. This guide compares the main types side by side so you can match the interface, sensor, and lens to your build.
Instead of ranking single products, the sections below explain what each camera type does well, where it falls short, and what it usually costs. Start with the comparison table below, then read the type notes and buying factors that fit your project.


The Main Camera Types Compared
Every option here connects to the board in one of two ways, through the CSI ribbon port or through a USB socket, and that choice shapes everything else. Unlike the standalone models covered in guides to the best digital cameras, these cameras rely on the board for processing, storage, and power. The table sums up the four types worth considering.
| Type | Best For | Pros | Cons | Typical Price |
|---|---|---|---|---|
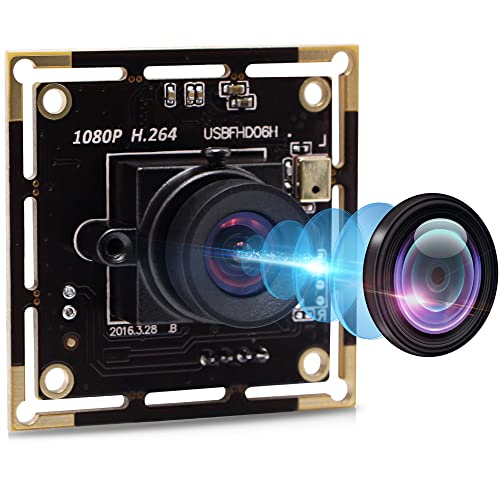
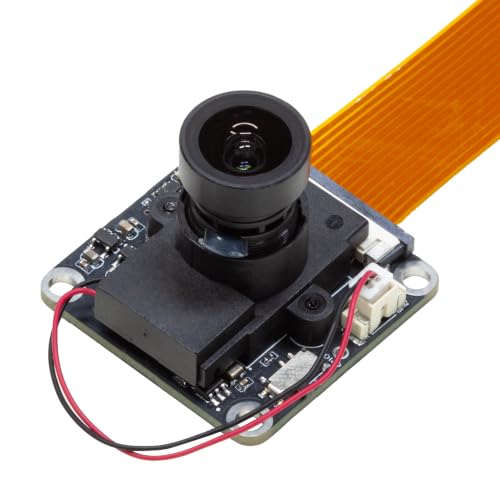
| CSI ribbon module | Fixed projects inside a case | Fast link, low processor load, compact | Short cable, delicate connector | about $10 to $30 |
| USB webcam | Desks, streaming, quick testing | Simple setup, long cable, easy to move | Uses processor power, bulkier body | about $20 to $60 |
| Infrared night vision module | Wildlife and dark spaces | Sees in total darkness with its lamps | Daytime colors need a switchable filter | about $15 to $40 |
| Global shutter module | Moving subjects and machine vision | No warped edges on fast motion | Lower resolution, higher price | about $50 to $80 |
CSI Ribbon Modules
These small boards plug into the camera port with a flat ribbon cable and let the board hardware handle the image pipeline, so stills and video stay smooth. Most use a fixed focus or manual focus lens a few millimeters wide, which suits projects mounted at a set distance. They are the natural pick for enclosed builds like printer monitors and smart doorbells. Their weakness is reach, since standard ribbons run about 15 to 30 cm and the connector latch breaks if you force it.
USB Webcams
A standard webcam treats the board like any small computer and sends video over USB with no ribbon handling at all. That makes webcams ideal for testing an idea on the desk before you commit to a permanent mount. Many include a microphone and autofocus, which bare modules rarely offer.
The trade off is load, because the board processor does more of the work, and cheap webcams can lag at higher resolutions. Cable length helps too, with about 1 to 2 meters of freedom.
Infrared Night Vision Modules
These modules drop the infrared blocking filter and add infrared lamps, so the sensor can record in darkness that looks pitch black to you. In daylight the missing filter washes colors toward pink and purple unless the module has a switchable filter that moves in and out. Lamp range is modest, usually about 3 to 8 meters, so judge them on the distance your subject actually sits from the lens.
Global Shutter Modules
A global shutter exposes every pixel at the same instant, while the rolling shutter in most cheap sensors reads the scene line by line. Fast motion exposes the difference, since spinning wheels and passing vehicles lean or wobble under a rolling shutter. You give up resolution in return, with many global shutter sensors near 1.6 megapixels, so they suit motion analysis far better than detailed still photography.
CSI Modules vs USB Cameras: Which Should You Choose?
Pick the CSI module when the camera lives in one place, the board sits nearby, and you want the lightest load on the processor. Pick USB when you need distance, a microphone, or the freedom to unplug the camera and test it on a laptop first. CSI also wins on power draw, which matters for battery projects running outdoors. USB wins on forgiveness, because a worn cable swaps in seconds while a damaged ribbon latch can end a build.
How to Choose the Right Camera for Your Board
Interface and Connector Fit
Check which camera connector your board carries before ordering anything, because newer compact boards use a smaller connector than the full size boards. Adapters exist, yet each adapter adds a failure point inside a tight case. Ribbon cables also come in versions for different board families, and the wrong one simply will not seat.
USB cameras avoid all of this, though they occupy a port you may need for storage or a dongle. Match the interface to the ports you can spare, not just the ones the board has on paper.
Sensor Size and Honest Resolution
Megapixel counts sell cameras, but sensor size decides how much light each pixel gathers. A larger sensor with fewer megapixels often beats a tiny sensor with inflated numbers, above all indoors. Read the native sensor resolution in the listing rather than the interpolated figure some sellers advertise. Honest 5 to 12 megapixel modules cover nearly every hobby build, and they keep file sizes friendly for small memory cards.
Lens and Focus Choices
Fixed focus lenses are set at the factory for a middle distance and cost the least. Interchangeable mount modules accept different lenses, so you can swap a wide view for a narrow one when the project changes. Autofocus modules adjust themselves and help when subjects move closer or farther away, like a feeder camera visited by birds of different sizes. Wide lenses near 100 degrees suit room views, while narrow lenses near 40 degrees suit a single nest entrance.
Low Light and Infrared Needs
Dim rooms punish small sensors, so look at pixel size and the minimum light rating if your project runs at night. Bigger pixels gather more light and hold detail with less grain. If the space goes fully dark, only an infrared module with lamps will see anything at all.
Remember that infrared lamps draw extra current and can glow faintly red at the source. For a porch or hallway with some ambient light, a sensitive standard module usually gives better color than switching to infrared.
Frame Rate and Video Modes
Video claims need the same skepticism as megapixels, since a camera may record 1080p at 30 frames per second yet drop to a slideshow at its top stills resolution. Slow motion modes trade resolution for speed, often reaching 90 to 120 frames per second at lower settings. Streaming projects should confirm the modes the software supports, not just the modes the sensor lists. Storage fills fast as well, with high frame rate clips eating a memory card in hours.
Cameras for Specific Project Needs
Best USB Cameras for Raspberry Pi
For USB use, prioritize a camera with true plug and play support in the operating system, a cable long enough for your desk, and a modest 1080p sensor rather than an advertised 4K badge. Autofocus earns its price if people or pets move in the frame during calls and streams. A built in microphone removes one more cable from the build. This is the easiest route for classrooms and first projects, where swapping hardware between computers matters more than saving the last bit of processor load.
Setup and Care Tips
Always switch the power off and unplug the board before connecting or removing a camera module, because the ribbon contacts can short against nearby parts on a live board. Open the connector latch gently, slide the ribbon in with the contacts facing the right way, and close the latch with even pressure. During setup, preview the image on one of the best raspberry pi monitors so you can focus and aim before the case closes, and keep one of the best keyboards for raspberry pi attached for terminal commands. Store spare ribbons flat, wipe lenses with a soft cloth, and keep modules in a dry box away from static prone surfaces.
Frequently Asked Questions
What features matter most in cameras for raspberry pi?
The interface matters most, because it decides processor load, cable reach, and how the camera mounts. Sensor size and lens choice come next, since they set image quality more honestly than megapixel badges. After that, weigh low light ability and software support for your exact board. A camera that matches your mounting distance and lighting will outperform a pricier module chosen only for its headline numbers, so start from the project and work backward to the specs.
Which camera specs matter most for beginners setting up a board camera?
Beginners should care about native resolution, connector type, and whether the current software release supports the module without extra drivers. A standard CSI module or a plug and play webcam removes most early frustration. Lens focus type matters too, since a fixed focus lens forgives rough aiming.
Skip exotic options like interchangeable lenses until a basic build works. Starting simple also keeps the budget near about $15 to $30, which leaves room for a case, cables, and a spare memory card.
Is a smartphone enough instead of a dedicated board camera?
A smartphone takes better casual photos, but it cannot sit inside a project and react to sensors, timers, or code. Board cameras exist for automation, capturing a frame when a door opens or a print finishes. Phones also lock you out of other uses while they record.
If you only want a few snapshots of a pet or a room, the phone wins on quality and costs nothing extra. For anything triggered, scheduled, or enclosed, a small dedicated module is the practical tool.
How long can a CSI ribbon cable be on a board camera?
Standard ribbons run about 15 to 30 cm, and longer aftermarket cables up to about 2 meters exist for special cases. Signal quality drops as length grows, so very long runs can produce errors, dropped frames, or a camera that fails to start. When the camera must sit far from the board, a USB webcam or a second small board near the subject usually proves more reliable than stretching the ribbon.
Which board camera type works best in low light?
A large pixel standard module works best where some light remains, holding color and detail in dim rooms. In complete darkness, an infrared module with built in lamps is the only type that records a usable image. Global shutter models sit between the two, freezing motion cleanly but gathering less light per frame.
Match the choice to your darkest real condition, not the lighting in the room while you shop. Testing at night with a cheap module first often saves money.
Wrapping Up
Start with the interface, then judge sensor size, lens, and low light ability against the space your project watches. The product table above gathers the main types with their typical prices in one place. For most fixed builds, the best cameras for raspberry pi are standard CSI modules, while USB webcams win for flexible desk setups and infrared modules own the night. Pick the type that fits your project first, and let the exact model follow from there.