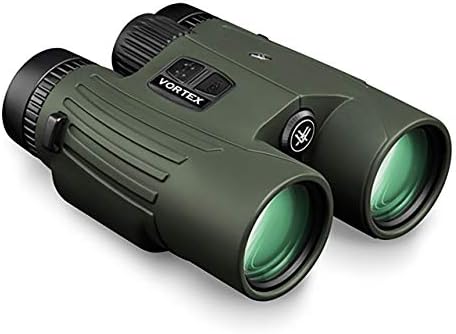
Best Binoculars Under $500: Types Compared for 2026
Disclosure: We may earn a commission when you buy through links on this page, at no extra cost to you. As an Amazon Associate I earn from qualifying purchases. Learn more

Best binoculars under $500 explained: compare prism types, magnification, eye relief, and low light performance to find a pair that suits you.
Shopping for best binoculars under $500 can feel confusing because the choices look similar at first glance, yet they behave very differently in the field. Some pairs favor a wide, bright view for scanning open country, while others favor a light body you can carry all day. This guide compares the main types side by side, explains the specs that matter, and helps you set realistic expectations at this price.
The comparison table below gives a quick overview of each type, and the sections that follow explain how to match a pair to your eyes, your hands, and your usual viewing conditions.


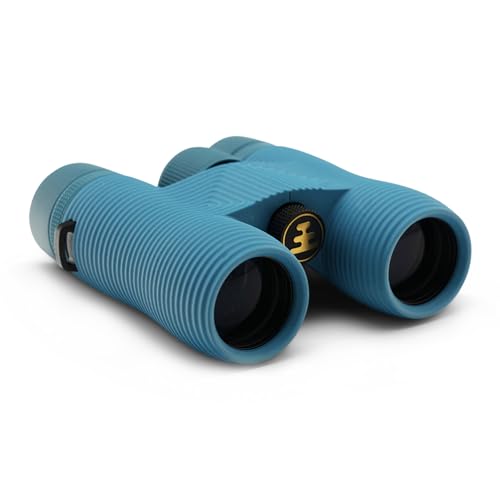


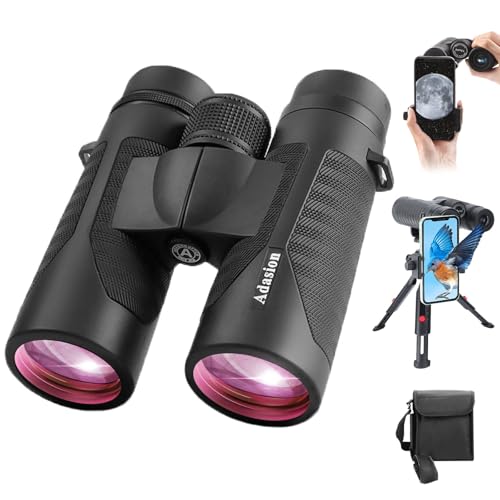
Best Binoculars Under $500: Types Compared
Most pairs under this budget fall into three broad groups. The shape of the prisms inside the body explains much of the difference in size, weight, and price, so it is worth learning the basics before you compare numbers on a spec sheet.
| Type | Best For | Pros | Cons | Typical Price |
|---|---|---|---|---|
| Porro prism | Bright views on a budget | Wide field, strong depth, good value | Bulkier body, heavier feel | About $80 to $300 |
| Roof prism | Carrying and packing | Slim shape, lighter feel, easier handling | Higher cost for equal brightness | About $150 to $450 |
| Compact | Travel and quick trips | Very light, pocket friendly, simple to carry | Smaller view, weaker low light image | About $60 to $250 |
Porro Prism Binoculars
Porro prism pairs use an offset prism path that gives a wide, roomy view and a strong sense of depth. That design often delivers a bright image for less money than a slim roof prism pair with similar glass, which is why many value minded buyers start here. The trade off is size, since the wider body takes more room in a bag and can feel heavy on a long walk.
Choose this type if you mostly watch from a fixed spot, such as a porch, a hide, or a viewing platform, and you want the most brightness per dollar. Check that the hinge moves smoothly, the focus wheel turns with steady resistance, and the body still feels balanced when you hold it up for several minutes at a time.
Roof Prism Binoculars
Roof prism pairs use a straight barrel design that keeps the body slim and easy to grip. They pack well in a day bag, hang comfortably from a neck strap, and suit buyers who walk, hike, or travel with their optics. To keep the image sharp and bright in a slim body, makers often use better coatings, so prices climb faster than with Porro prism pairs.
Choose this type if portability matters as much as image quality, or if you plan to carry the pair for hours. Pay close attention to the feel of the focus wheel and the eyecups, since a slim pair that is awkward to hold will stay in your bag no matter how good the glass looks on paper.
Compact Binoculars
Compact pairs shrink the objective lenses and the body to make carrying almost effortless. They suit concerts, city walks, short hikes, and trips where a full size pair would feel like a burden. The smaller lenses gather less light, so the view can look dim at dawn, at dusk, or under heavy tree cover.
Choose this type only when size and weight are your top priorities and you mostly view in good daylight. If you often watch at first light or last light, a full size pair will serve you better, even if it weighs a little more and takes more room.
Porro Prism vs Roof Prism: Which Should You Choose?
Compare these two types on brightness, size, handling, durability, and price, and the right choice usually becomes clear. Porro prism pairs tend to win on brightness per dollar and on the sense of depth in the view, while roof prism pairs tend to win on slim handling, packing, and all day comfort. Neither design is better in every situation, so match the strength to the way you actually watch.
If you watch mostly from one place and want the brightest view your budget allows, a Porro prism pair is hard to beat. If you walk long distances, travel often, or share the pair with family members who value a light grip, a roof prism pair is usually the smarter pick.
How to Choose the Right Pair of Binoculars
The numbers on the box tell a useful story once you know what each one controls. Magnification sets how close a subject looks, objective size sets how much light enters, and eye relief sets how far your eyes can sit from the eyepieces while still seeing the full view.
Magnification and Objective Lens Size
The first number in a label such as 8x42 is the magnification, and the second number is the objective lens diameter in millimeters. An 8x pair gives a steadier, wider view that is easier to hold still, while a 10x pair brings distant subjects closer but also magnifies hand shake. A 42 mm objective gathers a good amount of light for general use, while a smaller 32 mm objective saves weight at some cost to brightness.
For most new buyers, 8x42 is a safe and forgiving starting point, and 10x42 suits open country where subjects stay far away. Avoid very high magnification in a handheld pair, since the image will shake and tire your eyes. If you need more reach than 10x, plan on a tripod or a support rather than stronger handheld magnification.
What You Can Realistically Get Under $500
At this budget you can expect solid glass, dependable coatings, a smooth focus wheel, and a body that handles regular outdoor use. You can also expect good brightness in daylight and fair performance at dawn and dusk, though the very best low light image still costs more. What you should not expect is flawless edge sharpness, perfect color in every lighting condition, or a featherweight body with top tier brightness all at once.
Spend your money where it shows up in the view: glass quality, coatings, and a precise focus mechanism. Do not cut corners on eye relief if you wear glasses, and do not pay extra for gimmicks that add weight without improving the image. A pair priced around $150 to $300 often covers general watching very well, while the range around $300 to $450 buys better coatings, a slimmer body, or stronger weather sealing.
Eye Relief and Comfort
Eye relief is the distance from the eyepiece to the point where you still see the full field of view. If you wear glasses, look for at least 15 mm of eye relief and eyecups that twist down fully, so your glasses sit close enough to the lenses. Without enough eye relief, the edges of the view will darken and you will feel as if you are looking through a tunnel.
Comfort also depends on weight balance, grip shape, and the neck strap. A pair that feels nose heavy will tire your arms on a long outing, even if the optics are excellent.
Low Light Performance
Low light performance depends on objective size, exit pupil, coatings, and glass quality working together. Exit pupil is the objective size divided by the magnification, so an 8x42 pair gives a 5.25 mm exit pupil that suits aging eyes well in dim light. Larger exit pupils help at dawn and dusk, but only up to the size your own pupils can use, so bigger is not always better.
Twilight factor is another number you may see, and it combines magnification and objective size into a rough guide to dim light detail. Use it only as a loose comparison, since coatings and glass quality change the real result. For buyers who watch often at first or last light, a 42 mm objective with good coatings is a sensible target, and a related guide to best hunting binoculars under $500 covers that use case in more detail. Never look at the sun through binoculars, and follow the manufacturer's instructions for safe use.
How to Make Your Pair of Binoculars Last Longer
Good care starts with the lenses. Use a lens cloth, not your shirt, and blow loose dust off before you wipe, since grit dragged across glass leaves fine scratches over time. Keep the lens caps on when the pair is in your bag, and store the pair in a dry, padded bag away from heat and damp.
Check the hinge, focus wheel, and eyecups now and then, and tighten a loose strap before it becomes a drop. Rinse salt spray off with fresh water after coastal use and dry the body fully.
Frequently Asked Questions
Can you get a good pair of binoculars under $500?
Yes, you can get a very capable pair at this budget for general watching, birding, and outdoor trips. Expect solid glass, good daylight brightness, and dependable handling, though the finest low light image and the lightest premium body still cost more. Focus on magnification, objective size, and eye relief rather than chasing the highest numbers, and check the grip and focus feel when you can. A mid priced pair that fits your hands will beat a costly pair that feels awkward in daily use.
How much should I spend on my first one?
Most first time buyers do well in the range around $120 to $250, where the image is bright, the build is sturdy, and the handling feels reassuring. Spending more buys better coatings, weather sealing, or a slimmer body, which matters most if you watch often or carry the pair for hours. Start with a forgiving 8x42 pair, learn what you like about the view and the grip, and only then consider a specialized pair for a narrow use. Avoid the cheapest pairs, since poor focus and dim glass can spoil an otherwise pleasant outing.
Which is better for low light?
A larger objective usually helps in dim light, so 42 mm pairs tend to outperform compact pairs at dawn and dusk. Coatings matter just as much, since they decide how much of the incoming light actually reaches your eyes. For regular low light watching, look for a 42 mm objective, a generous exit pupil, and fully coated glass, and pair that choice with realistic expectations. No handheld pair turns night into day, and a steady hold matters more than a small spec advantage when light fades.
What specs matter most for beginners?
Beginners should focus on magnification, objective size, eye relief, field of view, and weight, in that order. Magnification and objective size set the basic character of the view, eye relief decides comfort with glasses, field of view decides how easy it is to find and follow a moving subject, and weight decides whether you carry the pair all day. Treat close focus distance as a bonus if you enjoy watching insects or nearby birds. Ignore exotic numbers until the basics feel right, since a pair that is comfortable and steady will teach you more than a spec sheet ever will.
What does 8x42 or 10x42 mean?
The first number is magnification, so 8x makes a subject look eight times closer and 10x makes it look ten times closer. The second number is the objective lens diameter in millimeters, so 42 mm lenses gather more light than 32 mm lenses. An 8x42 pair gives a wider, steadier view that is easier for new users, while a 10x42 pair gives more detail at distance but magnifies hand shake. Choose 8x for woodland, general watching, and unsteady hands, and choose 10x for open country, shorelines, and distant subjects.
Is a smartphone enough instead?
A smartphone works well for quick photos and for identifying a subject after the fact, but it cannot match binoculars for live, detailed viewing at distance. Binoculars give a bright, magnified, three dimensional view with both eyes open, which helps you follow movement and judge depth. Many watchers carry both, using binoculars to find and study a subject and a phone to record it. A related guide to best birding binoculars under $500 explains how birders balance reach, brightness, and weight for that hobby.
Wrapping Up
The best choice comes down to three decisions: the prism type that fits your carrying style, the magnification and objective size that fit your viewing conditions, and the eye relief that fits your eyes. A Porro prism pair favors brightness per dollar, a roof prism pair favors slim handling, and a compact pair favors effortless carrying. Weigh those strengths honestly against how you actually watch, not how you imagine you might watch one day.
Set your budget, shortlist pairs that meet your eye relief and weight needs, and check the product table above before you order. For a final reminder, best binoculars under $500 is a broad category, so the pair that fits your hands and your light conditions will always beat the pair with the longest spec list. If you want ranging help in the same budget, see our guide to best rangefinder binoculars under $500, and if you want more reach, see our guide to best 12x50 binoculars under $500.