
Best Binoculars for Under $100: The Buyer Checklist for 2026
Disclosure: We may earn a commission when you buy through links on this page, at no extra cost to you. As an Amazon Associate I earn from qualifying purchases. Learn more

Shoppers weighing the best binoculars for under $100 get a clear checklist covering magnification, brightness, build and red flags.
Shopping for best binoculars for under $100 is easier when you judge every option against the same short checklist instead of chasing one impressive number on the box. A low price does not have to mean a poor view, but it does mean you should check the basics carefully before you spend anything. The product table gives you a quick way to compare options at a glance.
This guide walks through magnification, brightness, build, and handling in plain language, then gives you a quick checklist and a list of warning signs. Never look at the sun through binoculars, since concentrated sunlight can damage your eyes in an instant.


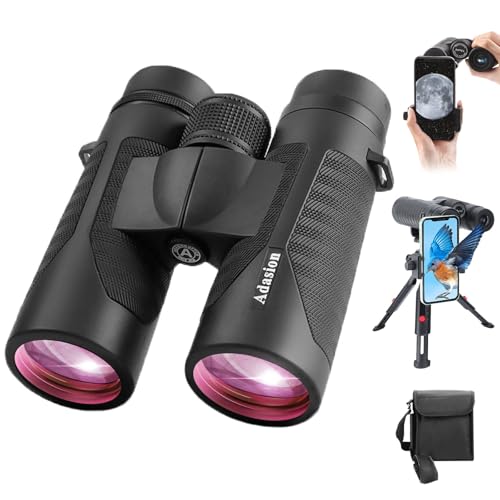


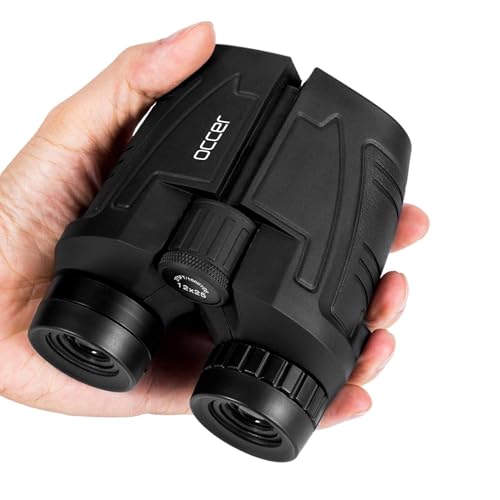
Buyer Checklist for Best Binoculars for Under $100
Think of this section as the filter you apply before you buy. Each point covers one thing that changes what you actually see, so work through them in order to spot weak options quickly.
What You Can Realistically Get Under $100
At this price you can expect a clear daytime view, a solid focus wheel, and a body that survives regular outdoor use, but you should not expect premium glass or a flawless view at the edge of the image. Makers in this range usually save money on coatings, prisms, or weather sealing rather than on the basic optics. Spend your budget on the view itself first, and treat extras such as a fancy case or a phone adapter as bonuses rather than reasons to choose one pair over another.
Magnification and Objective Lens Size
The two numbers in a name such as 8x42 tell you the magnification first and the width of the front lens in millimeters second. Eight power gives a steady image that most people can hold without a tripod, while ten power brings distant subjects closer but shakes more in the hand. A 42 millimeter front lens gathers enough light for bright daylight and mild shade, while a smaller 25 or 32 millimeter lens keeps the pair lighter for travel. For a first pair in this price range, 8x42 is a sensible starting point because it balances reach, brightness, and steadiness.
Field of View and Eye Relief
Field of view tells you how wide a scene you can see at a set distance, and a wider view makes it easier to find birds, players, or boats before you zoom in with your eyes. Eye relief is the distance your eyes can sit from the eyepieces while still seeing the full image, and it matters most if you wear glasses. Look for eye relief around 15 millimeters or more if you plan to keep your glasses on, and check that the eye cups twist up or fold down to fit your face.
Glass, Coatings, and Brightness
Coatings are thin layers on the glass that cut glare and let more light through, and they make a bigger difference than most buyers expect at this price. Fully coated lenses have one layer on all air to glass surfaces, while fully multi coated lenses have several layers and usually give a brighter, higher contrast view. Prism type matters too: roof prism pairs are slim and straight, while Porro prism pairs are wider and often give good depth at a lower price.
Build, Weather Sealing, and Weight
A pair you carry all day should feel balanced in your hands rather than heavy at the front, and the focus wheel should turn smoothly without sticking or wobbling. Weather sealing keeps out rain and dust, and nitrogen purging inside the body helps stop the lenses from fogging when you move between cold air and a warm room. Rubber armor protects against bumps and gives a surer grip, which matters on wet mornings.
Focus, Stability, and Handling
Center focus should move both barrels together with one wheel, and a small diopter control near one eyepiece lets you correct for a difference between your two eyes. Try the focus travel if you can: it should run from a near subject to a distant one without dead spots or gritty spots. People who want a lighter travel pair can read about best compact binoculars under $100, since compact pairs trade some brightness for a body that fits a jacket pocket.
Spending Levels Without Overspending
The cheapest pairs in this range can work for occasional use, but they often cut corners on coatings and focus smoothness. A middle spend usually buys better coatings, a sturdier hinge, and more reliable sealing, which is where most buyers get the best return. Decide your ceiling before you shop, then pick the pair that scores best on the checklist above within that ceiling.
Sensible Middle for Regular Outings
Regular watchers gain the most from the middle of the range, where coatings and build improve without pushing past the budget. The best binoculars for under $100 often combine a 42 millimeter front lens, decent eye relief, and weather sealing in one pair. Hunters who need a rugged pair for field use can compare best hunting binoculars under $100 alongside general purpose pairs, since field use puts extra weight on sealing and grip.
Quick Buyer Checklist
Run through these questions before you pay, and skip any pair that fails more than one of them.
- Does the magnification suit your hands, with 8 power for steady viewing and 10 power only if you can hold it still?
- Is the front lens wide enough for your light, with 42 millimeters a good default for daylight and shade?
- Does the coating type appear by name, such as fully multi coated, rather than as vague marketing words?
- Is the eye relief long enough for your glasses, and do the eye cups adjust to your face?
- Is the body sealed against rain and dust, with rubber armor for grip?
- Does the focus wheel run smoothly from near to far with no sticking?
- Does the weight feel comfortable for the length of outing you have planned?
- Does the warranty cover defects for a reasonable period, with clear terms you can read before buying?
Red Flags to Watch For
Be cautious when a listing hides the coating type, the prism type, or the field of view, since honest makers state these numbers plainly. Extremely high magnification claims at a very low price usually mean a shaky image and weak glass rather than a bargain.
Very short or unclear warranty terms, missing weight and size figures, and reviews that repeat the same phrases with no detail about actual use are all reasons to pause. A pair that promises night vision performance at this price should also raise doubt, since true low light ability needs larger lenses and better glass than this budget usually allows. Bird watchers who want a purpose built option can read best bird watching binoculars under $100 rather than trusting a generic listing that claims to suit every activity at once.
Tips to Get the Most From Your Binoculars
Use a soft lens cloth, not your shirt, since grit on fabric can scratch coatings over time. Keep the lens caps on when the pair is in your bag, and store the pair in a dry, padded case away from heat and damp. Learn the diopter setting once and leave it alone, then use only the center wheel for daily focusing.
Clean the lenses with a blower or a gentle brush before wiping, so dust does not drag across the glass. If you plan to watch after dusk, read best night vision binoculars under $100 to understand what low light designs can and cannot do, and remember that no budget pair turns night into day.
Frequently Asked Questions
Can You Get a Good Pair for Under $100?
Yes, you can get a good pair for daytime use if you judge it by coatings, field of view, and build rather than by magnification alone. A well made 8x42 pair in this range gives a bright, steady view for birds, sports, and scenery, while a poor pair with the same numbers can look dull and soft at the edges. The trick is to follow the checklist in this guide and to accept honest limits on low light performance. Buy from a seller with a clear return policy so you can try the view yourself.
Which Is Better for Low Light Viewing?
A wider front lens and better coatings help more in low light than higher magnification, which actually makes the image dimmer and shakier. A 42 millimeter lens gathers more light than a 25 millimeter lens, and fully multi coated glass passes more of that light to your eyes. At dusk, even a good budget pair will show less detail than it does at midday, so plan to watch earlier or accept a softer image. Never point the pair at the sun, since that can injure your eyes no matter how good the glass is.
What Specs Matter Most for Beginners?
Beginners should weigh magnification, field of view, eye relief, and weight first, since these decide whether the pair feels easy or frustrating from the first outing. Eight power is forgiving, a wide field helps you find subjects, and long eye relief keeps glasses wearers comfortable. Coatings come next, because they shape brightness and contrast in everyday light. Size and weight matter too, since a pair that is pleasant to carry gets used far more than a heavier pair left behind.
Is a Smartphone Enough Instead of Binoculars?
A smartphone is handy for photos, but its digital zoom crops the image and quickly loses detail at distance, while binoculars give a direct optical view that stays sharp. Binoculars also work better with both eyes open to the scene, which helps you track moving subjects such as birds or players. Phones win for sharing pictures and for very close subjects, so many people carry both. If distance viewing is your main goal, a dedicated pair is the better tool.
How Much Should You Spend on Your First Pair?
Most first time buyers do well spending in the middle of this range, where coatings and build improve enough to notice without breaking the budget. A price around $60 to $90 usually buys a pair you will enjoy for years of casual use, while a much cheaper pair may frustrate you into replacing it soon. Set your ceiling, compare two or three pairs on the checklist, and choose the one with the clearest view rather than the longest feature list. Keep the receipt and try the pair outdoors before the return window closes.
What Does 8x42 or 10x42 Mean?
The first number is magnification, so 8x makes a subject look eight times closer and 10x makes it look ten times closer, while the second number is the front lens width in millimeters. A larger second number gathers more light, which helps at dawn, dusk, and in shade, but it also adds size and weight. The pair 8x42 is popular because it balances reach, brightness, and steadiness for most people. Ten power suits steadier hands or supported viewing, such as resting your elbows on a rail.
Wrapping Up
Start with magnification you can hold steady, insist on named coatings, and check eye relief, sealing, and weight before you buy. The product table above lets you compare the options side by side, and the checklist in this guide turns those numbers into a decision you can trust. If you remember one thing, let it be this: a clear, comfortable view beats a bigger number on the box every time. Choose the pair that fits your eyes and your outings, and best binoculars for under $100 will serve you well for years of watching.


