Best Binoculars Birdwatching Made Simple: A Clear Buying Guide for 2026
Disclosure: We may earn a commission when you buy through links on this page, at no extra cost to you. As an Amazon Associate I earn from qualifying purchases. Learn more

A plain English guide to the best binoculars birdwatching beginners can buy: key terms, sizes, budget bands and setup.
If you have never bought binoculars before, the product pages can feel like a wall of mystery numbers. This guide slows everything down and starts from zero. It explains the few terms that matter in plain English, shows which choices actually settle your purchase, and points out the claims you can safely ignore while you compare the best binoculars birdwatching options for your first seasons outside.
Start with the product table to see how the common sizes and price levels sit next to each other. Then read the sections in any order you like. By the end you will know which size fits your walks, what a fair first budget looks like, and how to set up a new pair on day one.





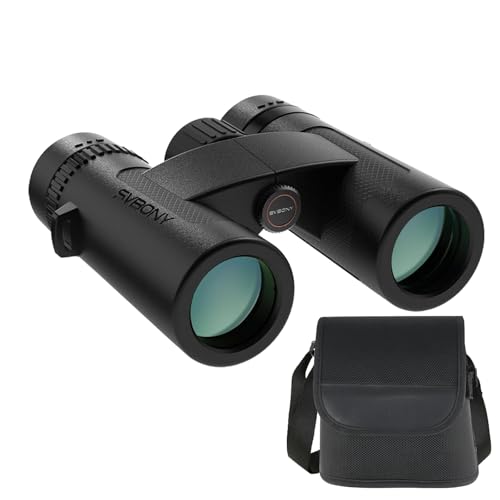
Binoculars 101: The Basics
A binocular is really two small telescopes joined side by side, one for each eye. Your brain merges the two views into a single image, and that is what gives the picture its sense of depth. One safety rule comes before everything else: never look at the sun through binoculars, and follow the manufacturer's instructions for safe use.
Every pair carries two numbers, such as 8x42. The first number is magnification, so 8x makes a bird look eight times closer than it does to your bare eyes. The second number is the width of the front lenses in millimeters, and bigger front lenses gather more light. A large wheel between the barrels focuses both sides at once, a small ring called the diopter fine tunes one side for your own eyes, and soft cups around the eyepieces set the right distance from your eyes.
That is honestly most of what you need to start. If you already know these basics and want advice written only for bird identification, our guide to the best binoculars birding goes deeper into the hobby side of the choice.
Two eyes also tire more slowly than one, which is why birders choose binoculars over a single small telescope for handheld watching. The merged image feels natural, so you can keep the pair raised through a whole dawn chorus without the squinting headache a monocular brings. The sense of depth helps as well, because judging whether a bird sits in front of or behind a branch is part of finding it at all.
Three Decisions That Settle Your Best Binoculars Birdwatching Purchase
New buyers often drown in small details and miss the three decisions that decide whether a pair makes them happy. Settle these first and the rest becomes simple comparison shopping.
Decision One: How Strong the View Should Be
Magnification sounds like a simple more is better scale, and it is not. An 8x pair shows a wider slice of the scene, so a bird is easier to find and easier to follow when it hops between branches. A 10x pair pulls the bird closer but narrows that slice, and every small tremor in your hands grows along with the image. Choose 10x only if you mostly watch across open water, fields or shorelines where birds stay far away, since a steady and wide view beats a shaky close one for most first time buyers.
Decision Two: How Big a Pair You Will Actually Carry
Full size pairs with 42 mm front lenses give the brightest and most comfortable view, and they are the default choice for a reason. Compact pairs with lenses around 25 to 32 mm weigh far less and slip into a jacket pocket, but their view is dimmer at dawn and dusk and they feel twitchier to hold. Be honest about your habits here. A modest pair that rides in your coat on every walk will show you more birds than a heavy pair that stays home because it felt like luggage.
Decision Three: A Budget You Can Defend
Under $100, expect a usable but plain view, with edges that soften and coatings that waste some light. Between about $100 and $250, the jump is real: brighter glass, better focus wheels and sealing against rain become normal instead of rare. Above about $250 you are paying for refinement, such as a flatter image and better performance in dim light, which matters more once you know your habits. A sensible first move is the middle band, because it is good enough to keep for years and cheap enough that a mistake does not sting.
Key Specs Explained in Plain English
Features That Matter for Birdwatching
Birds move fast and rarely pose, so birdwatching asks specific things of a binocular, starting with a focus wheel that turns smoothly and quickly, because a warbler gives you seconds, not minutes. A wide field of view helps you find the bird in the first place and follow it when it flits sideways. Close focus matters more than people expect, since feeders, butterflies and tame shorebirds can sit just a few feet away. Finally, comfort counts: if the pair hurts your eyes or neck after twenty minutes, you will simply stop raising it.
The Second Number and Brightness
Binoculars have no sensor and no megapixels, whatever some listings imply, and their brightness comes from the front lenses and from how well the glass is coated. A quick brightness clue is the exit pupil: divide the second number by the first, so an 8x42 gives about 5.25 mm. When that number roughly matches the pupil of your eye in dim light, the view looks full and easy. A compact 10x25 works out to only 2.5 mm, which is why small pairs look fine at noon and tired at sunset, and why coating claims on a box are best read as maker descriptions rather than measurements.
Low Light at Dawn and Dusk
Many birds are busiest in the first and last hour of light, so this is where cheap glass shows its limits. An exit pupil around 5 mm or more, honest coatings and clean lenses all help more than any single headline figure. You will see a twilight factor printed on some boxes; treat it as a rough hint, not a measurement, because coating quality can outweigh it in practice. If your real interest is wildlife after full dark, that is a different tool entirely, and our guide to the best night binoculars covers those electronic devices instead.
Rain, Fog and Rough Handling
Waterproof on a binocular means the body is sealed so rain, splashes and damp grass cannot get inside. It does not mean you should store the pair soaking wet or leave it submerged in a sink, because seals age and shallow ratings have limits. Fogproof pairs are filled with nitrogen so the inside glass does not mist when you step from a warm car into cold air. Rubber armor over the body absorbs bumps and gives wet hands something to grip, and the caps and case included in the box do more for lifespan than any coating, so check that they are there.
Focusing and Steady Views
There is no autofocus on a binocular; your fingers do that job on the center wheel, so a wheel that is smooth, neither stiff nor sloppy, is worth real money. A small class of image stabilized binoculars exists and genuinely calms the view, but it costs far more and adds batteries and weight. For everyone else, steadiness is technique: brace your elbows against your ribs, lean on a fence post or tree, and let the strap take some weight. If your hands shake noticeably, 8x plus good bracing beats 10x every time.
What Ratings and Product Labels Really Mean
Listings love the word rated, along with phrases like top rated, but no shared standards body hands those labels out. Two pairs can both claim top marks and deliver completely different views, and the label often reflects price and popularity rather than optical quality. Treat every such claim as advertising, not measurement, and our overview of best rated binoculars explains how these labels get used across listings. Your defense is boring but reliable: compare magnification, lens size, field of view and sealing, and let the numbers outrank the adjectives.
Rookie Mistakes to Avoid
- Buying the biggest magnification on the shelf. Very strong pairs such as 20x or 30x belong on a tripod, and handheld they shake so much that you see less detail, not more.
- Choosing the tiniest compact for dawn walks. Small front lenses starve the image of light, so the view turns dim and gray exactly when birds are most active.
- Ignoring eye relief while wearing glasses. Short eye relief cuts the edges of the view off for glasses wearers, like looking through a keyhole.
- Skipping the diopter setting. With it left at zero, one eye always sees a slightly softer image and your eyes tire fast.
- Tossing binoculars loose into a bag. Uncapped lenses collect grit and scratches that no cleaning can fully undo.
Getting Started: Setup and First Use
Five minutes of setup on day one pays off every time you raise the pair afterward. Work through these steps in order:
- Attach the neck strap or harness before the first outing, because most drops happen in the first week of ownership.
- Set the barrel width. Fold the hinge until the two circles of view merge into one clean circle with no dark edges.
- Set your eye cups. Glasses wearers usually keep them twisted down; everyone else raises them until the view fills out.
- Set the diopter. Close your right eye and focus on a distant sign with the center wheel, then close your left eye and turn only the diopter ring until the same sign is sharp.
- Clean only with a lens cloth. A shirt tail grinds dust across coatings, so keep the cloth in the case and blow loose grit off first.
Store the pair dry, capped and in its padded case, away from steamy bathrooms and hot car dashboards. Heat and damp both age seals and coatings faster than normal use does.
On your first outing, practice on forgiving targets before chasing warblers. Ducks on a pond, pigeons on a roof and gulls over a beach sit still long enough to teach you the focus wheel and the habit of raising the pair to where your eyes already look. Ten minutes of that practice saves real birds later.
If two people share one pair, expect to reset the diopter at every handover, because the setting matches one person's eyes, not the binocular itself. Noting your setting near the case saves the ritual of hunting for it in the field. The same applies to eye cup height when one user wears glasses and the other does not.
Frequently Asked Questions
What features matter most in binoculars for birdwatching?
A smooth and fast focus wheel, a wide field of view and close focus of about 6.5 feet or less matter most, because birds move quickly and often sit nearby. Brightness from 42 mm front lenses helps at dawn and dusk, when many species feed. One point buyers overlook is carrying comfort: a harness that spreads weight across your shoulders keeps the pair ready on long walks, while a thin neck strap can ache within the hour and tempt you to leave the binoculars behind.
What specs matter most for beginners?
Beginners should lock in three specs: 8x magnification for a steady and wide view, 42 mm front lenses for brightness, and eye relief of about 16 mm or more if glasses are worn. Everything else is refinement. It also helps to check the warranty before buying, because coverage length varies a lot between brands at the same price. A longer warranty on a modest pair is often worth more than a flashier spec sheet on a pair with only a short guarantee.
What does 8x42 or 10x42 mean?
The first number is magnification and the second is the front lens width in millimeters, so 8x42 magnifies eight times with 42 mm lenses. A 10x42 magnifies ten times through the same size lenses, which narrows the view and shrinks the exit pupil to about 4.2 mm. The same math works for any pair you meet: an 8x32 gives a 4 mm exit pupil. Reading the two numbers this way lets you predict brightness and field of view before you ever hold the binoculars.
Which binoculars are better for low light?
A full size pair with an exit pupil around 5 mm or more, such as an 8x42, is better for low light than any compact. Bigger front lenses gather more light and coatings pass more of it through to your eyes. One habit matters as much as the hardware: keep the front lenses clean, because fingerprints and dust scatter light and wash out exactly the dim detail you are straining to see at dusk. Wiping with a proper lens cloth takes ten seconds and noticeably brightens the view.
How much should I spend on my first binoculars?
About $100 to $250 is the sensible first purchase zone for most people, because that band buys sealed bodies, decent coatings and focus wheels that do not fight you. Under $100 works for a trial season, and above $250 the improvements get smaller per dollar. Keep a little of the budget aside for the hobby itself, such as a regional field guide or a bird identification app. Knowing what you are looking at makes even a modest pair feel twice as capable.
Is a smartphone enough for birdwatching instead of binoculars?
No, a smartphone is not enough for real birdwatching, because phone zoom mostly crops and enlarges pixels rather than gathering more detail. At the distance of a warbler in a treetop, a phone image turns to mush while an 8x binocular still shows wing bars and eye rings clearly. Phones are still useful companions for recording a sighting or identifying a song. Think of the phone as your notebook and the binoculars as your eyes, and never point either one at the sun.
The Bottom Line
Keep the decision simple: 8x42 for most people, a mid range budget of about $100 to $250, and eye relief that suits your glasses if you wear them. The product table gathers the common sizes side by side so you can compare them against those three rules. Set the diopter once, keep a lens cloth in the case, and the best binoculars birdwatching choice for you will be the pair you actually carry out the door.