
Best Bike Pumps for MTB: A First Time Buyer's Guide for 2026
Disclosure: We may earn a commission when you buy through links on this page, at no extra cost to you. As an Amazon Associate I earn from qualifying purchases. Learn more

Shopping for the best bike pumps for mtb for the first time? Learn the terms, compare options, and avoid rookie mistakes with this easy guide.
If this is your first pump purchase, the good news is that mountain bike tires are forgiving in one way: they need volume, not extreme pressure. Choosing the best bike pumps for mtb comes down to a few plain terms, your valve type, and where you plan to inflate, at home or out on the trail.
This guide starts with the basics, explains each key spec in simple language, and flags the rookie mistakes that waste money. By the end you will know whether a floor pump, a mini pump, or a small electric pump fits your riding, and you can compare the comparison table below with confidence.







Bike Pumps 101: The Basics
A bike pump pushes air through a valve on the inner tube or tubeless rim until the tire reaches the pressure printed on its sidewall or your preferred riding pressure. Mountain bike tires are wide, so they hold a lot of air at fairly low pressure, often about 20 to 35 PSI depending on rider weight and terrain. That shapes pump design: a wide barrel that moves lots of air per stroke beats a narrow barrel built for very high road bike pressures.
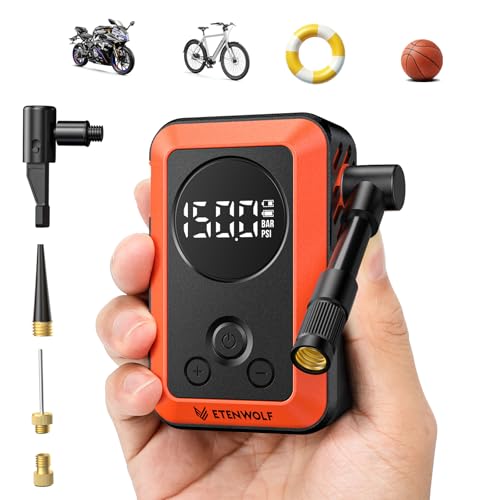
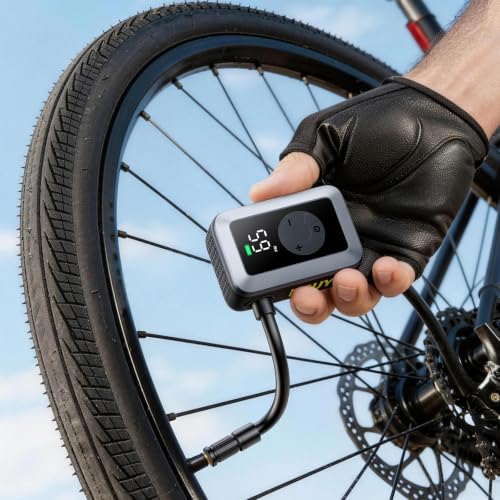
There are three families to know. Floor pumps stand on the ground with a long hose and a big gauge, and they are the easiest way to inflate at home. Mini pumps mount on the frame or ride in a pack for trail repairs. Electric pumps use a small battery motor and suit riders who inflate often or dislike hand pumping. Most riders end up with a floor pump first, then add a trail option later.
Key Specs Explained in Plain English
Spec sheets look technical, but each number answers a simple question about your ride. Read the six points below and you can judge any pump in a shop or a listing in under a minute.
Features That Matter for MTB
Mountain bike use demands three things above all: high air volume per stroke, a gauge that reads accurately at low pressures, and a head that seals on tubeless valves without leaking. A gauge marked in small steps between 0 and 60 PSI is far easier to set precisely than one that sweeps to 160 PSI. A bleed button is a quiet hero feature, since it lets you drop one or two PSI at a time to fine tune grip. If you run tubeless tires, also ask whether the pump can seat a bead, because that task needs a sudden burst of air rather than steady strokes.
Bike Type and Riding Style
Your riding style sets the pressure range you live in. Cross country riders often run firmer tires and inflate mostly at home, so a floor pump with a crisp gauge covers nearly everything. Trail and enduro riders adjust pressure more often and ride farther from the car, so a packable pump with a flexible hose earns its place. Downhill riders may also need a shock pump, which is a separate small pump for suspension air springs and not a tire tool at all. Match the pump to the adjustments you actually make each week.
Weight and Components Upgrade Path
For a floor pump, weight barely matters, but materials do: a steel barrel and a wide stable base outlast flimsy plastic. For a trail pump, every gram rides with you, so an alloy barrel is a sensible middle ground. Think of your kit as a path rather than one purchase. Start with a solid floor pump, add a mini pump when you begin riding alone, and consider a tubeless inflator tank or an electric pump later if you set up tires often. Our guide to the best mtb pumps compares the main styles side by side for that planning.
Suspension (Hardtail vs Full Suspension) and Travel
Suspension does not change your tire pump directly, but it changes how precisely you should treat pressure. On a hardtail, the rear tire does more of the comfort work, so small pressure changes feel big and a readable gauge matters even more. Full suspension bikes with 100 to 160 mm of travel let the fork and shock absorb hits, yet tire pressure still sets grip and rim protection. Remember that suspension forks and shocks use their own high pressure, low volume shock pump, and using a tire pump on them gives poor control.
Wheel Size and Tires
Bigger wheels and wider tires simply hold more air. A 29 inch wheel with a wide trail tire can take twice the strokes of a narrow 27.5 setup, which is why barrel volume matters for home inflation speed. Tubeless setups add two needs: enough flow to seat the bead and a head that does not clog with sealant. If you swap between wheel sizes in one household, a floor pump with a high volume mode covers both without strain. For garage duty, our guide to the best bike floor pumps explains base stability and gauge sizes in more depth.
Motor, Battery, and Range (for E Bikes)
Electric pumps bring motor and battery specs into the decision. Look at the battery size, the stated number of tires filled per charge, and the recharge time, and treat those figures as best case claims. E mountain bikes run the same tire pressures as regular bikes, so the pump choice stays about volume and gauge accuracy, not motor power of the bike itself. An electric pump suits riders who top up several bikes or struggle with hand strength. Our guide to the best electric bike pumps covers battery care and realistic range expectations.
Rookie Mistakes to Avoid
- Buying a high pressure road pump that takes forever to fill a wide mountain bike tire.
- Ignoring valve type, then discovering the pump head does not seal on your Presta valves.
- Trusting a gauge that starts at high numbers, which makes 24 versus 28 PSI almost impossible to set.
- Carrying no pump on the trail because the home floor pump felt like enough, until the first flat far from the car.
- Overinflating to the maximum printed on the sidewall, which hurts grip and comfort on dirt.
Every one of these mistakes comes from buying before checking two things: your valve type and your target pressure range. Write both down before you shop and most bad options eliminate themselves.
Getting Started: Setup and First Use
When your pump arrives, test it the same day on a tire you can afford to experiment with. Lock the head onto the valve, inflate slowly, and watch the gauge rise so you learn how many strokes a full tire takes. Press the bleed button once to feel how pressure drops in small steps. Set your tires to a sensible starting point, around the middle of the range on the sidewall, then adjust by feel over your next few rides. Check tire pressure before every ride, since mountain bike tires lose a little air each day and grip changes quickly with it. For trail carry, our guide to the best mini bike pumps shows the sizes that fit common packs and frame mounts.
Store the pump indoors with the hose unclipped and relaxed rather than bent sharply. Keep the head clean, because trail grit inside the chuck wears the seal and causes slow leaks at the valve.
FAQs
What features matter most in bike pumps for mtb?
Volume per stroke, an accurate low pressure gauge, and a secure valve head matter most. Mountain bike tires need lots of air at low pressure, so those three decide how fast and how precisely you can inflate. A bleed button for small adjustments and a tubeless friendly head come next. Brand and color matter least, so spend your budget on the gauge and the barrel rather than on looks.
Do I need a separate pump for tubeless tires?
Not always, but seating a tubeless bead often needs a sudden rush of air that a plain floor pump may not deliver. Many riders manage with a high volume floor pump and soapy water on the bead, while a pump with a built in air chamber makes the job far more reliable. If you mount tires a few times a year, the chamber style is worth it. For simple top ups between rides, any good floor pump works fine.
How do I know if my valves are Presta or Schrader?
Presta valves are thin metal stems with a small knurled tip you unscrew before inflating, and they are standard on most mountain bike rims. Schrader valves are thicker, look like car tire valves, and appear on some budget and kids bikes. Most pump heads sold now fit both, but check before you buy. If your head fits only one type, a small brass adapter costs very little and solves the mismatch.
How often should I check my tire pressure?
Check before every ride, because wide tubeless tires can lose several PSI over a week and even tubed tires drift. A quick squeeze test misses differences that change how the bike corners and climbs. Use the pump gauge or a separate handheld gauge for consistency, and note the pressures that feel right for your weight and trails. That small habit prevents pinch flats, rim damage, and the vague feeling that the bike handles worse than last week.
Can a mini pump replace a floor pump?
A mini pump can get you home, but it rarely replaces a floor pump for daily use. Small barrels need many strokes to fill a wide tire, and most mini gauges are crude or absent. Treat the mini as your trail repair tool and the floor pump as your precision tool. If budget forces one choice first, buy the floor pump and borrow trail support from riding partners until you add a mini later.
How much should I spend on my first pump?
Plan around $30 to $60 for a floor pump that will last for years, since that range buys a steel barrel, a stable base, and a readable gauge. Cheaper pumps often have gauges that fail early, which erases the saving. A trail mini pump adds around $20 to $40 when you are ready. Spending a little more at the start is cheaper than buying a weak pump twice.
The Bottom Line
Start with your valve type and your pressure range, then choose volume and gauge quality over headline pressure numbers. A good floor pump first and a trail pump second covers nearly every situation a new rider meets. With those basics settled, the best bike pumps for mtb are easy to spot in the product table above, so pick the style that matches where you inflate most often.


