
Best Bike Light Mountain Bike: Every Type Explained Side by Side for 2026
Disclosure: We may earn a commission when you buy through links on this page, at no extra cost to you. As an Amazon Associate I earn from qualifying purchases. Learn more

Handlebar, helmet, combo and backup lights compared by ideal user and price range, so you can choose the right light style for night trails.
Night riding turns familiar trails into a new puzzle, and the light you choose decides how much of that puzzle you can see. Handlebar lights, helmet lights, combo sets and small safety lights all solve different problems, and buying the wrong type leaves you either underlit on descents or carrying weight you never needed.
This guide explains each type side by side, with honest strengths, limits and typical prices. Start with the comparison table below, then use the sections that follow to match the best bike light mountain bike setup to your trails, your speed and your budget.

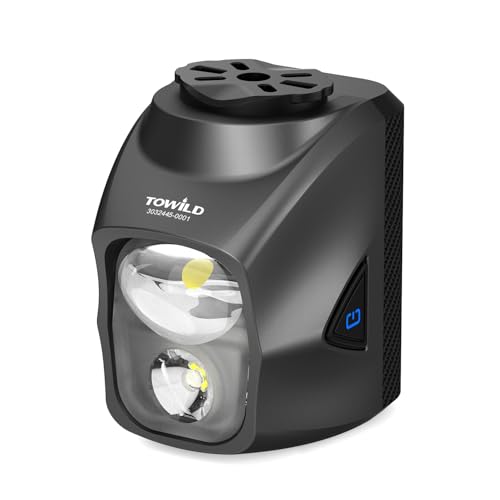


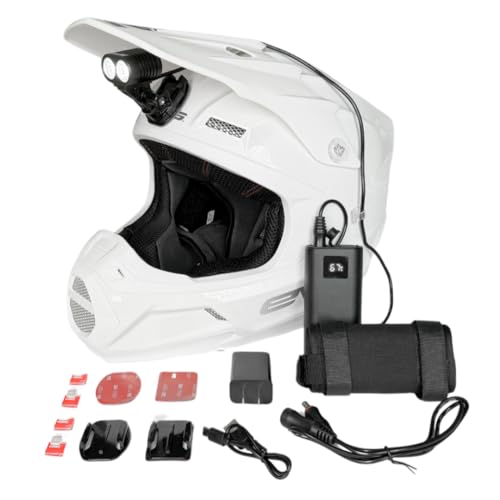


Types of Bike Light Mountain Bikes Compared
The four types below cover nearly every night setup you will see at a trailhead. Many experienced riders combine two of them, because a single light source always leaves shadows where the beam cannot reach.
Handlebar Mounted Lights
A handlebar light is the foundation of night riding. It points where the bike points, throws a wide flood for trail detail and usually carries the biggest battery, so runtimes stretch to several hours on medium settings. Output for serious trail use starts around 800 lumens and climbs past 2,000 for fast descents. The limit is corners: the beam stays fixed while your eyes look through the turn. Prices run about $50 to $250 depending on output and battery size. Our guide to the best mountain bike front light options covers beam shapes in more depth.
Helmet Mounted Lights
A helmet light points where you look, which makes it brilliant for tight switchbacks, scanning for trail markers and spotting lines before the bike arrives. These lights are smaller, typically 400 to 1,000 lumens, with shorter runtimes and a battery you wear on the helmet or in a pack. Used alone, a helmet light flattens shadows and can feel harsh, so most riders pair it with a bar light. Our guide to the best helmet light mountain bike setups explains how to balance the two beams without blinding yourself on dust or mist.
Combo Light Sets
A combo set packages a bar light and a helmet light designed to work together, sometimes with matched color temperature so the two beams blend instead of fighting. Buying a set usually costs less than the same lights bought separately, around $120 to $300, and chargers and mounts match across the kit. The trade off is flexibility: you accept the maker balance of output and runtime rather than choosing each light on its own merits. For riders starting night riding from zero, a set is the simplest path to a complete setup.
Small Safety and Backup Lights
Compact blinking lights serve a different job: being seen on the ride to the trailhead and providing backup when a main battery dies early. They weigh almost nothing, cost about $15 to $40 and clip to a pack, seatpost or helmet. Their output, often under 200 lumens, is far too low for trail riding at speed. Treat them as insurance and road visibility, never as your main beam. Every night rider should carry one, because walking a dark trail with a dead light is a miserable and risky plan B.
Handlebar Lights vs Helmet Lights: Which Should You Choose?
Choose by beam duty first. A bar light gives a stable, wide view and longer runtime, so it wins for straight, fast trails and for riders who do one long night ride each week. A helmet light gives directional control, so it wins on twisty singletrack and technical ground where you constantly look off the bike line. On battery, bar lights usually last longer per charge because they carry bigger cells. On comfort, a helmet light adds weight above your neck, which some riders feel after an hour. The honest answer for regular night riders is both, run at moderate settings, which also gives you a spare if one fails.
How to Choose the Right Bike Light Mountain Bike
Output and Beam Pattern
Lumens tell only half the story, because beam shape decides where that light lands. A wide flood reveals roots and rocks at your front wheel, while a focused spot reaches down the trail for speed. Good trail lights blend both, with a bright center and soft edges. Check runtime at the output you will actually use, not the headline number, since many lights hold maximum output for only part of the charge. If a listing hides its runtime chart, assume the brightest mode fades quickly. Our roundup of the best mountain bike night lights shows how makers report these figures differently.
Battery Life and Charging
Plan your battery around your longest ride plus a margin. A light that runs two hours on high may run four to six hours on medium, and medium is enough for most trails once your eyes adjust. USB C charging has become the convenient standard and lets you top up from the same cable as your phone. Removable battery packs extend runtime for bikepacking and racing, at extra cost and weight. Cold nights cut battery performance, so store the light indoors and start winter rides with a full charge.
Mounting and Compatibility
The mount must hold the beam steady over roots and drops. Look for a clamp that fits your bar diameter, often 31.8 or 35 mm, with a rubber shim for smaller bars, and a quick release so you can remove the light at the cafe or trailhead. Helmet mounts should attach through vent slots without tilting under the light weight. Practical know how: aim the beam on a dark road before your first trail ride, setting the hotspot center slightly below level, so you light the trail surface instead of the trees.
Modes and Controls
You need at least three useful output levels and a button you can find with gloves on. A low mode around 200 to 300 lumens stretches battery on climbs, medium handles most singletrack and high serves fast descents. Avoid lights that cycle through flashing modes to reach the setting you want, because fumbling mid descent is unsafe. A battery level indicator, even a simple colored light near the button, prevents the classic surprise shutdown halfway home. Riders comparing related setups can also see our guide to the best bike light for mountain biking for more mode and mount detail.
Choosing Bike Light Mountain Bikes for Your Situation
Best Bike Light Mountain Bike Under $100
If your budget is under $100, spend it on one good handlebar light rather than two weak ones. At this level, expect about 800 to 1,200 claimed lumens, a fixed battery and two to three hours on medium settings, which covers most after work rides. Prioritize a solid metal body and mount over extra modes or app features. Add an inexpensive helmet light later when funds allow. This staged approach beats a cheap combo set whose beams and batteries disappoint from the first ride.
Setup and Care Tips
Charge lights after every long ride so they are always ready, and store them with a partial charge if they will sit unused for months, which is kinder to lithium cells. Clean the lens with a soft cloth, because a film of dust and dried mud quietly steals output. Check tire pressure before every ride too, since night riding punishes mistakes you would catch by daylight, and keep the mount bolts snug. Once a season, run the light on medium indoors and time it, so you know the real runtime of an aging battery before it matters.
Frequently Asked Questions
How many lumens do I need for mountain bike night riding?
Most riders do well with 800 to 1,200 lumens on the bar for moderate trails, plus a smaller helmet light for corners. Faster, wider trails reward 1,500 lumens or more, while slow technical riding needs less raw power and more beam control. Remember that doubling lumens does not double how far you see, because your eyes respond to brightness in a compressed way. Beam shape and mounting height matter almost as much as the number.
How long does a bike light battery last on one charge?
Runtime depends on the mode: expect about one to two hours on maximum output, three to six hours on medium and much longer on low for typical trail lights. Makers measure runtime down to a dim fraction of full output, so real usable light is shorter than the box claim. For planning, assume about two thirds of the stated runtime at the brightness you actually need, and carry a backup light on remote trails.
Handlebar light or helmet light for beginners?
Beginners should start with a handlebar light, because it is simpler, runs longer and shows the trail as the bike sees it. Add a helmet light once night riding becomes a habit and twisty trails make you want light in the corners. Starting with only a helmet light often disappoints, since the narrow beam flattens depth and every head movement swings the view. One solid bar light is the correct first purchase.
How much should I spend on my first mountain bike light?
About $60 to $120 buys a dependable bar light with enough output and runtime for real trail riding, a sturdy mount and USB C charging. Cheaper lights cut corners on batteries and mounts, which are exactly the parts that fail. Spending far more mainly buys higher output and longer runtime for racing or very fast descents. If you ride weekly at night, cost per ride drops quickly even at the top of that range.
How do I stop a bike light from slipping on rough trails?
Use the correct shim for your bar diameter, tighten the clamp until the light resists a firm hand twist, and position the light close to the stem where bar flex is lowest. A strip of grip tape or an old inner tube section under the clamp adds friction on slippery carbon bars. Recheck the angle after the first rough descent, because small slips compound as the mount works loose.
Final Thoughts
Decide the type first, bar, helmet, combo or backup, then judge output by beam shape and honest runtime rather than the biggest lumen claim. A secure mount and glove friendly controls complete the picture. Compare your shortlist in the product table above, and the right best bike light mountain bike setup will turn night trails into some of the best riding of your week.


