Best Bicycle Touring Shoes for Every Need: How to Pick the Right One for 2026
Disclosure: We may earn a commission when you buy through links on this page, at no extra cost to you. As an Amazon Associate I earn from qualifying purchases. Learn more

Walkable soles, cleat fit and weather protection compared, so the best bicycle touring shoes suit your daily miles and your terrain.
No single touring shoe suits every rider, because tours differ in daily miles, weather, terrain, and how much walking you do off the bike. A shoe that shines on a paved rail trail week can punish your feet on a rainy mountain route with long pushes on gravel.
This guide matches the best bicycle touring shoes to real use cases first, so you can find your group, learn which features serve it, and skip the rest. Scan the product table above, then read the sections that fit your next trip.


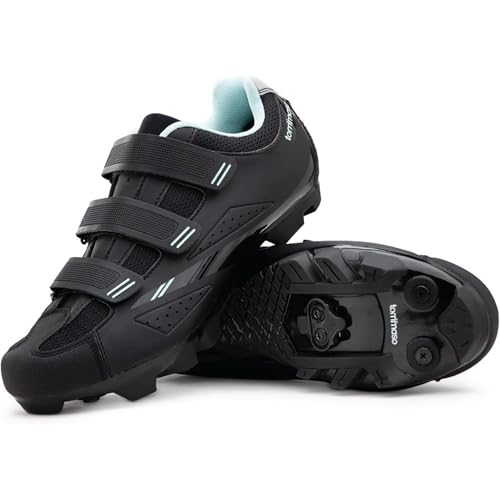
Who Should Buy Which Bicycle Touring Shoes?
For Small Spaces and Easy Storage
Your constraint is luggage volume. You tour with small panniers, a single bag, or a bike box with strict limits, and every item must earn its space. Choose a low profile shoe with a flexible sole that packs flat, dries fast, and doubles as your only off bike shoe at camp and in towns.
Light weight matters here as much as packed size, because shoes are dense for their volume. A shoe you can also walk in all evening removes the need for a second pair entirely, which is the biggest space saving of all. Dark colors hide road grime on long trips, and removable insoles let you air the shoes overnight in a small tent or room.
For Weekend Beginners
Your tours are one to three days on mostly paved routes, and you want comfort without a steep learning curve or price. Choose a shoe with a moderately stiff sole, a roomy toe box, and a simple closure such as laces or a single strap. Flat pedal friendly tread is the safest start if you have never ridden clipped in.
Value and forgiveness lead for this group. A shoe that walks well lets you explore towns and handle a cafe stop without a waddle, and a price around $60 to $120 leaves budget for bags and lights. Our broader guide to the best bicycle shoes shows how touring models differ from race and mountain styles if you are still weighing the category itself.
For Bad Weather and Tough Conditions
Your routes include rain, cold mornings, mud, and unpaved detours, so protection leads your list. Choose a shoe with a water resistant upper, sealed seams where offered, a higher ankle cut for warmth, and deep tread that grips wet rock and slick roots during hike a bike sections.
Drying speed is the hidden spec in this group. A shoe that stays soaked for two days breeds blisters and odor, so look for mesh drainage zones or liners that release water, and plan wool socks that stay warm when damp. Riders planning long European routes in mixed seasons will find route specific advice in our guide to the best shoes for touring europe, which pairs well with the weather points here.
For Frequent or Serious Users
You ride long days for weeks at a time, and your shoes are work equipment. Choose a stiff sole that supports the foot over six hour days, a secure closure that never loosens on rough descents, and a cleat system with strong aftermarket support so a lost bolt never ends a trip.
Durability and warranty decide value at this level. Reinforced toe and heel zones, replaceable tread pads, and a maker that sells spare straps and buckles all extend service life. Expect to pay around $150 to $250, and expect the shoe to repay it across several seasons. Fit still rules, so serious riders should try two sizes and walk inclines in the shop before committing.
Key Features to Compare
Value and Warranty
Value in a touring shoe means cost per season of comfortable use, not the lowest sticker price. A shoe that fits well and lasts three seasons beats a cheap shoe replaced twice, and it spares your feet the break in period each time. Read the warranty terms for sole bonding and closure hardware, the two failure points that matter most on the road.
Check return terms too, because fit is hard to judge online. A seller that allows an indoor trial walk on carpet protects you from the most common touring shoe mistake, which is a size that feels fine seated and pinches after an hour of pedaling. Keep the box and tags until you have done one real ride.
Weather Resistance and Durability
Weather resistance in shoes is about managing water, not sealing it out forever. Water resistant uppers shed road spray and light rain, while truly waterproof membranes keep feet dry in steady rain but dry slowly once soaked from the top. For most summer tours, fast drying beats full sealing.
Durability shows in the details. Glued and stitched sole joins outlast glue alone, synthetic uppers tolerate repeated soaking better than leather that is never conditioned, and metal closure hardware survives grit that cracks thin plastic. Inspect your shoes monthly on a long tour, since a small sole split found early can be repaired, while one found late cannot.
Compatibility With Your Bike or Gear
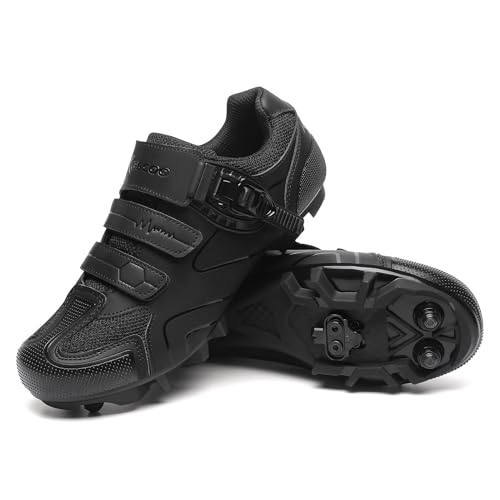
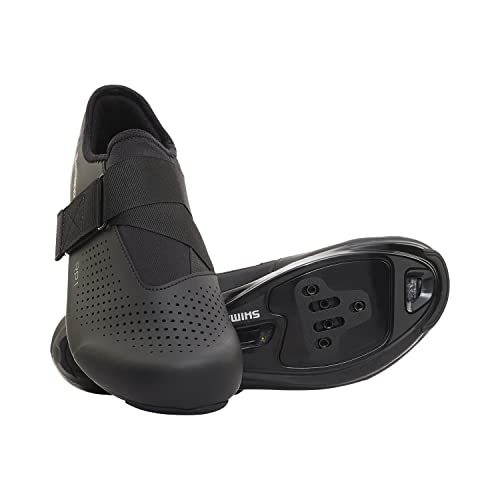
Cleat compatibility is the first check. Most touring shoes use the two bolt SPD style cleat, which sits recessed in the tread so you can walk normally, while road style three bolt cleats protrude and make walking awkward and slippery. Match the shoe to your pedals before anything else, or plan new pedals into the budget.
Flat pedal riders skip cleats entirely and should choose a grippy and moderately stiff sole instead. Other gear checks are quick. Confirm the shoe fits inside your toe clips if you use them, and confirm bulky tread clears your chainstay on the backstroke. Road focused riders can compare fit and stiffness trade offs in our guide to the best road bicycle shoes before deciding how walking friendly they need to be.
Common Mistakes to Avoid When Buying Bicycle Touring Shoes
- Buying by price alone. A poor fit costs you every mile of the tour, which makes the cheapest shoe the most expensive mistake on this list.
- Ignoring value and warranty. Sole bonding and strap failures end trips, so check coverage and spare part support before you pay.
- Choosing race shoe stiffness for touring. A sole built for short hard efforts can create hot spots and numbness over six hour days with walking mixed in.
- Sizing for seated comfort. Feet swell on long rides, so a shoe that feels snug in the shop often hurts by day three of a tour.
- Skipping a real walk test. Touring means stairs, gravel, and wet tile, and a sole that only pedals well fails half of its job.
How to Make Your Bicycle Touring Shoes Last Longer
Check fit and tightness before each ride, since a loose shoe rubs and a cranked down shoe cuts circulation on long climbs. After wet days, pull the insoles out, stuff the shoes loosely with newspaper or a dry cloth, and air them away from direct heat, which cracks adhesives and stiffens uppers.
On tour, rotate two pairs of socks so a dry pair is always ready, and rinse grit out of cleat pockets before it grinds the bolts. A compact pump and dry shoes are the two comforts riders praise most at camp, and our guide to the best bicycle pumps covers the first of those. At home, store shoes dry with the closures relaxed, and replace worn cleats before the release feel turns vague.
Frequently Asked Questions
How often should I replace my bicycle touring shoes?
Replace them when the sole flexes like a walking shoe, the tread around the cleat is worn smooth, or the upper no longer holds your heel. For most riders that point arrives after about two to four seasons of regular touring. Upper cracks near the toe bend and closures that slip mid ride are earlier warnings. A shoe that causes new pain on a familiar route is telling you it is done.
How do I choose the right size?
Size for your feet at their largest, late in the day and in the socks you tour in. Leave roughly a thumb width ahead of your longest toe, because feet swell and push forward on descents. Width matters as much as length on tour, so prefer brands with wide options if normal shoes pinch you. When you fall between sizes, the larger size plus a thicker insole is usually the safer touring choice.
Clipless or flat pedals for beginners?
Flat pedals are the calmer start, because you can put a foot down instantly and walk without thinking about your shoes. Clipless systems reward you later with a secure foot on rough ground and steady power on climbs. Many tourers begin on flats with grippy shoes and switch after a season. Neither choice is permanent, and a recessed cleat shoe lets you try clipless without giving up walkability.
Final Thoughts
Fit, walkability, and cleat match decide a touring shoe, in that order. Stiffness helps power, weather design helps comfort, and price helps only after those three are right. Use the product table above to compare your shortlist on sole type, closure, and weight, then choose the pair that suits your longest planned day rather than your average one.
The best bicycle touring shoes for you will disappear under you, letting the route hold your attention instead of your feet. Buy with a trial walk, break them in on short rides before the big trip, and they will carry you through seasons of quiet and reliable miles.