Best Backpacking Camping Stove: Types and Buying Tips (2026)
Disclosure: We may earn a commission when you buy through links on this page, at no extra cost to you. As an Amazon Associate I earn from qualifying purchases. Learn more

Match trip length, group size and fuel type to find the best backpacking camping stove, from canister top to liquid fuel designs.
Picture the last night of a family trip, when everyone is hungry, the light is fading, and the stove in your pack has to boil water and cook pasta in one small pot. The best backpacking camping stove for that moment is not simply the lightest model on the shelf. It is the one that fits your pot, your fuel supply, and the way your household actually cooks outdoors. This guide helps you choose by trip length, group size, storage space at home, and budget, and the comparison table below sums up the main types side by side.
If you are still weighing whether you need a trail stove at all, our overview of the best camping stove options for every style of trip is a useful starting point. Below, the focus stays narrow, on stoves you carry in a pack.




Quick Answer: The Main Types in Brief
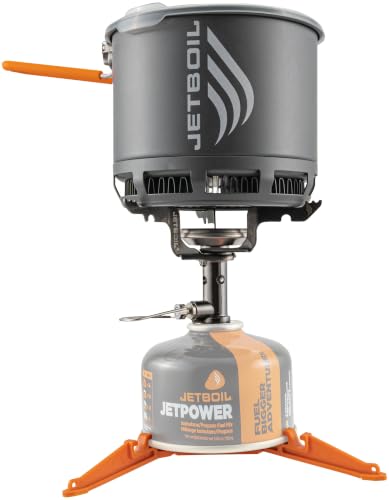
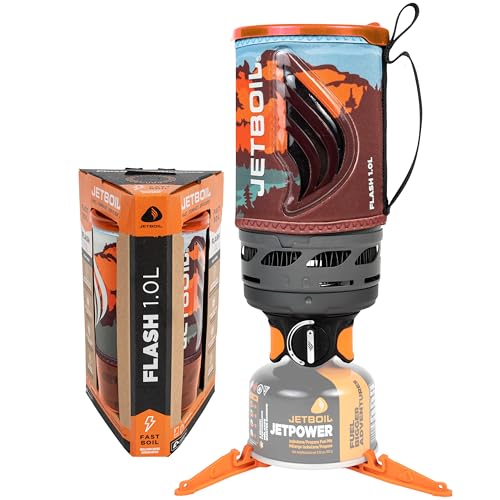
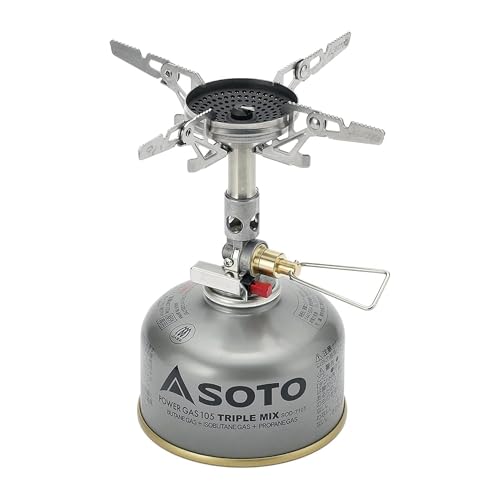
Backpacking stoves fall into three broad types. Canister top stoves screw onto a fuel canister and suit one or two people on short trips. Remote canister and integrated system stoves add stability and wind protection for groups and colder trips. Liquid fuel and wood burning stoves trade convenience for fuel you can find almost anywhere.
Before You Buy: A Quick Checklist for Choosing a Camping Stove
Six factors decide whether a trail stove earns its place in your pack.
Which Type Fits Your Routine
Start with how you travel. Solo hikers and couples who mostly boil water for dehydrated meals need very little stove, and a small canister model covers nearly every trip. Families and groups who simmer real food need wider pot supports and a stable base, since a tall pot on a narrow burner tips easily. If you camp in cold or windy places, look for a design that shields the flame and keeps pressure steady.
Features Worth Paying For and Ones to Skip
A precise flame control valve is worth paying for, because it lets you simmer rice or sauce instead of only boiling at full power. A built in igniter saves fumbling for a lighter with cold hands, and sturdy pot supports matter every single cook. Features you can usually skip include oversized windscreens sold as extras, elaborate stands, and griddle or grill attachments, which add pack weight for meals most backpackers rarely make.
Fuel Type and Running Cost
Most backpacking stoves burn a blend of isobutane and propane sold in sealed canisters, which is clean, simple, and easy to store at home between trips. The drawback is cost per ounce and the pile of part used canisters that are hard to judge by hand. Our comparison of butane vs propane stove fuels explains how each gas behaves in cold weather and storage. Liquid fuel costs less per trip and works in deep cold, but it needs priming and more care.
Cooking Space and BTU Output
On a backpacking stove, cooking space means the diameter of pot the supports hold safely, not a grate measured in square inches like a home grill. Check that your widest pot sits flat without overhang that traps heat against the canister. BTU output tells you how fast water boils, and most trail stoves cluster in a similar range, so boil speed alone rarely separates two models. Flame control matters more for real meals, since a stove that only runs at full blast scorches thin pot bottoms.
Build Materials and Rust Resistance
Burner heads are usually brass or stainless steel, while pot supports and bodies often use steel or aluminum to keep weight down. Stainless steel resists rust best when a stove is stored in a damp garage, and brass parts tolerate heat cycles well over many seasons. Thin aluminum saves ounces but bends if a heavy pot lands hard on the supports. Whatever the material, a stove stored dry in a stuff sack will outlast a stronger stove put away wet.
Realistic Budget Ranges
At under $50 you get a simple canister top stove with basic flame control, which is plenty for boiling water on weekend trips. Between about $50 and $100, stoves add better simmer control, stronger supports, and an igniter. From about $100 to $200 you are paying for integrated systems, cold weather performance, and lower packed weight. Above that, gains shrink for most households, so set the budget after you know your type, not before.
Three Types Compared: Choosing by Trip Style
Here is how the three types compare, and who each one suits best.
Canister Top Stoves for Short Trips
These stoves screw directly onto the canister, pack to about the size of a fist, and weigh very little, which is why they dominate weekend backpacking. They boil water fast and ask almost nothing beyond opening the valve and lighting the flame. Their weakness is stability, since the pot sits high on a narrow base, and wind steals heat from the exposed burner. For trips of one to three nights for one or two people, start with guides to the best single burner camping stove category, where most of these designs sit.
Remote Canister and Integrated System Stoves
Remote canister stoves connect the burner to the fuel by a hose, so the pot sits low and steady and you can use a full windscreen safely. Integrated systems lock a tall pot onto the burner and shield the flame inside the body, which boils water quickly and sips fuel in rough weather. Both types weigh and cost more than a canister top model, and integrated pots limit you to mostly boiling and simple one pot meals. Choose them for groups, windy ridges, and households that cook for three or four people at once.
Liquid Fuel and Wood Burning Stoves
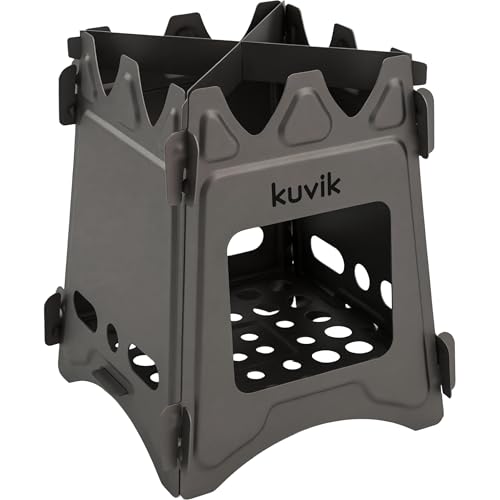
Liquid fuel stoves run on refillable bottles of white gas and similar fuels, perform in severe cold, and cost little to run on long trips. They ask more of you in return, with priming, occasional clogged jets, and a stronger fuel smell in storage. Wood burning stoves remove fuel cost and canister waste entirely, but they need dry twigs, constant feeding, and patience, and fire bans rule them out in many places.
Our Selection Process for the Best Backpacking Camping Stoves
We compared types and models using manufacturer specifications, verified buyer reviews, and the criteria in the checklist above. The factors that counted most were flame control, stability with a real pot, packed size, fuel efficiency, and how easily the stove cleans and stores at home. This guide narrows the field by trip style and budget, so the product table can present a short list that fits your household.
What We Like and What We Do Not Like About Backpacking Stoves
What we like most is the freedom a pack stove gives you. It weighs little, stores in a kitchen drawer or a small gear bin, and turns any trailhead or picnic spot into a place where you can make a hot meal. Fuel use is modest, cleanup is quick, and one stove serves a whole household for years of trips.
The trade offs are real. A backpacking stove cooks for a few people at most, and its small burner struggles with big pans and elaborate meals. If your trips involve driving to a site and cooking for a crowd, the models in our guide to the best camping stove for car camping will serve you better. Wind and cold also cut performance more than new buyers expect, and canister fuel costs add up across a busy season. A trail stove is a specialist tool, and it shines only when the trip matches it.
Common Buying Mistakes to Avoid
- Buying for weight alone. The lightest stove often has the weakest pot supports, so a family sized pot wobbles from the first meal.
- Ignoring your pot size. A pot wider than the supports wastes heat and can push hot air down toward the canister.
- Forgetting fuel availability. A stove that needs a specific canister fitting is a poor choice where shops stock only one fuel type.
- Paying for cooking extras. Grills and griddles add cost and pack bulk that most backpacking meals never use.
- Skipping a trial run at home. Lighting a new stove for the first time at camp, in the dark, turns small surprises into a cold dinner.
Cost of Ownership and Care
Ownership cost is mostly fuel. A household taking six to eight trips a year will use a handful of canisters, and buying fuel in multipacks during sales lowers that bill without much effort. Keep a simple lighter in the cook kit, since ignition is the part most likely to fail first. Store canisters upright in a cool dry place away from living spaces, and keep the stove in its case so the burner head stays clean.
Care is simple but not optional. Let the stove cool, wipe food spills off the supports, and check that the valve closes fully before packing it away. Our step by step guide on how to clean a camping stove covers the deeper seasonal clean in detail. Put the stove away dry, because wet storage in a sealed bin can start rust on steel parts over one winter.
Your Questions, Answered
Are backpacking camping stoves worth the money for casual campers?
Yes, for most casual campers they are worth it, because one modest stove covers years of weekend trips and also boils water at home during a power cut. The value case weakens if you camp only once a year, where borrowing or renting makes more sense. If you can name three trips in the next year where you will cook outdoors away from the car, the purchase usually pays for itself in convenience.
How long does a backpacking camping stove last?
A well kept stove often lasts a decade or more, because the burner has few moving parts beyond the valve. The parts that age first are rubber seals where the stove meets the canister, and those are cheap to replace on many designs. Retire a stove when the flame burns yellow and uneven after cleaning, when the valve leaks with the knob fully closed, or when supports bend so far that pots no longer sit level. Those signs point to wear that cleaning cannot fix.
How do you clean a backpacking camping stove after cooking with salty or sticky food?
Start once the stove is fully cool. Wipe the supports and burner cup with a damp cloth, then use a soft brush on any baked on sauce before it hardens. Coastal trips deserve one extra step, since salt air speeds up corrosion on steel parts. Rinse the cloth in fresh water, wipe every metal surface again, and dry the stove in open air before it goes back into its case.
What size fuel canister should you carry for a weekend backpacking trip?
For one or two people boiling water twice a day, a small canister usually covers a two or three night trip with fuel to spare. Groups and real cooking change that fast, so carry the next size up when you simmer meals. Weigh part used canisters on a kitchen scale at home and mark the remaining weight on the base. That habit turns guesswork into a number you can plan around.
Can you use a backpacking camping stove indoors during a power outage?
Only with great care, and outdoors on a porch or in an open garage is safer than any room inside the house. These stoves produce carbon monoxide, a gas you cannot see or smell, so never run one in a tent, a closed room, or near bedding. If you must cook under shelter, keep doors or windows wide open, stay beside the stove the whole time, and let it cool fully outdoors afterward. A home carbon monoxide alarm adds a further layer of warning.
Final Thoughts
Choosing the best backpacking camping stove comes down to matching the type to your trips, then checking flame control, pot fit, fuel, and budget in that order. Short trips for two point to a canister top stove, groups and cold weather point to a remote or integrated design, and long remote trips reward liquid fuel. Compare your short list against the product table above, and before your first trip, read our walkthrough on how to use a camping stove.