
Best Affordable Mountain Bike for 2026: Budget, Midrange, and Premium Tiers
Disclosure: We may earn a commission when you buy through links on this page, at no extra cost to you. As an Amazon Associate I earn from qualifying purchases. Learn more

Compare the best affordable mountain bike at every price point. Learn what budget, midrange, and premium tiers buy in frame, fork, and brakes before you pay.
Affordable means different things on different trails, so the search for the best affordable mountain bike starts with a price tier, not a single model. Bikes in this part of the market run from about $250 to about $2,000, and each step up buys real changes in the fork, the brakes, and the frame. This guide explains what each tier honestly includes, what it leaves out, and which riders each shelf suits.
Use the comparison table below to see the tiers side by side, then read on for the parts of the price that listings rarely mention, such as assembly, fitting, and the first service. By the end you will know which shelf matches your trails and which upgrades are worth planning for later.

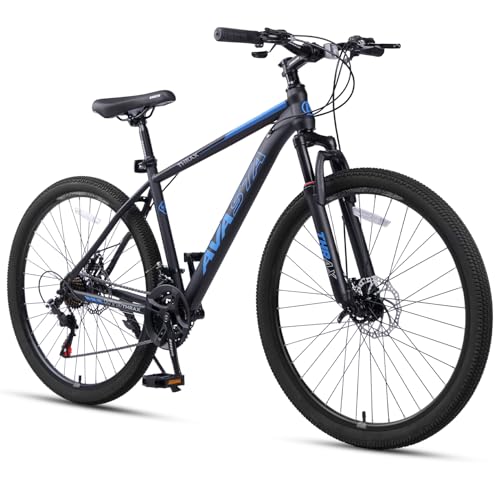


Three Tiers, Three Very Different Bikes
Price tiers in this market are not marketing labels. Each shelf has a typical build, a typical rider, and a typical limit, and the limit matters as much as the feature list when you ride rough ground. The best affordable mountain bike for smooth dirt paths is rarely the right one for steep, rooty descents.
| Tier | Typical Price | Fork and Brakes | Best For |
|---|---|---|---|
| Budget | about $250 to $500 | Coil fork, cable disc brakes | Smooth trails, dirt paths, learning the basics |
| Midrange | about $500 to $1,000 | Air fork, hydraulic disc brakes | Regular trail riding on varied ground |
| Premium | about $1,000 to $2,000 | Air fork with more adjustment, stronger hydraulic brakes | Rough trails and frequent riders |
Budget Tier: Built for Light Trails and First Rides
Budget bikes usually pair an aluminum or steel frame with a coil suspension fork and cable operated disc brakes. The fork adds comfort on rough paths, but it is heavy and offers little adjustment beyond a basic preload dial. Cable brakes stop the bike reliably on gentle ground, though they need more hand effort and more frequent adjustment than hydraulic brakes.
Expect a wide range of gears with a front derailleur on many builds. This shelf suits smooth dirt, gravel paths, and easy woodland tracks. Its limits show up on steep descents and root filled trails, where the fork and brakes run out of control long before the rider runs out of nerve.
Midrange Tier: Where Most Riders Land
The midrange step buys the two upgrades riders feel on every ride. An air fork replaces the coil unit, which cuts weight and lets you set the spring rate to your body weight with a pump. Hydraulic disc brakes replace cables, giving stronger stopping with lighter lever pressure and less upkeep.
Many midrange builds also move to a single chainring drivetrain with a clutch rear derailleur, which keeps the chain quiet and secure on rough ground. Frames at this level often include routing for a dropper seatpost, even when the post itself is not included. For riders who head out most weekends, this is the shelf where the bike stops holding the ride back.
Premium Tier: What the Extra Money Really Buys
Premium affordable bikes spend the extra money on control and durability rather than on decoration. The air fork gains more adjustment, including rebound control that changes how fast the wheel returns after a bump. Brakes grow larger rotors and stronger calipers, which matters on long descents.
Wheels are often ready for tubeless tires, which can run at lower pressure for grip and suffer fewer punctures from thorns. A dropper seatpost is commonly included at this level, and frame bearings and seals are usually built to survive more wet riding. The gains are real, but they reward riders who use them. On smooth local trails, a premium build feels only slightly better than a midrange one.
The Parts of the Price Listings Rarely Mention
Assembly and the First Service Are Part of the Price
Many affordable bikes arrive in a box with the front wheel, handlebar, and pedals left for the buyer to fit. Assembly quality varies widely at this price, and a loose headset or a badly adjusted brake can spoil the first ride or worse. Treat a professional safety check as part of the purchase price, at around $40 to $80 in most areas.
A shop will confirm that bolts are tight, gears shift under load, and brakes bite evenly. Plan on a first service after a few weeks of riding as well, because new cables settle and bolts can relax as parts bed in.
Fit Comes Before Parts
Frame size is the one choice you cannot upgrade later, so it comes before every component decision. Match the frame to your height and inside leg measurement using the maker sizing chart, and remember that charts differ between brands. A cheap bike in the wrong size is not a bargain, stated plainly.
It will hurt your knees, strain your back, and sap confidence on descents no matter how good its fork is. Sizing guidance also differs by rider, so compare the fit notes in the guides to best affordable men's mountain bike and best affordable mountain bike for women before you order.
Upgrades: What Is Worth Changing Later
Some parts are cheap to change and transform the ride, so they are worth upgrading on a sound frame. Tires, grips, pedals, and the saddle all fall into that group. Other upgrades make little sense. Swapping a coil fork for a good air fork can cost close to half the price of a budget bike, and the frame may limit you anyway through older axle standards, limited tire clearance, or no dropper post routing.
If the frame limits everything you want to change, the bike is not worth upgrading. Buy the tier above instead and change the small parts as they wear.
Features Worth Paying For (and Ones to Skip)
What You Can Realistically Get on a Budget
On a budget of about $250 to $500, expect a hardtail frame, a basic coil fork, and cable disc brakes, and judge the bike on fit and assembly rather than on feature list stunts. Full suspension at this shelf is the feature to skip, because a cheap rear shock adds weight and flex without adding control.
Very high gear counts and carbon parts at this price are decoration as well. The places not to save are braking and the contact points. Brakes you trust and tires that grip are worth more than a long list of gears.
Bike Type and Riding Style
Match the bike class to the ground you will actually ride. Cross country bikes are light and efficient for distance on smoother trails, while trail bikes add travel and slacker geometry for rougher descents. Lift served descending is its own discipline, and the guide to best affordable downhill mountain bike covers the long travel bikes built for it.
One class sits outside this guide entirely. An e bike adds a motor and a battery, which changes the price, the weight, and the rules on some trails, so treat it as a separate purchase and see the guides to best affordable e mountain bike and best affordable mountain e bike if electric assist is what you want.
Suspension and Travel: Hardtail or Full Suspension
A hardtail has a suspension fork at the front and a rigid rear end, which keeps it light, simple, and efficient for the money. A full suspension bike adds a rear shock, which improves grip and comfort on rough descents but adds weight, cost, and pivots to maintain.
Fork travel tells you the intended terrain in rough terms. Travel of about 100 to 120 mm suits cross country riding, while about 130 to 160 mm suits harder trail use. At affordable prices, a good hardtail almost always rides better than a cheap full suspension bike, so most first time buyers should start with a hardtail.
Frame Material and Geometry
Aluminum dominates this market because it is light, stiff, and affordable to build. Steel frames weigh more but shrug off knocks and can feel forgiving on rough ground, while carbon appears only at the top of the affordable range.
Geometry shapes how the bike feels as much as material does. A slacker head angle makes the steering calmer on descents, and longer reach adds stability at speed, while shorter and steeper numbers feel nimbler on tight, flat trails. Read the geometry chart for the size you need, not the size the listing happens to picture.
Safety Gear and Checks That Belong in the Budget
A helmet is standard riding gear, not an optional extra, so price one into every tier at about $40 to $80. It should sit level on your head, feel snug without pressure points, and stay put when you shake your head with the straps done up. Replace a helmet after any crash, even when the shell looks unmarked, because the foam that absorbs impact can be damaged out of sight.
Before each ride, squeeze the brake levers to confirm a firm bite, check tire pressure and tread, and confirm that wheels sit tight in their axles. Those two minute checks, plus the shop safety check described above, help catch many of the failures that end rides early.
Long Term Costs to Factor In
The purchase price is only the first bill. Tires wear, brake pads thin, and chains stretch, so budget for consumable parts every season if you ride weekly. An annual service at a shop keeps pivots, bearings, and gears healthy and usually costs around $60 to $120 depending on the work needed.
Add the small costs of a pump, a spare tube, and chain lubricant, plus helmet replacement after a crash or every few years as makers advise. A midrange bike often works out cheaper over three years than a budget bike that needs constant repairs, so weigh the total cost of ownership, not just the sticker.
Affordable Mountain Bike Questions Answered
How much should a first time rider spend on a mountain bike?
Spend about $500 to $1,000 if you plan to ride trails most weekends, and about $250 to $500 if your riding is paths and smooth dirt. The midrange shelf buys hydraulic brakes and an air fork, which most riders keep for years. Keep part of the budget aside for a helmet and the assembly safety check, because those costs arrive with the bike rather than later. Buying the cheaper bike and skipping the safety spending is the false economy to avoid.
Is a hardtail or a full suspension bike better for beginners?
A hardtail is better for most beginners. It costs less for the same quality of fork and brakes, weighs less, and has fewer pivots to service. Riding a rigid rear end also teaches line choice, because the bike rewards smooth paths through rough ground.
Full suspension makes sense sooner for riders whose local trails are steep and rocky, or for riders with back comfort concerns who have asked their doctor about the choice. Everyone else can add rear suspension on a later bike.
What frame size should I choose if I fall between two sizes?
Choose the smaller size in most cases. A smaller frame is easier to move around on the trail, and you can fine tune the fit with a longer stem or a higher seatpost within safe limits. Check the standover height first, because you need clearance when you step off on uneven ground.
Then check reach, since a frame that feels stretched on a short ride feels worse after an hour. If the two sizes still feel close, pick the one that leaves your knees clear of the handlebar when you turn at low speed.
Can I upgrade a budget mountain bike into a midrange one later?
You can improve one, but you rarely save money doing it. A fork swap, a brake upgrade, and new wheels bought one at a time, plus shop labor, usually add up to more than the price gap between the tiers. Compatibility limits the plan as well, because older frames use older axle and headset standards.
Upgrade the cheap contact points such as tires, grips, and pedals, and enjoy the bike as it is. When your riding outgrows it, sell it complete and buy the tier you actually need.
Should I buy a mountain bike online or from a local shop?
Buy from a local shop when the prices are close. A shop build includes proper assembly, a fit check, and often a free first service, which together cover much of the online saving. Shops also make warranty claims simpler, because you hand the bike to a person rather than posting it.
Online buying suits confident home mechanics who own the tools and know their frame size for certain. If you buy online, keep the assembly safety check in the budget and have the shop confirm the build before your first trail ride.
Final Thoughts
Choosing the best affordable mountain bike comes down to three decisions: the tier that matches your trails, the frame size that matches your body, and brakes you trust on a descent. Everything else can be upgraded, adjusted, or replaced as it wears. Compare the tiers in the table above, add the helmet and safety check to your budget, and buy the most honest build your money reaches rather than the longest list of features.


