
Best Blenders for Nuts 2026 Butter and Milk Guide
Disclosure: We may earn a commission when you buy through links on this page, at no extra cost to you. As an Amazon Associate I earn from qualifying purchases. Learn more

A plain guide to blenders for nuts: nut butter, nut milk, coarse meals, motor care, and cleaning, so nut blending stays smooth and safe every time.
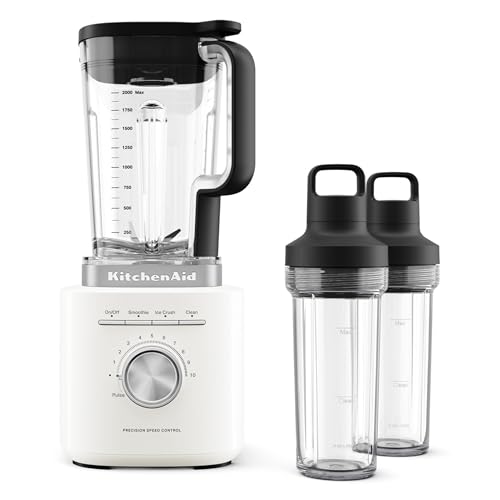
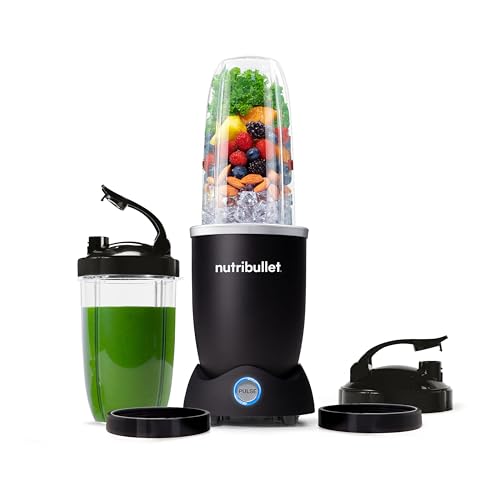
Nuts test a blender in every way, from coarse chopping to silky butter, and best blenders for nuts are the ones with the power, tamper, and patience to turn hard nuts into smooth results without burning out the motor. Nut butter needs long blending with rest periods, nut milk needs fine straining, and coarse meals need short pulses, so one machine must handle very different jobs. The comparison table below shows the main blender types side by side, so you can compare power, jar design, and nut handling before you buy.
This guide explains how to make nut butter, nut milk, and nut meals, plus the motor care that keeps a blender alive through thick grinding. It also covers allergy safety, since nut residue in a shared blender matters for guests, and cleaning oily residue that traps flavours. By the end you should know whether your blender suits nuts or whether a dedicated machine is smarter.






Nut Butter: Patience, Tamper, and Rest Periods
Nut butter starts as coarse meal, then clumps into a ball, then suddenly turns smooth as oils release, and the middle stage tests both blender and cook patience. Use a tamper constantly to push nuts onto the blades, blend in bursts with rest periods to avoid overheating, and expect the process to take several minutes for a truly smooth butter. Roasted nuts blend easier than raw ones, since roasting releases oils, but let them cool before blending so heat does not build up too fast.
Add no oil at first, since most nuts release enough of their own, and add only a teaspoon at a time if the mixture stays dry after several minutes. Store nut butter in a clean jar in the fridge or a cool cupboard, and stir before use if oil separates, which is normal for natural nut butter. If your motor smells hot or slows badly, stop and rest it fully, since pushing a hot motor can burn it out.
Nut Milk: Blending and Straining
Nut milk starts with soaked nuts blended with fresh water until smooth, then strained through a fine sieve or nut milk bag to remove pulp. Soak almonds, cashews, or hazelnuts for several hours or overnight, drain, and rinse before blending, since soaking softens nuts and improves texture. Blend with fresh water at a ratio of about one part nuts to three or four parts water, adjusting to taste.
Strain in batches, squeezing gently rather than forcing pulp through, since forced pulp clouds the milk and gives a gritty texture. Keep leftover pulp for baking, smoothies, or crackers rather than wasting it, and store nut milk in the fridge for up to four days, shaking before use since separation is normal. Clean the blender promptly, since nut residue dries fast and smells stale quickly.
Coarse Meals, Flours, and Chopping
Coarse nut meals for baking need short pulses and frequent checks, since a few extra seconds turns meal into butter. Pulse in one second bursts, shake the jar between pulses, and sift out fine meal, returning coarse bits for another short burst. This control matters for recipes where texture defines the result, such as cakes and coatings.
Chopped nuts for toppings need even less blending: a few pulses give rough pieces, while longer blending gives dust. Work in small batches for even chopping, since an overfilled jar chops unevenly, with fine dust at the bottom and large pieces on top. For consistent results, a small food processor or a knife may beat a blender for chopping, though a blender handles larger batches faster.
Motor Care for Thick Nut Blending
Nut butter is the hardest job most blenders ever do, so motor care matters. Blend in bursts with rest periods, keep batches moderate, and never run the motor continuously for many minutes on a thick load. If the blender has a thermal cutout, respect it: let the machine cool fully before restarting, rather than resetting and pushing on immediately.
Check the blade assembly and jar base after nut butter sessions, since thick mixtures stress couplings and gaskets. Replace worn gaskets promptly, since a leaking jar lets oily mixture into the motor base, which is hard to clean and can damage the machine. A blender rated for nut butter by its maker is a safer choice than a standard model pushed beyond its design.
Allergy Safety in a Shared Blender
Nut residue matters for guests with nut allergy, since even small traces can cause serious reactions. If you blend nuts regularly and cook for allergic guests, clean the blender thoroughly before their food, washing the jar, lid, blades, and gasket with hot soapy water and drying fully. Better still, use a separate jar or blender for nut free cooking if allergies are severe, since shared equipment always carries some risk.
Ask guests about allergies before serving, label nut containing foods clearly, and keep serving utensils separate to avoid cross contact. Store nut butters and nut milks clearly labelled and away from nut free foods. When in doubt about cleaning, choose a freshly washed separate container and utensils for the allergic guest meal.
Cleaning Oily Nut Residue
Nut oils coat jars, blades, and gaskets, and they turn rancid if left, so clean promptly after nut blending. Blend warm water with soap briefly, then rinse and wipe the blade base carefully, taking care with sharp edges. For stubborn oil, soak the jar in warm soapy water, then brush gently and dry fully before storing, since damp oily residue smells fast.
Avoid harsh abrasives that scratch the jar, since scratches trap oil and harbour smells. Inspect the gasket after nut butter sessions, since oil degrades rubber over time, and replace gaskets when they stiffen or crack. A clean, dry blender with a fresh gasket blends nuts well for years, while a neglected one smells stale and leaks.
Baking With Nut Meals and Butters
Nut meals from the blender enrich cakes, biscuits, and coatings, adding flavour and moisture that wheat flour alone cannot match. Use coarse meal for crumble toppings and coatings, where texture matters, and fine meal for cakes, where a smooth crumb matters more. Replace part of the flour with nut meal rather than all of it at first, since nut meal lacks gluten and a full swap can make cakes dense or crumbly.
Nut butter works in baking too, binding biscuits and adding richness to sauces and dressings, but it also adds oil, so reduce other fats in the recipe slightly. Store baked goods with nut meal in airtight containers, since nut oils turn rancid faster than plain flour goods. Label baked goods clearly when sharing, since nut allergy can be severe and guests need to know exactly what is inside.
Related Buying Guides
For nut focused blending, see best blenders for nuts and seeds and best blenders for nut milk, plus the butter specific guide to best blenders to make nut butter. For the wider picture, compare best quality blenders and best stick blenders.
Frequently Asked Questions
Can a regular blender make nut butter?
A high performance blender with a tamper can make smooth nut butter, but a standard blender may stall or overheat on thick nut loads. Blend in bursts with rest periods, use the tamper constantly, and stop if the motor smells hot. If your blender struggles often, a dedicated nut butter machine or food processor may handle the job better and last longer.
Why does my nut butter stay grainy?
Grainy butter usually means blending stopped too early, before oils fully released and the mixture turned smooth. Keep blending through the clumping stage, using the tamper and rest periods, until the texture turns silky. Roasted nuts blend smoother than raw ones, and a small amount of added oil helps only after several minutes of blending without progress.
How do I make nut milk in a blender?
Soak nuts for several hours or overnight, drain and rinse, then blend with fresh water at about one part nuts to three or four parts water. Strain through a fine sieve or nut milk bag in batches, squeezing gently rather than forcing pulp through. Store nut milk in the fridge for up to four days, shaking before use since separation is normal.
How do I clean a blender after nut butter?
Blend warm water with soap briefly right after use, then rinse and wipe the blade base carefully, taking care with sharp edges. For stubborn oil, soak the jar in warm soapy water, brush gently, and dry fully before storing. Inspect the gasket after nut sessions, since oil degrades rubber over time and worn gaskets leak.
Is a shared blender safe for nut allergy guests?
Nut residue can cause serious reactions, so clean the jar, lid, blades, and gasket thoroughly with hot soapy water before cooking for allergic guests. For severe allergies, a separate jar or blender for nut free cooking is safer, since shared equipment always carries some risk. Ask guests about allergies, label foods clearly, and keep serving utensils separate.
Final Thoughts
The best blenders for nuts combine strong torque, a tamper for thick mixtures, and a jar design that circulates dense loads. The product table above gives a quick comparison, but patience and motor care matter as much as power. Blend in bursts, rest the motor, and clean oily residue promptly, and your blender will turn out smooth butter, fresh milk, and even meals for years. If you blend nuts daily in large batches, though, a dedicated machine may be the smarter long term choice.

