Best Binoculars on a Budget: A 2026 Guide by Price Band
Disclosure: We may earn a commission when you buy through links on this page, at no extra cost to you. As an Amazon Associate I earn from qualifying purchases. Learn more

The best binoculars on a budget, sorted by price band: what each tier buys in field width, coatings and low light brightness, and where more money stops helping.
Budget binoculars run from pocket money toys to genuinely good glass, and the price tag alone does not tell you which one you are holding. Shoppers hunting the best binoculars on a budget usually find that the price band predicts the view far better than the brand name printed on the box. Two pairs can share the same 10x42 label and still show you very different pictures.
This guide sorts the market into three price bands and shows what each band honestly buys, what it skips, and who should stop at each level. The comparison table below lines the bands up side by side, so the trade offs are easy to scan before you read on.




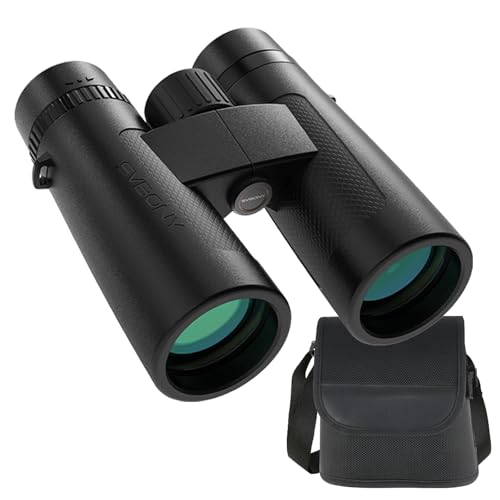
Choosing the Best Binoculars on a Budget: Start With the Price Band
Bands work because makers build to a price first and a spec sheet second. Inside one band, rival pairs tend to share the same glass classes, the same coating levels, and the same compromises, whichever logo they carry. If this is your first pair and the basic terms are still new, start with our simple guide to best budget binoculars, then come back here and choose your band with confidence.
| Price band | Typical picture | What is usually missing | Good match for |
|---|---|---|---|
| Under about $50 | Narrow field, dim edges, basic coatings | Wide field and a strong dim light view | Kids, spare pairs, first trials |
| About $50 to $100 | Wider field, clearer center, better coatings | Top glass classes and premium build | Most regular watchers |
| About $100 to $200 | Wide bright field, smoother focus, tougher body | Very little for casual use | Serious hobby use on a firm cap |
Under About $50: The Starter Band
The lowest band buys a real, usable daylight view, and that is an honest achievement at this price. Expect simple Porro prism designs or small roof prism compacts, basic coated optics, and a clear center picture for stadiums, school concerts, and a pair that lives in the car glove box. Magnifications of 8x and 10x dominate, and in good light the image is perfectly pleasant.
What this band skips is width and brightness. The field of view is narrow, so following anything that moves takes practice, and the edges of the picture go soft and dim. Dawn and dusk views fade quickly, hinges and focus wheels are light plastic, and alignment varies from copy to copy, which makes a generous return window part of the product here.
About $50 to $100: Where the Basics Get Fixed
The middle band is where the annoying flaws of cheap glass mostly disappear. Fully coated and multicoated optics become common, and the extra light that reaches your eyes shows up as better contrast and a cleaner center image. Fields of view widen enough to follow birds, boats, and ball games without constantly losing the subject.
Build quality takes a step up as well, with sturdier hinges, smoother focus travel, and eye relief that starts to suit glasses wearers. Roof prism models appear in this band with respectable sealing against dust and splashes. For most people who will use a pair every month rather than every day, this band is the sensible ceiling, and the view per dollar is hard to beat.
About $100 to $200: The Top of Budget
The top budget band adds refinement rather than a new category of performance. Better glass classes, including low dispersion elements in some lines, clean up color fringing on bright edges. Fields grow wider and stay sharp further out, focus wheels turn with a precise and damped feel, and bodies use more metal, tougher armor, and longer warranties.
This is also the band that rewards low light patience. Readers who mostly watch game at first light should also read the notes gathered for best hunting binoculars on a budget, because dawn viewing rewards the generous exit pupil these pairs can afford. Past about $200, you have left budget territory and entered the midrange, where each extra dollar buys smaller gains in edge sharpness, coating quality, and weight.
The Numbers Printed on the Box
Two Numbers, One Code
Every pair carries a two number code such as 8x42 or 10x32. The first number is magnification, how many times closer the subject appears, and the second is the diameter of the front lenses in millimeters, which sets how much light the pair can gather. The code describes size class and light appetite only. It says nothing about glass quality, which is exactly why the same code appears in every band.
Why More Power Usually Looks Worse
Higher magnification feels like an upgrade, but it taxes a budget pair twice. First, it narrows the field of view, so finding and following a moving subject gets harder. Second, it magnifies the shake in your hands by the same factor, so a 12x image trembles where an 8x image sits still. On cheap glass the trembling also exposes soft optics.
For handheld use, 8x is the steady choice and 10x is the realistic ceiling for most people.
Exit Pupil and Dim Light
Divide the front lens size by the magnification and you get the exit pupil, the width of the light beam that reaches your eye. An 8x42 pair delivers about 5 millimeters, which matches the pupil of many eyes in dim light, while a 10x42 gives about 4 millimeters. A larger exit pupil keeps the view bright as light fades, which is why the bigger front lenses in the upper bands earn their keep at dawn and dusk. No coating can fully rescue a tiny exit pupil once the light drops.
Coating Words, Translated
Coatings are thin films on the glass that stop light bouncing away before it reaches your eye, and the trade describes them in coverage classes. Coated means some surfaces are treated, fully coated means all air to glass surfaces are treated, multicoated means some surfaces carry several layers, and fully multicoated means every surface carries several layers. Each step up that ladder passes more light and lifts contrast. The catch is that makers use these words loosely, and the labels are not standardized across brands, so a coating claim only means something inside one price band or one brand line.
Worth Paying For, and Safe to Skip
Pay for a Smooth Focus Wheel
The center focus wheel is the control your fingers live on, so its feel decides whether a pair is a pleasure or a chore. Good wheels turn smoothly with light and even resistance, without grit, stiffness, or loose spots. A small diopter ring near one eyepiece matters too, because it lets you balance the focus between your two eyes. Both parts are cheap to make well, so a bad wheel on a listing sample is a warning about the whole build.
Pay for Eye Relief if You Wear Glasses
Eye relief is the distance your eye can sit from the eyepiece and still see the whole field. Glasses add distance of their own, so wearers should look for eye relief around 15 millimeters or longer, paired with twist up eye cups that stay where you set them. Without enough relief, the picture shrinks into a tunnel with the edges cut away. This single spec is worth more to a glasses wearer than any glass upgrade in the same band.
Skip the Zoom and Night Vision Wording
Variable zoom binoculars sound flexible, but the moving parts cost sharpness and brightness at every setting, and budget zooms are the softest glass on the shelf. Night vision wording on passive binoculars is worse, because plain glass cannot show you anything in total darkness, no matter what the box promises. Treat either phrase as a sign that you are looking at the cheapest shelf in the store, and step back up a band.
Skip Bundled Extras
Gift sets pad the listing with phone mounts, mini tripods, and cleaning kits that cost little and add less. A wobbly bundled tripod will not steady a 10x view, and a phone mount rarely fits the eyepiece it ships beside. The money in a bundle price is money taken out of the glass. Buy the plain pair, then add the one or two accessories you actually need later.
Long Term Costs to Factor In
The sticker price is not the whole price of ownership, even at budget level. A few small costs follow almost every pair home, and planning for them keeps the total honest.
- A protective case and a wider, more comfortable neck strap often cost about $10 to $25 together when the box includes only a thin pouch.
- A microfiber cloth and a lens brush cost a few dollars and prevent the scratches that slowly ruin cheap coatings.
- Warranty length varies by band, from a single year at the bottom to much longer cover at the top, and it is worth reading before you buy.
- Internal fogging or a knocked hinge usually means replacement rather than repair at these prices, since a repair bill can rival the cost of a new pair.
None of these costs should scare you off. They simply mean the honest budget for a complete setup sits a little above the price on the product page, and the product table above helps you compare pairs on that fuller basis.
Your Questions Answered
How much field of view is enough on budget binoculars?
Around 300 feet of visible width at 1,000 yards is a comfortable floor for general use, and more is better for moving subjects. Field figures are printed on most listings, but makers measure them in more than one way, so compare numbers only within the same listing style. Remember that the field narrows as magnification climbs at the same price, which is one more reason the 8x configurations feel so easy to use.
Do budget binoculars work well at sports stadiums?
Yes, budget binoculars handle daylight stadiums well, because the light is strong and the action sits at a steady distance. A compact 8x25 pair is the easy carry, though its small exit pupil makes evening games under lights look dimmer than a full size 8x42 would. Check the venue rules before you go, because some stadiums limit the size of bags and optics you can bring through the gate.
Can budget binoculars show the moon clearly?
Yes, the moon is bright enough that even the starter band shows craters and the dark plains clearly. The most detailed views come when craters sit near the line between light and shadow on the surface, where low sunlight throws long shadows. One firm safety rule applies here: never point binoculars at the sun, because the concentrated light can damage your eyes in an instant.
How long should budget binoculars last?
A cared for pair from the middle band upward should serve for many years of regular use. The hinge and the focus wheel are the parts that wear first, so a pair that develops play in either one is telling you its age. Storing the pair dry is the cheapest protection you can give it, and a small silica gel pack inside the case quietly absorbs the moisture that leads to internal fogging.
Are budget binoculars a good choice for children?
Yes, a starter band pair is a sensible first instrument for a child, since the loss hurts less if it gets dropped. The fit detail that matters most is the hinge spacing: the barrels must fold close enough together to match a smaller face, or the child sees two separate circles instead of one picture. Choose a light pair with a strap, and expect the lower magnification models to suit younger hands best.
Final Thoughts
Pick your band first, then read the numbers, and the choice mostly makes itself. The middle band fixes the real flaws of cheap glass, while the top band buys refinement and low light strength. In the end, the best binoculars on a budget is the pair whose price band matches where and how often you will actually use it. Compare the pairs in the product table above against the band that fits your plans, and you will spend once and spend well.