Best Automatic Yogurt Maker (2026): Jars, Capacity and Timer
Disclosure: We may earn a commission when you buy through links on this page, at no extra cost to you. As an Amazon Associate I earn from qualifying purchases. Learn more

Best Automatic Yogurt Maker guide: compare jar, single batch and cooling models by capacity, timer, cleaning and counter footprint.
A good week in many homes starts with a batch of yogurt already setting while everyone sleeps, ready for breakfast bowls, packed lunches, and smoothies the next day. If you want that routine without watching temperatures or guessing when fermentation is done, the best automatic yogurt maker for your home is the one that matches your counter space, your household size, and how much yogurt you eat each week. This guide helps you choose by routine, capacity, and budget, and the product table below lists current models.
Automatic models handle the timing and steady warmth for you, then signal or switch off when the cycle ends. That matters most if you make yogurt weekly and want the same texture each time.


Quick Answer: The Main Types in 30 Seconds
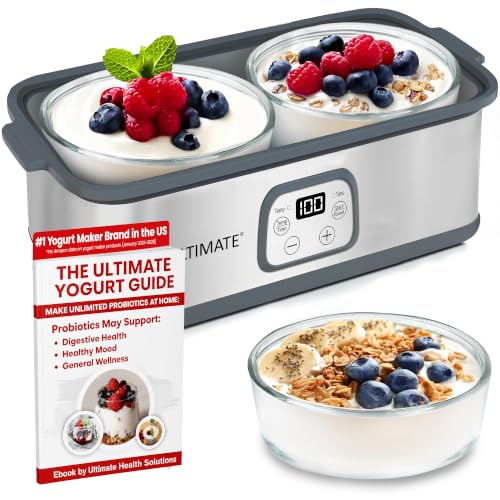
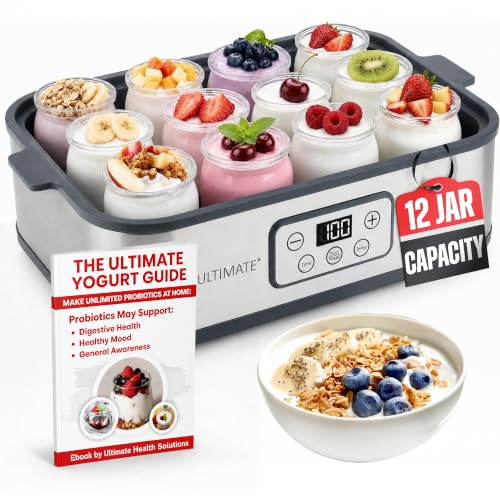
If you need a fast answer, think in types rather than names. Jar models divide one batch into single servings that go straight into the fridge, which suits households where everyone eats at different times. Single container models make one larger batch you scoop from, which suits families who cook with yogurt. Models with a cooling phase chill the batch after culturing, which helps if you start yogurt before work or bed and cannot move it to the fridge on time.
Capacity is the quickest filter. Most home models make about 1 to 2 quarts per cycle, enough for a few days for most homes.
Before You Buy: A Quick Checklist for Choosing a Yogurt Maker
The checklist below follows the order that matters in daily use. Start with the type and the jars, then check power, safety, and size, and only then compare prices.
Which Type Fits Your Routine
Glass jar models give you ready portioned servings and make it simple to add fruit or honey to some jars and leave others plain. A single large container saves washing up and works better for strained styles and marinades where you need several spoonfuls at once. If thick strained yogurt is your main goal, see our guide to the best yogurt maker for greek yogurt for the straining side. Automatic timing suits all types, so choose the container format first.
Features Worth Paying For and Ones to Skip
A clear timer with an audible end signal is worth paying for, since it frees you from checking the clock during a cycle that can run 8 to 12 hours. A strainer included in the box is also worthwhile if you like thick yogurt, as it saves buying a separate piece of kit. Removable lids and jars that fit on the top rack of a dishwasher save real time each week. You can skip preset flavor programs, since flavor is added after culturing anyway, and skip extra jar sets unless you plan back to back batches.
Wattage, Power and Energy Use
Yogurt makers are gentle appliances, and most draw roughly 15 to 40 watts while culturing, far less than an oven light left on for the same hours. The job is only to hold milk near the warm range cultures prefer, not to cook it, so higher wattage does not mean better yogurt. Check that you have an outlet within reach of where the maker will sit undisturbed for the full cycle.
Safety Features and Certifications
Look for a listing mark such as UL or ETL on the base, which shows the electrical design was checked by an independent safety body. An automatic shutoff at the end of the timer is both a convenience and a safety plus, since the unit will not keep heating if you are out longer than planned. Stable feet and a lid that stays seated during the cycle also matter in busy kitchens. Keep the base away from sink spray, and never immerse it in water.
Counter Space and Dimensions
Most jar models have a footprint close to a dinner plate, while single container models are often a little narrower but taller. Measure the spot you have in mind, including the height under wall cabinets, and allow room to lift the lid straight up without tilting warm jars. Storage matters too, since a maker that lives in a hard to reach cupboard tends to stay there. A compact shape you can leave out beats a larger unit you must assemble each time.
Realistic Budget Ranges
Basic automatic models sit under about $50 and cover steady culturing, a timer, and a set of jars or one container, which is enough for most homes starting out. Models around $50 to $100 usually add a cooling phase, larger capacity, or a strainer in the box. Above about $100 you are mostly paying for build materials, bigger batches, and finer temperature control for specialty cultures. Milk and starter are the ongoing costs, and they stay modest over time.
Automatic Yogurt Maker Types Compared
The three types below cover nearly every home. They differ in serving style, washing up, and how forgiving they are about timing.
Jar Models for Most Homes
Jar models are the easiest place to start because each serving is stored in the same glass it cultured in, so there is no transfer step and no extra bowl to wash. Typical sets hold six to eight jars and make about 1 to 1.5 quarts in total. Portions help with school and work lunches, and picky eaters can sweeten their own jar. The trade off is more lids and jars to wash and store.
Compact Single Batch Models for Small Budgets
A compact model with one container is often the lowest cost way into automatic culturing, and it suits one or two people who eat yogurt a few times a week. You scoop what you need and the rest stays in the covered container in the fridge. These units take the least counter and cupboard room, a real advantage in apartments. The limits are batch size and flexibility, since one flavor must suit everyone until the container is empty.
Large Capacity Models with a Cooling Phase
Larger models making close to 2 quarts suit families who go through yogurt quickly or use it daily in cooking. A cooling phase that chills the batch after culturing adds forgiveness to your schedule, since the yogurt stays fresh even if you return home hours after the cycle ends. This is also the type to consider for specialty cultures with longer fermentation, a topic covered in our guide to the best yogurt maker for l reuteri. Expect a higher price and a bigger footprint.
Our Selection Process for Automatic Yogurt Makers
We judge these appliances on capacity, steadiness of culturing temperature, ease of use, cleaning, noise, safety, and warranty support, using maker specifications and patterns in verified buyer feedback rather than marketing claims. For this guide the angle is daily fit: how a model suits your space, household size, and weekly routine, plus what it costs to own over time. Any best automatic yogurt maker recommendation should survive that practical test. For a wider view of the category, see the best yogurt maker guide.
What We Like and What We Do Not About Automatic Versus Other Yogurt Makers
The clear gain with an automatic model is consistency without attention. You pour in warmed milk mixed with starter, set the hours, and the machine holds the right warmth and stops on time, which is far easier than coaxing an oven or a cooler box to stay steady overnight. Repeat batches taste and set alike, so you can adjust one variable at a time, such as a longer cycle for more tang.
The trade offs are real but modest. An automatic unit is one more appliance to store, and it does only one job, while methods using gear you already own cost nothing extra. Some models beep as they finish, which is trivial in a kitchen but noticeable in a studio. If you prefer glass over plastic for storage, our roundup of the best yogurt maker with glass jars focuses on that choice.
Common Buying Mistakes to Avoid
- Buying a large capacity model for a small household, so yogurt sits uneaten and loses freshness before the batch is finished.
- Ignoring the space under your cabinets, then finding the lid cannot lift clear while jars are warm.
- Paying for many preset programs when a simple timer covers plain, tangy, and strained styles just as well.
- Forgetting replacement costs, such as spare jars, lids, or a strainer.
- Skipping the manual on starter amounts, which leads to thin batches that get blamed on the machine.
Cost of Ownership and Care
Running costs stay low. Electricity for a full cycle costs only a few cents at typical home rates, given the low wattage, and your main spend is milk plus an occasional fresh starter if a saved culture weakens after several batches. Keep a small budget for a replacement jar or lid now and then.
Care is simple and protects flavor. Wash jars, lids, and containers in hot soapy water or on the top rack of the dishwasher if the maker allows it, and dry them fully so no moisture dilutes the next batch. Wipe the base with a damp cloth only, and store the unit with the lid ajar so no stale odor builds up. If a batch smells sharp or looks pink or moldy, discard it and start again with fresh starter. Our walkthrough on how to use a yogurt maker covers starter ratios and timing.
Your Questions, Answered
How do you clean a yogurt maker between batches?
Wash the jars, container, lids, and strainer as soon as the yogurt is in the fridge, since dried milk film gets harder to remove with time. A soak in hot soapy water loosens residue without scrubbing that can scratch plastic. The base only needs a wipe with a damp cloth, because its heating surface should never sit in liquid. A monthly rinse with a mild vinegar solution helps clear lingering odors from the jars.
How long does an automatic yogurt maker last?
A cared for unit often serves for many years, because the heating element works at low temperatures and faces little stress. The parts that usually age first are jar lids, seals, and strainer mesh, not the base itself. Avoid sudden temperature shocks, such as placing a hot glass jar on a cold stone counter. If some jars set unevenly, check lid fit and jar placement before assuming the base has failed.
Are automatic yogurt makers worth it for small households?
They can be, if you eat yogurt at least a few times a week and value a batch that is ready without supervision. A compact 1 quart model keeps the commitment small, and homemade batches usually cost less per serving than single cups bought at the store. The value drops if yogurt is only an occasional food for you, because the maker will sit idle. Frequency of use, not household size alone, is the real test.
Can an automatic yogurt maker make plant based yogurt?
Yes, most models can culture plant based milks, and the automatic timer helps because these batches often need longer cycles to set. Soy milk tends to firm up most reliably on its own, while coconut and oat versions often need a thickener or a starter made for plant based use. Expect a softer set than dairy yogurt. Chill the finished batch fully before judging thickness, since it firms up a good deal in the fridge.
Why did my homemade yogurt turn out thin or runny?
Thin yogurt usually traces back to milk that was too hot when the starter went in, which can weaken the culture, or to a cycle that ended too soon. Moving the maker during culturing can also break a delicate set. Next time, let heated milk cool until it feels warm but not hot on your wrist, keep the unit still, and add an hour to the cycle. A spoonful of milk powder stirred in beforehand also helps firm the result.
Final Thoughts
Start with how much yogurt your home eats, pick the container format that fits that habit, and let the timer and shutoff do the steady work for you. Jar models suit most homes, compact models keep costs and storage low, and larger models with cooling earn their price when schedules are unpredictable. From the product table above, the best automatic yogurt maker is the one that fits your counter and routine well enough that you reach for it every week.