Best Anti Fog for Trail Cameras: Every Type Explained Side by Side for 2026
Disclosure: We may earn a commission when you buy through links on this page, at no extra cost to you. As an Amazon Associate I earn from qualifying purchases. Learn more

Compare sprays, wipes, cloths, and inserts to find the best anti fog for trail cameras for your weather, camera housing, and checking routine.
Fog on a trail camera lens is frustrating because it strikes at the exact moments you care about most, usually at dawn when deer move and the air turns cool and damp. Choosing the best anti fog for trail cameras means sorting through sprays, wipes, cloths, and moisture absorbing inserts that all promise clear images but work in very different ways. This guide compares each type side by side so you can match the method to your climate and your camera.
The comparison table below gives you a quick view of the main options and their prices. After that, the sections below explain how long each treatment lasts, how it behaves in rain and cold, and what can go wrong if you apply it the wrong way.


Types of Anti Fog Compared
Every anti fog method does one of two jobs. Surface treatments spread condensed water into a thin, clear film on the lens, while moisture absorbers lower the humidity inside the housing so condensation never forms. A fogged outer lens and a fogged inner lens look identical in your photos but need opposite fixes, so knowing which job your camera needs comes first.
Liquid Sprays
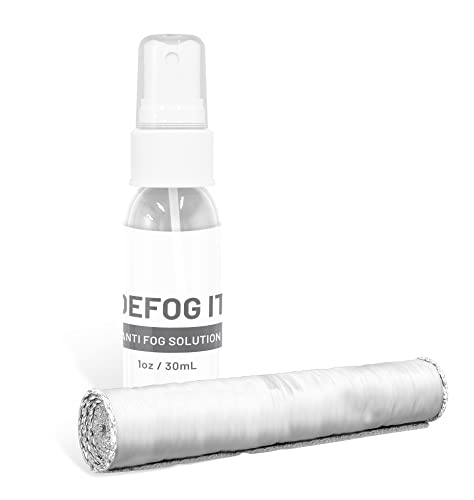
Sprays are the most flexible option. You mist a small amount onto the clean outer lens, spread it gently, and buff lightly once it hazes. A good spray keeps the outer lens clear through several nights of dew and light rain, and one small bottle treats many cameras across a whole season, which makes sprays the lowest cost choice per camera.
The limits are practical. A spray only protects the surface you touch, so it does nothing for moisture trapped inside the housing. Heavy rain gradually washes the coating away, and overbuffing during application can polish the treatment right back off. Sprays suit owners who check cameras every few weeks and can reapply as part of that visit.
Pretreated Wipes
Wipes arrive sealed in individual packets with the anti fog solution already soaked into the cloth. You tear one open, wipe the lens in slow circles, and let the film dry. There is no bottle to spill in your pack and no guessing about how much product to use, which makes wipes popular for cameras placed far from the truck.
Each wipe is a single use item, so the cost per treatment is higher than a spray, and the film tends to last a shorter time in wet weather. Wipes suit hunters who service a handful of remote cameras and value speed and consistency over cost.
Reusable Treatment Cloths
A reusable cloth carries a dry anti fog compound in its fibers. You breathe lightly on the lens or simply wipe the dry glass, and the cloth transfers a thin layer of compound. There is no liquid to freeze in a cold pack, no drying wait, and one cloth handles hundreds of applications before it loses strength.
The trade off is durability. The film from a dry cloth is thinner than a spray film, so in steady rain it may give you one or two clear nights rather than a week. The cloth also stops working well once it picks up dirt or oil, so it needs its own clean storage pouch. If you already run cameras from our guide to the best trail cameras, a cloth in the same gear bag is an easy habit to build.
Moisture Absorbing Inserts
Inserts are small packets or cartridges filled with silica gel or a similar drying material. You place one inside the camera body, near the battery tray, and it pulls humidity out of the sealed air inside the housing. This is the only method on this list that prevents fog on the inside surface of the lens, a common problem after a camera sits through big day and night temperature swings.
Inserts do nothing for dew on the outer lens, so many owners pair an insert with a spray or cloth. Packets saturate over time and must be dried or replaced. Check them at every card swap, especially on cameras from our roundup of the best cell trail cameras that stay in the field for months.
Surface Treatments vs Inserts: Which Should You Choose?
Start by diagnosing where your fog forms. If photos are misty only in the first hours after sunset or at dawn, and the lens feels wet when you touch it, the fog is outside and a surface treatment is the answer. If the haze looks soft and even, appears after warm days and cold nights, and the outer lens feels dry, the fog is inside and you need inserts plus a check of the door seal.
Cost also points the way. A spray bottle at around $10 to $20 treats a whole fleet, while inserts run about $5 to $15 per camera and need renewal. Effort matters too. Treatments need a visit to apply, while inserts work silently between visits, which suits cameras you rarely touch, such as the setups described in our guide to the best trail cameras for security. Many owners in humid regions simply use both, because each method covers the weakness of the other.
How to Choose the Right Anti Fog
Match the Method to Your Climate
Climate decides more than brand does. In the humid Southeast, where dew forms almost every night, a spray with a longer lasting film plus an insert inside the housing gives the most reliable coverage. In dry western states, fog is rare and a reusable cloth carried for the occasional damp morning is usually enough.
Cold northern seasons create a different pattern. Cameras pulled from a warm truck into freezing air fog quickly on the inside, so let the camera cool gradually before sealing the door, and lean on inserts through winter.
Check Compatibility With Your Lens and Housing
Trail camera lenses are small and often sit behind a protective window, so confirm the product is safe for coated glass and plastics before you buy. Most quality treatments state this on the label. Avoid household glass cleaners and anything with ammonia, which can damage coatings and leave a streaky film that scatters the infrared flash at night.
Housing design matters for inserts. Measure the spare room near the battery tray before ordering cartridges, and keep packets clear of the lens window and the motion sensor. Owners of connected models should also review our guide to the best wifi trail cameras when planning how often they open the door.
Think About Battery Visits and Service Intervals
Your anti fog schedule should ride along with trips you already make. If you swap cards and batteries monthly, a spray or wipe applied at each visit rarely lapses. If your cameras run for a full season on lithium cells, choose longer lasting films and fresh inserts sized for that whole span.
Power choices affect this too. Long life batteries mean fewer visits and longer gaps for treatments to fail quietly. Our guide to the best batteries for trail cameras explains realistic run times, so align your fog plan with the service interval those batteries actually give you.
Consider Night Image Quality
A treatment that looks clear at noon can still hurt night photos. Thick or uneven films scatter infrared light and create a glow around bright animals, while fingerprints left during application show up as soft smears. Apply treatments in daylight, inspect the lens from an angle, and take a few test shots at home in a dark room before the camera goes back out.
Weigh Cost Per Camera Per Season
Sticker price misleads here. A spray at around $15 may treat ten cameras for a season, while premium wipes at about $1 to $2 each add up fast across a fleet. Inserts sit in the middle, with reusable types costing more at first but less over two or three seasons because you dry and reuse them. Count your own labor too. The cheapest system is the one whose service rhythm matches trips you already make.
Setup and Care Tips
Technique decides results more than the product does. Clean the lens first with a dry microfiber cloth, because treating over dust locks grit under the film. Apply sprays sparingly, spread in one direction, and buff only until the haze clears. Use a lens cloth, not your shirt, since shirt fabric carries oils and rough fibers that scratch coatings.
- Mount the camera with a slight downward tilt so dew and rain run off the lens window instead of pooling on it.
- Face the camera north or south where possible, because direct sunrise sun on a cold lens encourages condensation and false triggers.
- Carry a spare packet of wipes and a dry cloth in a sealed bag so a fogged camera found on a morning check can be fixed on the spot.
- Store treatments and inserts in a dry, padded bag at home, and dry saturated silica packets as the maker directs before reusing them.
One more habit helps. Note the date and method on a small card inside each camera door, so after a season you know which treatment survived your weather.
FAQs
What features matter most in anti fog treatments for trail cameras?
Look first at how long the film or packet lasts in wet weather, then at safety for coated lenses and plastic windows. Ease of application in the field matters more than laboratory claims, and a treatment you can renew in under a minute at the tree will beat a stronger one you skip. Size and storage needs round out the list for owners running many cameras.
Why does my trail camera fog on the inside of the lens?
Inside fog means moist air was sealed in the housing and then cooled until water condensed on the lens. It often starts after you open the door on a humid day or bring a cold camera into a warm room. A fresh drying insert, a sound door gasket, and letting the camera reach outdoor temperature before closing it usually solve the problem.
How much should I spend on anti fog for my first trail camera?
About $10 to $20 covers a first season for one or two cameras. A single spray bottle or a small pack of wipes plus a couple of drying inserts fits that budget and lets you learn which problem, outer dew or inner moisture, your site actually has. Spend more only after a season of notes shows a clear pattern.
Is a smartphone lens cleaner enough instead of a trail camera treatment?
No, not for long. Phone cleaners are built for glass touched daily and wiped often, and their films fade within hours outdoors. Trail cameras sit untouched for weeks in dew, rain, and frost, so they need treatments rated for longer outdoor exposure. A phone cloth is fine for a quick clean, but plan on a real treatment for lasting clarity.
Which anti fog approach works better in low light and at night?
A thin, even spray film usually performs best at night because it adds the least scatter to the infrared flash. Thick gels and half dried wipe residue can create a halo around animals close to the camera. Whatever you choose, test it with night shots at home, since daylight clarity does not guarantee clean infrared images.
What should beginners check before buying an anti fog product?
Beginners should confirm three things: the label says the product is safe for coated optics and plastics, the method matches where their fog forms, and the reapplication interval fits how often they visit the camera. Starting with one spray and one set of inserts covers both fog types for little money and teaches you what your location demands.
Our Verdict
For most owners, the winning setup is a spray or reusable cloth for the outer lens plus a drying insert inside the housing, renewed on the same trips you already make for cards and batteries. Match the film strength to your climate, keep applications thin for clean night images, and track results per camera. Compare the options in the product table above, and you will find the best anti fog for trail cameras for your woods, your weather, and your budget.