Best 12 Inch Sliding Compound Miter Saws 2026 Guide
Disclosure: We may earn a commission when you buy through links on this page, at no extra cost to you. As an Amazon Associate I earn from qualifying purchases. Learn more

Best 12 inch sliding compound miter saws for wide boards, crown molding, and bevels. Compare capacity, accuracy, and dust control before buying.
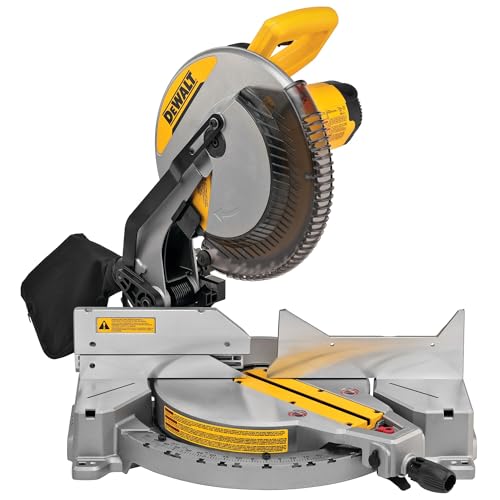
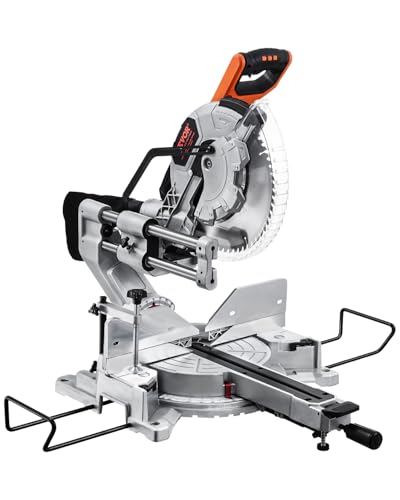
Choosing the best 12 inch sliding compound miter saws starts with capacity, because a sliding 12 inch saw cuts wider boards and taller crown molding than a smaller non sliding saw. The sliding rail lets the blade travel forward across the workpiece, so a 12 inch blade can crosscut boards up to about 12 inches wide and cut bevels in both directions. The product table gives a quick overview, and the guide that follows explains capacity, accuracy, and safety in plain terms.
A sliding compound saw suits trim work, framing, decking, and furniture projects where accurate angles matter on wide material. It is a workshop centerpiece that rewards careful setup, and a poorly adjusted saw frustrates every cut, so accuracy checks matter as much as power ratings.






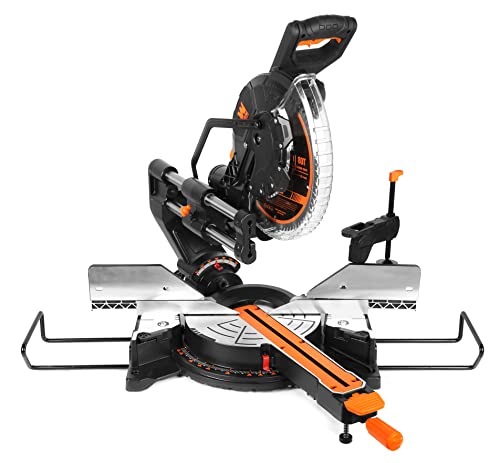
Who Needs a 12 Inch Sliding Compound Saw
A 12 inch sliding compound saw suits trim carpenters, deck builders, framers, and serious home woodworkers who regularly cut wide boards and crown molding. It also suits remodelers who cut baseboards, casing, and stair parts at varied angles. The larger blade and slide capacity handle jobs that strain a 10 inch saw, especially wide shelving and deck boards.
A 12 inch sliding saw may not suit everyone, though. It is heavier and larger than a 10 inch saw, needs more bench space, and costs more. Casual users who cut only small trim a few times a year may do well with a smaller saw or a circular saw with a guide. Workshop space and lifting ability matter, since moving a heavy saw alone can strain the back.
Key Features Worth Comparing
Cutting capacity is the first check: maximum crosscut width at 90 degrees, maximum height for crown molding nested against the fence, and bevel range in both directions. Compare capacity at common angles too, since capacity drops as the miter angle increases. A saw that handles your widest board at 90 degrees may still fall short for wide boards at 45 degrees.
Accuracy, Fences, and Detents
Accuracy decides whether trim joints close tightly. Check miter detents at common angles, bevel stops, and fence straightness, and make trial cuts with a square before trusting the factory settings. A good fence stays straight under clamping pressure and supports long boards without flex. Laser or shadow line guides help align cuts, but a sharp blade and a square setup matter more than any guide light.
Blade Quality and Motor Power
Blade quality shapes cut finish more than motor size alone. A fine tooth blade gives smooth trim cuts, while a general purpose blade suits framing and decking. Motor power of about 15 amps suits most 12 inch saws, but a smooth start and steady speed under load matter as much as peak power. Keep a spare blade and change it when cuts tear or burn, since a dull blade is both slow and dangerous.
Dust Collection and Workspace
Miter saws throw dust widely, so dust collection matters for cleanup and for the air you breathe. A dust bag helps a little, while a shop vacuum connection with a good shroud captures far more. Check the dust port size and hose fit before buying, and wear eye, hearing, and dust protection for every cut. A saw stand with long supports helps handle wide boards safely and keeps the saw at a comfortable working height.
Safety Features and Setup
Safety features include a blade guard that moves smoothly, a hold down clamp for small pieces, and a lock for transport. Never remove the guard, never cut freehand without the fence, and keep hands well clear of the blade path. Set the saw on a stable stand, check that the blade is square to the fence and table, and make trial cuts in scrap before cutting finished trim. Follow the manufacturer's instructions.
How to Choose the Right Saw
Start with capacity: list your widest boards, tallest crown, and most common angles, then confirm the saw handles them with margin. Next, compare accuracy features, fence quality, and dust collection, since these decide daily satisfaction more than peak power. Then check weight and bench space, including slide travel behind the saw, which needs clearance on some rail designs.
Prices range from about $250 to $900 for 12 inch sliding compound saws, with professional models higher. A mid range saw with good fences, smooth slides, and effective dust collection usually gives the best workshop value. Check warranty and parts availability, since slide bearings and fences wear over years of use.
Finally, budget for blades and a stand. A fine trim blade, a framing blade, and a sturdy stand complete the setup and protect both accuracy and safety. Keep the manual and setup tools nearby, and recheck square settings after moving the saw or changing blades.
Common Mistakes to Avoid
One common mistake is trusting factory square settings without trial cuts, which leads to gaps in trim joints. Always square the saw and cut scrap first. A second mistake is cutting small pieces without a clamp, which lets the offcut fly or the hand slip toward the blade. Clamp small workpieces and keep hands clear.
A third mistake is using a dull blade to save money, which burns wood, tears grain, and increases kickback risk. Replace blades when cuts degrade. A fourth mistake is ignoring dust collection and hearing protection during long sessions. Connect a vacuum, wear protection, and keep the workspace clear.
For a broader sliding saw comparison, see the guide to best sliding compound miter saws. Blade choices matter greatly, so the guide to best saw blades for miter saws explains tooth counts and finishes for trim and framing work.
Before You Decide
Workshop layout around a sliding saw needs more thought than a simple bench. Sliding rails need clearance behind the saw on some designs, while the saw table needs long supports on both sides for wide boards. Plan the full footprint including slide travel and board overhang, and keep the area behind the saw clear so the slide never hits stored material mid cut.
Blade storage and labeling save time and prevent mistakes. Keep trim, framing, and general purpose blades in labeled sleeves near the saw, and note tooth count on each sleeve. A blade used for the wrong job gives rough cuts and wears faster.
Calibration should become a routine, not a one time event. Check square settings after moving the saw, after blade changes, and at the start of any trim project where joints must close tightly. A five minute check with a square and scrap wood prevents hours of rework on expensive trim material.
Frequently Asked Questions
What can a 12 inch sliding miter saw cut?
A 12 inch sliding miter saw can crosscut boards up to about 12 inches wide at 90 degrees, cut tall crown molding nested against the fence, and bevel in both directions for compound angles. Capacity drops at steeper miter angles, so check capacity at your common angles before buying. Wide shelving, deck boards, and trim all suit this saw size.
Is a sliding miter saw better than a non sliding saw?
A sliding miter saw cuts wider boards than a non sliding saw of the same blade size, since the blade travels forward across the workpiece. Non sliding saws are lighter, cheaper, and simpler, which suits small trim work. Choose sliding when wide boards and crown molding appear regularly in your projects.
How do I keep miter saw cuts accurate?
Keep miter saw cuts accurate by squaring the blade to the fence and table, checking miter detents and bevel stops, and cutting scrap before finished work. Support long boards so they do not sag during the cut, and keep the blade sharp. Recheck settings after moving the saw or changing blades.
What blade should I use for trim work?
A fine tooth blade with 60 to 80 teeth gives smooth trim cuts with little tear out on painted and hardwood trim. A general purpose blade suits framing and decking where speed matters more than finish. Change blades when cuts tear, burn, or slow down, since a dull blade harms both quality and safety.
Is a 12 inch miter saw safe for beginners?
A 12 inch miter saw can suit careful beginners who learn setup, clamping, and guard use before cutting finished work. Always keep hands clear of the blade path, clamp small pieces, wear eye and hearing protection, and practice on scrap. If you feel unsure about any cut, stop and seek guidance from an experienced woodworker first.
Final Thoughts
The product table gives a useful starting point, but the right saw comes from matching cutting capacity, fence accuracy, and dust collection to your widest boards and most common angles. Square the saw, check it on scrap, and keep blades sharp.
With those checks done, you can choose the best 12 inch sliding compound miter saws option that delivers tight joints and smooth cuts across trim, decking, and furniture work. A well set up saw rewards every project that follows.