
Best Bottle Cage for Mountain Bike: A Trail Ready Buying Guide for 2026
Disclosure: We may earn a commission when you buy through links on this page, at no extra cost to you. As an Amazon Associate I earn from qualifying purchases. Learn more

How to pick a mountain bike bottle cage that holds on rough trails: frame fit, side entry, materials, grip, and the small details that prevent lost bottles.
A good best bottle cage for mountain bike choice is easy to overlook until a bottle bounces out on a rocky descent. Trail riding shakes, rattles, and jolts a bike far harder than road riding, so a cage that feels secure in the shop can still lose a bottle on the first rough section. The comparison table below gives a quick side by side view, and this guide explains fit, grip, and materials for real trail conditions.
Cage choice also depends on your frame. Full suspension frames often leave little room inside the main triangle, small frames squeeze bottle space further, and some riders carry a bottle on the seat tube, the down tube, or both. Measuring your frame clearance before you buy prevents the common frustration of a cage that fits the bottle but not the bike.
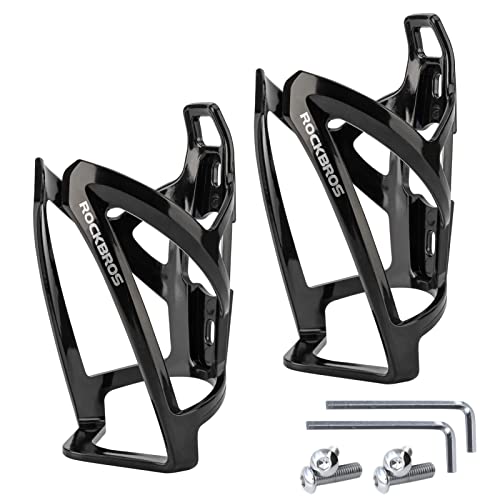


Frame Fit Comes First
Start by measuring the space inside your frame where the cage will sit. Note the distance between the bottle bosses, the clearance above the cage for pulling the bottle out, and any interference from suspension linkages or frame bags. A top entry cage needs vertical room to lift the bottle clear, while a side entry cage needs lateral room on one side, which suits tight frames far better.
Also check bottle size against the frame. A tall bottle may hit the top tube on a small frame, while a short bottle may sit loose in a cage designed for larger diameters. Bring your usual bottle when you shop if you can, and test insertion and removal while the bike stands still. A cage that fights you in the shop will fight you more on a trail when your hands are tired and dusty.
Grip and Retention on Rough Trails
Retention is the cage ability to hold the bottle through vibration, drops, and sudden impacts. Metal cages can be bent slightly to tighten grip, while plastic and composite cages rely on their molded shape and flex. Look for a cage that grips the bottle at more than one point, since a single narrow contact patch lets the bottle rock and work loose over rough ground.
Test retention by shaking the bike firmly with the bottle in place and by riding a short rough section near home before a long ride. A bottle that rattles loudly is telling you the fit is loose, even if it has not fallen out yet. Adding a grippy bottle or a cage with rubberized contact points can help, but the cage and bottle should match in diameter first. Related bottle options are covered in our guide to best mountain bike bottle and best water bottle for mountain bike.
Materials: Plastic, Metal, and Carbon
Plastic and composite cages are light, affordable, and forgiving, since they flex rather than bend permanently. They suit most trail riders and survive crashes without sharp edges. Their weakness is fatigue over time: a cage that has flexed thousands of times may slowly lose grip, so inspect it each season and replace it when bottles start to feel loose.
Metal cages, usually aluminum or steel, offer a firmer hold and can be adjusted by hand to restore grip. They weigh a little more and can scratch bottles, but they last well and suit riders who value a solid feel. Carbon cages are the lightest and look sharp, yet they cost more and can crack rather than bend in a hard crash.
For most riders, a quality composite or metal cage gives the best balance of weight, grip, and price. Holder styles are compared in our guide to best mountain bike bottle holder.
Side Entry Versus Top Entry
Side entry cages let you slide the bottle out to one side, which is a major advantage on small frames and full suspension bikes where vertical space is tight. Left and right entry versions exist, so choose the side that matches your frame layout and your dominant hand. A side entry cage on the wrong side can be awkward to use when the frame bag or suspension linkage blocks the opening.
Top entry cages suit larger frames with generous clearance and riders who prefer a simple straight pull. They often grip more firmly around the bottle neck, which helps on very rough descents. If your frame allows both, try each style in the shop and notice which one lets you replace the bottle without looking down for long. On technical trails, that small ease of use matters for safety as well as convenience.
Two Bottles, Packs, and Alternatives
Some riders need more water than one frame bottle provides, especially on long summer rides. A second cage on the seat tube helps if space allows, while others prefer a hydration pack for longer outings. Frame bags, handlebar bags, and seat packs can also carry a spare bottle, though they change weight distribution and access speed.
Think about your longest typical ride when deciding. A single bottle suits short loops near a refill point, while longer remote rides may need a second bottle or a pack. Matching capacity to your ride length prevents both dehydration and the annoyance of carrying water you never drink. Our guide to best mountain bike water bottle cage covers cage and bottle combinations for mountain bikes.
A Final Check Before You Order
Before you order, measure frame clearance, confirm boss spacing, and check your bottle diameter against the cage design. Note whether you need left or right side entry, and whether a second cage will fit without hitting suspension parts. Those measurements take five minutes and prevent most returns in this category.
After fitting, ride a short rough section and listen for rattles, then adjust grip or swap bottles if needed. A cage that holds quietly on a trial ride will hold on a long descent, and a cage that rattles early will only get worse. With fit, grip, and material settled, choosing a cage becomes a simple, confident decision.
Maintenance and Seasonal Checks
A bottle cage needs little maintenance, but a seasonal check prevents most trail failures. Inspect the cage arms for cracks, bends, or worn contact points, and check that mounting bolts stay tight without over tightening, which can crack composite cages or strip frame threads. A tiny drop of thread compound on bolts, where appropriate, keeps them secure through vibration without making future removal difficult.
Clean the cage after muddy rides, since dried mud adds weight and can abrade bottle surfaces over time. Rinse with water, wipe dry, and check that rubberized grips, if fitted, have not peeled or hardened. Replace a cage that rattles despite adjustment, since a loose cage will only worsen on rough ground and may eventually drop a bottle at the worst moment.
Seasonal changes also matter. Cold weather makes some plastics stiffer and more brittle, while summer heat can soften cheaper composites slightly. If you ride year round, inspect more often in winter and after any crash, even a low speed one, since a cracked cage may look fine until it fails under load on a descent.
Frequently Asked Questions
Why do bottles fall out of mountain bike cages?
Bottles fall out when grip is loose, the bottle diameter mismatches the cage, or vibration works the bottle free over rough ground. A cage that grips at several points and matches your bottle size holds far better. Test on a rough section near home before a long ride, and replace a cage that has lost its tension.
Is side entry or top entry better for trail riding?
Side entry suits small frames and full suspension bikes with limited vertical space, since you slide the bottle out sideways. Top entry suits larger frames and often grips more firmly. Choose based on your frame clearance and which motion feels natural without looking down for long on technical trails.
Do carbon cages hold bottles better than plastic?
Carbon cages are lighter and very stiff, but they do not automatically grip better than quality plastic or metal cages. Grip depends on shape, contact points, and bottle match. Carbon also costs more and can crack in a crash, while metal can be bent back and plastic flexes. Most riders do well with composite or metal.
Can I fit two bottle cages on a full suspension bike?
It depends on frame size and suspension layout. Many full suspension frames fit one cage comfortably and a second only with a side entry design or a smaller bottle. Measure both mounting positions, check suspension movement through its full travel, and test with bottles fitted before relying on two cages.
How often should I replace a bottle cage?
Replace a cage when bottles feel loose, rattle loudly, or show cracks, bent arms, or worn contact points. Plastic cages may lose tension over seasons of flexing, while metal cages can be adjusted a few times before replacement. A quick check each season keeps trail rides free of lost bottle surprises.
Final Thoughts
A trail ready bottle cage is a small part with an outsized effect on ride comfort. Fit it to your frame, match it to your bottle, and test retention on rough ground before a long ride. Those checks turn a simple accessory into reliable trail kit.
Prioritize grip and frame fit over weight savings, since a lost bottle costs far more time and hydration than a few grams ever save. With those priorities clear, picking the best bottle cage for mountain bike use becomes straightforward, and your water stays where it belongs on every descent.


