
Best Blenders for Ice Cream 2026 Dessert and Shake Guide
Disclosure: We may earn a commission when you buy through links on this page, at no extra cost to you. As an Amazon Associate I earn from qualifying purchases. Learn more

A plain guide to blenders for ice cream: thick shakes, soft serve style desserts, frozen fruit treats, and cleaning, so desserts come out smooth.
Blending ice cream sounds simple, but thick frozen desserts test a blender hard, and best blenders for ice cream are the ones with the torque, tamper, and jar design to turn frozen scoops into a smooth shake without stalling or melting the mixture. A weak blender leaves lumps and liquid at the bottom while the top stays frozen, while a strong one gives a thick, even texture in under a minute. The product table above lets you compare power, jar design, and frozen handling before you buy.
This guide explains how to blend thick shakes, soft serve style desserts, and frozen fruit treats, plus the layering and liquid ratios that make the difference. It also covers cleaning sticky dairy residue, noise, and the food safety basics that matter for frozen desserts. Whether you make milkshakes for children or frozen treats for a party, the right blender makes dessert easy.


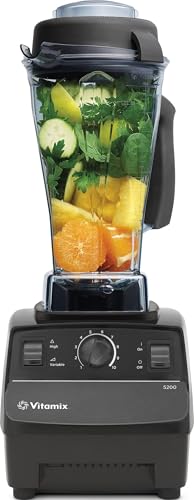
Torque and Thicker Mixtures
Thick frozen desserts need torque more than top speed, since the blades must turn through a dense frozen mass rather than a liquid. A high performance blender with a strong motor and a tamper handles this best, because the tamper pushes frozen material down onto the blades without stopping the machine. Weaker blenders stall on thick mixtures, and repeated stalling strains the motor and heats the dessert.
If your blender stalls on ice cream, add liquid a little at a time rather than running a stalled motor, since a small amount of milk or cream helps circulation enormously. Start on low speed and build up, using pulse bursts to break large frozen chunks. A blender that handles thick mixtures well will also handle smoothies and soups with ease, making it a versatile kitchen machine.
Shakes, Soft Serve, and Frozen Fruit Treats
Classic milkshakes need ice cream, milk, and flavourings blended just long enough to combine, since over blending melts the shake thin. Soft serve style desserts use frozen fruit or frozen yoghurt blended with minimal liquid and a tamper, giving a thick spoonable texture straight from the jar. Frozen fruit treats, often called nice cream, use frozen banana and berries blended with a splash of milk for a dairy free dessert that tastes surprisingly like ice cream.
Each style needs a different liquid ratio: shakes need enough milk to pour, soft serve needs as little liquid as possible to stay thick, and frozen fruit treats sit in between. Taste and adjust sweetness after blending, since cold dulls sweetness and frozen desserts often need a little more sugar or honey than expected. Serve at once, since thick desserts melt and separate quickly at room temperature.
Layering and Liquid Ratios
Layering matters for frozen desserts: put liquid and soft ingredients first, then ice cream or frozen fruit, so the blades catch liquid and build a vortex. Add liquid gradually rather than all at once, since too much liquid turns a thick dessert into a thin drink that cannot be fixed. If the mixture stops moving, stop the blender, stir or tamp, and restart, rather than running a stalled motor.
Chill glasses and bowls in the freezer while you blend, since a cold serving dish keeps thick desserts firm longer. For parties, blend in batches and keep finished servings in the freezer briefly, stirring before serving. Label dairy and non dairy batches clearly when guests have allergies or dietary needs, and keep serving spoons separate to avoid cross contact.
Dairy, Allergies, and Food Safety
Frozen desserts made with dairy need care: keep ice cream frozen until blending, blend promptly, and serve at once rather than leaving blended desserts standing at room temperature. Dairy left warm for hours can grow harmful bacteria, so discard any blended dessert left out for more than two hours, or one hour in hot weather. Clean the jar promptly after dairy use, since milk residue smells quickly and can harbour bacteria.
For guests with milk allergy or lactose intolerance, use dedicated dairy free ingredients and clean the jar thoroughly before blending their servings, since even small dairy residue can cause reactions. Check labels on ice cream, toppings, and mix ins for hidden milk, nuts, and gluten, and ask guests about allergies before serving. A little care keeps dessert enjoyable for everyone.
Cleaning Sticky Dairy and Fruit Residue
Dairy and fruit residue dries fast onto blades and seals, so rinse the jar immediately after blending, before residue hardens. Blend warm water with a drop of soap briefly, then rinse and dry fully before storing, since damp jars smell quickly. Check whether your jar and blades are dishwasher safe, and inspect the gasket regularly, since dairy residue trapped in a worn gasket causes smells that no rinse will fix.
For stubborn residue, soak the jar in warm soapy water for a few minutes, then brush gently around the blade base, taking care with sharp edges. Never immerse the motor base in water, and unplug the blender before cleaning around blades. A blender that cleans in a minute gets used for dessert often, while one that takes ten minutes stays in the cupboard.
Noise, Size, and Party Batches
Ice cream blending is loud, since the motor works hard on frozen material, and a heavier base reduces vibration and noise. Blend in short bursts where possible, and warn the household before a party batch marathon. If noise is a regular issue, a model with a sound enclosure helps, though it adds cost and size.
Batch size matters for parties: a large jar handles several servings at once, but thick desserts blend less evenly in an overfilled jar, so blend in moderate batches and keep servings chilled between rounds. A mid size jar around 1.5 litres suits most families, handling two to four servings well. Measure your freezer space too, since storing ice cream and frozen fruit for parties takes room.
Toppings and Mix Ins That Blend Well
Toppings added before blending become part of the texture, while toppings added after stay distinct, so decide which effect you want. Soft mix ins such as peanut butter, chocolate sauce, and soft fruit blend smoothly into shakes, while hard mix ins such as nuts, biscuits, and chocolate chips need only a few pulses at the end to stay chunky. Over blending hard mix ins turns them to dust and loses the contrast that makes a dessert interesting.
Add toppings in stages: blend the base smooth first, then pulse in chunky mix ins briefly, and save a spoonful for garnish on top. Check for allergies before adding nut toppings, and keep nut and nut free servings separate with different spoons. A dessert with a smooth base, a few chunks, and a garnish on top looks and tastes far better than a uniformly blended mixture.
Related Buying Guides
For ice handling in general, compare best blenders for smoothies and ice and best blenders for chopping ice. Both explain ice crushing technique that also helps frozen desserts blend smoothly.
Frequently Asked Questions
Why does my blender stall on ice cream?
Thick frozen desserts need torque, and a weak blender stalls when blades meet a dense frozen mass. Add liquid a little at a time, start on low speed, and use a tamper to push material onto the blades. If stalling happens often, your blender is underpowered for thick desserts, and a high performance model with a tamper will handle them far better.
How much liquid should I add to a milkshake?
Start with a small amount of milk and add gradually, since too much liquid turns a thick shake into a thin drink that cannot be fixed. Put liquid first, then ice cream, and blend just long enough to combine, since over blending melts the shake thin. Chill glasses in the freezer while blending, and serve at once for the thickest texture.
Can I make dairy free frozen desserts in a blender?
Yes, frozen banana and berries blended with a splash of milk alternative make a thick dairy free treat often called nice cream. Use a tamper and minimal liquid for a spoonable texture, and clean the jar thoroughly before blending dairy free servings if dairy was used before, since even small residue can affect guests with milk allergy.
How long can a blended ice cream dessert stand out?
Serve blended desserts at once, and discard any dairy dessert left at room temperature for more than two hours, or one hour in hot weather, since dairy left warm can grow harmful bacteria. For parties, keep finished servings in the freezer briefly between batches and stir before serving. Never refreeze a melted dairy dessert that has stood warm.
How do I clean a blender after ice cream?
Rinse the jar immediately before dairy and fruit residue dries onto blades and seals. Blend warm water with a drop of soap briefly, rinse, and dry fully before storing. Inspect the gasket regularly, since dairy residue trapped in a worn gasket causes smells. Never immerse the motor base in water, and unplug before cleaning around blades.
Final Thoughts
The best blenders for ice cream combine torque for thick mixtures, a tamper for pushing frozen material down, and a jar size that matches your batches. The product table above gives a quick comparison, but liquid ratio and layering matter as much as power. Add liquid gradually, blend just long enough to combine, and serve at once in chilled glasses. With the right blender and a little technique, thick shakes and frozen treats become a reliable dessert rather than a stalled motor and a melted mess.


