
Best Adventure Bike Boots for 2026: The Buyer Checklist
Disclosure: We may earn a commission when you buy through links on this page, at no extra cost to you. As an Amazon Associate I earn from qualifying purchases. Learn more

Use this checklist for the best adventure bike boots, covering protection, sole grip, waterproofing, fit, closures, and spending levels before you buy.
Before you buy best adventure bike boots, run through a clear checklist of what matters, rather than judging boots by looks or price alone. Adventure riding mixes pavement, gravel, dirt, and walking, so a good boot must protect you on the bike and still feel reasonable on foot. This guide gives you that checklist in plain language, so you can compare any boot against the same standards. Start with the comparison table below, then work through each checkpoint in order.
The checklist approach works because it keeps you focused on the boot itself, not on the bike you ride. Engine size, suspension, and electronics do not change what your feet need, so this guide skips bike buying questions and stays on boot protection, grip, weather resistance, fit, and build. If a boot passes most checkpoints and fits well, it deserves a place on your shortlist, whatever your bike or experience level.


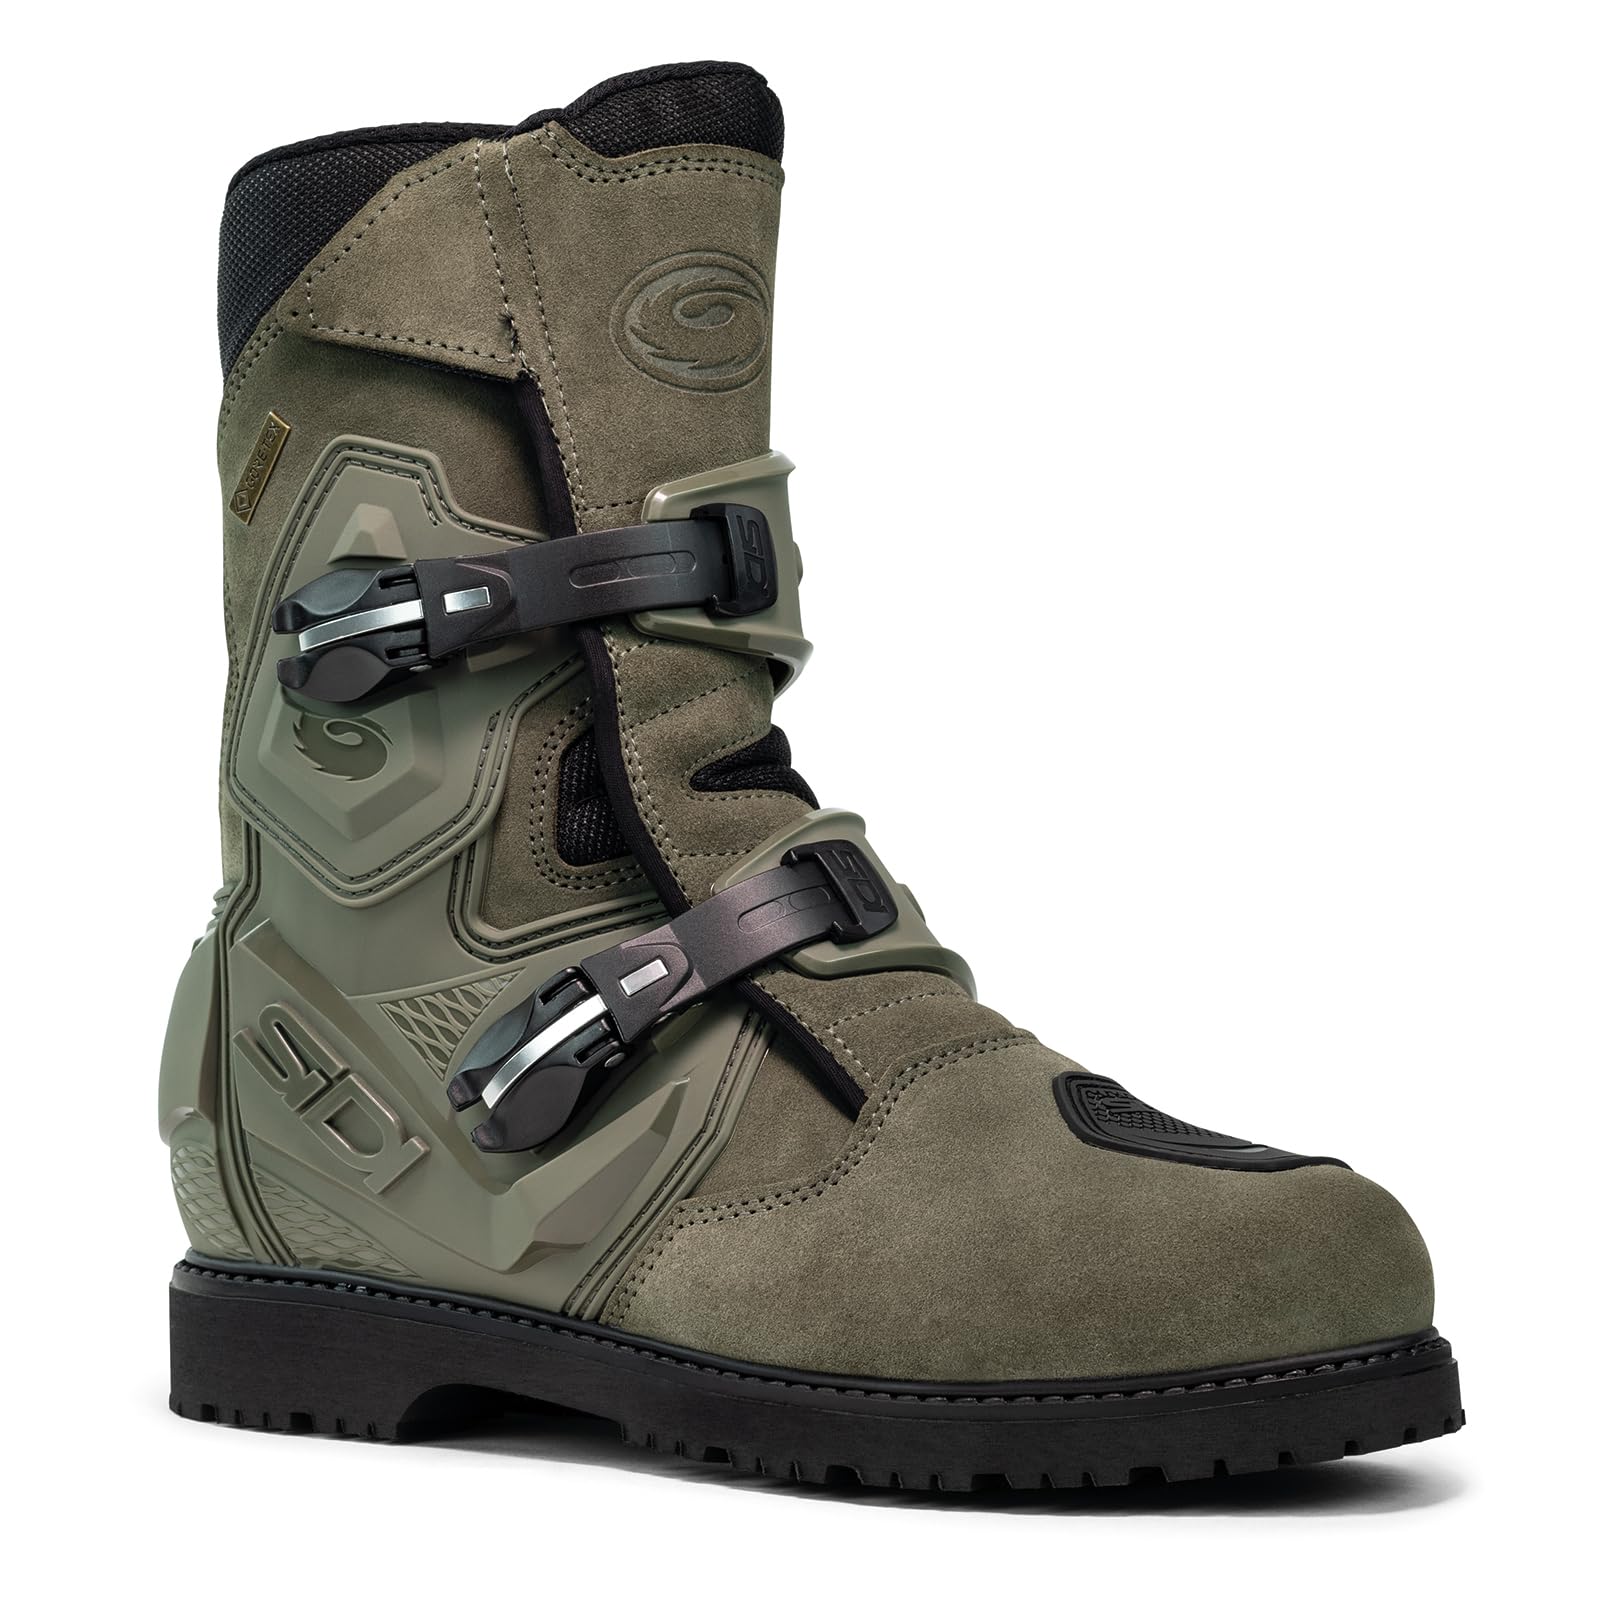


A Checklist for the Best Adventure Bike Boots
Use the checkpoints below as a scorecard. A boot does not need a perfect score on every point, but it should pass the protection, grip, and fit checks without excuses, since those affect your safety and control directly. The remaining checkpoints help you choose between boots that all clear the basics, based on your weather, distance, and walking needs. Riders also considering shorter footwear can read our guide to the best adventure boots to compare coverage levels.
Protection First
Check for molded or padded armor over both ankle bones, a reinforced toe box, a sturdy heel cup, and a shin plate that covers the front of your lower leg. Flex your ankle and walk a few steps to confirm the armor stays in place. Look for a shift pad on top of the boot, which guards against lever wear and adds a layer over the toes. No boot can guarantee protection in every crash, so pick the most complete protection you can wear comfortably.
Sole and Grip
Inspect the tread pattern and the rubber compound, since the sole connects you to the pegs and the ground. Deep, open lugs shed mud and grip loose gravel when you put a foot down, while a stable section under the arch keeps the boot planted on a foot peg. A sole that is too smooth can slip on wet pegs, and a very soft sole may wear fast on long pavement stretches, so match the tread to your riding mix. Replace boots once the tread wears smooth, since grip is not something to compromise on.
Waterproofing and Weather
Decide how much weather protection your riding really needs before you pay for it. A waterproof membrane built into the lining keeps feet drier through rain and stream crossings, but it also adds warmth that can feel heavy in summer heat. Treated outer materials resist light rain and dry faster, yet they soak through in sustained downpours. Sealed seams and a gusset behind the closure help at the usual weak points, and a tall shaft with a snug top keeps water from running in over the edge.
Fit and Comfort
Fit is the checkpoint most buyers rush, and it is the one most likely to cause regret. Try boots with your riding socks, walk indoors for several minutes, and check that your toes have a little room while your heel stays seated. The ankle should feel supported without painful pressure on the ankle bones, and your foot should not slide forward when you press down as if braking. Measure both feet and use the maker size chart, since sizing varies between brands and feet are rarely identical.
Closure and Adjustability
Try every closure with gloves on, because roadside adjustments in cold or wet weather are frustrating with fiddly fasteners. Buckles adjust quickly and let you fine tune tightness over the ankle and shin, while laces give an even fit but take longer and need securing so they cannot snag. A side zipper speeds entry, but it should sit behind a protective flap rather than exposed as a weak point. Tug each buckle and strap firmly to confirm it holds under strain, and check that the closure lets you adjust tightness as the boot breaks in.
Materials and Build
Compare outer materials on durability, weather resistance, and care needs rather than on appearance alone. Full grain leather breaks in nicely and lasts well with conditioning, while modern synthetics often resist water and scuffs with less maintenance.
Check stitching at stress points, the quality of buckles and zippers, and whether the sole is stitched, bonded, or both, since sole attachment affects long term durability. A well built boot should feel solid without feeling like a rigid box, and it should flex at the ankle for walking while holding its shape on the peg. If you also ride in lighter conditions, our guide to the best bike shoes covers lower cut options for comparison.
What Different Budgets Buy You
At a modest spending level, about $100 to $180, expect sound basic protection, a durable synthetic or split leather outer, and a grippy rubber sole. Waterproofing here is usually a treated outer rather than a full membrane, and closures tend to be simpler, but the core protection and grip can still be solid. These boots suit newer adventure riders and those who ride mostly on pavement with occasional gravel.
Spending about $180 to $320 usually buys better ankle bracing, a waterproof membrane, more refined closures, and soles tuned for mixed surfaces. Build quality steps up noticeably, with stronger stitching and reinforcement, and walkability often improves thanks to hinged ankles or more flexible designs. This range suits riders covering longer distances and riding dirt more often, since weather protection and durability pay off over many miles.
Above that level, you pay for advanced protection systems, premium materials, and soles designed for serious off road use. For most buyers, though, the middle range offers the best balance of protection, comfort, and value, and you can step up later once your riding style is clear.
Quick Buyer Checklist
- Does the boot protect both ankle bones, the toes, the heel, and the shin?
- Does the sole grip on loose ground and stay planted on a foot peg?
- Does the weather protection match the rain and water you actually ride through?
- Does the boot fit snugly with riding socks, with no pinching and no heel lift?
- Can you operate every closure easily while wearing gloves?
- Can you walk comfortably in the boots for the distances your trips require?
- Is the build quality strong at the stitching, closures, and sole attachment?
- Does the price match the protection and durability on offer, not just the styling?
Red Flags to Watch For
Be wary of boots with vague protection claims and no clear description of ankle armor or reinforcement, since real protection should be easy for a maker to describe. Thin, smooth soles are another warning sign, because they slip on pegs and loose ground. Short shafts that expose the ankle bones, flimsy closures, and uneven stitching are all reasons to walk away. Finally, treat any boot that promises complete safety as suspect, since no boot can guarantee protection in every crash, and honest makers say so.
Setup and Care Tips
When your boots arrive, wear them indoors with riding socks to find pressure points before your first ride, and break them in with shorter rides before a long trip. Check fit and tightness before each ride, and recheck buckles and straps after the first few miles, since new boots can settle. Never adjust closures while riding, and pull over somewhere safe if something needs attention, keeping to local road rules wherever you travel.
After muddy or wet rides, clean off dirt, let boots dry naturally away from direct heat, and condition leather as the maker directs. Inspect soles, stitching, and closures at the start of each season, and replace boots that show worn tread, torn seams, or failed closures.
Adventure Bike Boots: Frequently Asked Questions
How Do Adventure Bike Boots Differ From Regular Riding Boots?
Adventure bike boots differ from regular riding boots mainly in their taller shaft, tougher soles, and stronger off road protection. Regular street boots often prioritize style and light weight, with shorter coverage and smoother soles suited to pavement. Adventure boots add shin protection, deeper tread for loose ground, and more ankle bracing for uneven surfaces, while staying easier to walk in than full motocross boots. If your riding includes gravel or dirt tracks, the extra coverage and grip are worth having.
Can I Walk Comfortably in Adventure Bike Boots?
You can walk comfortably in many adventure bike boots, but comfort varies a lot between designs, so try walking in them before you commit. Boots with a hinged ankle, a flexible forefoot, and a moderate weight feel most natural on foot, while very stiff boots can tire your legs over distance. Walk indoors on hard floors and, if possible, on gravel to judge real world feel, and wear your riding socks for accuracy. If you plan to hike during trips, weight and sole flexibility should rank high on your checklist.
Do I Need Waterproof Adventure Bike Boots?
You need waterproof adventure bike boots if you often ride in rain, cross streams, or travel through muddy ground. A waterproof membrane keeps feet drier and warmer on long wet rides, which matters for comfort and focus over distance. If you ride mostly in dry weather, a water resistant boot may be enough, and you can carry lightweight overboots for rare wet days. Keep in mind that no boot stays dry once water runs in over the top, so tall coverage and a snug closure matter alongside the membrane.
How Do I Choose the Right Size in Adventure Bike Boots?
Choose the right size by measuring both feet, using the maker size chart, and trying boots with your riding socks. Your toes should have a little room to move, your heel should stay seated when you walk, and the ankle should feel supported without painful pressure. Try boots later in the day, when feet are slightly larger, and walk around indoors for several minutes before deciding. If you fall between sizes, the larger size with a slightly thicker sock often works better than a tight boot, since tight boots cause numbness on long rides.
How Long Do Adventure Bike Boots Last?
Adventure bike boots last anywhere from a few seasons of heavy use to many years of occasional riding, depending on mileage, surfaces, and care. Inspect them regularly rather than relying on age alone, and replace them when tread wears smooth, ankle support feels soft, closures no longer hold, or seams and materials show cracks or tears. A crash is another clear reason to replace boots, even if damage looks minor, because hidden harm can reduce protection. Cleaning off mud and salt, drying boots naturally, and conditioning leather as directed all extend their life.
Final Thoughts
Work through the checklist in order, and let protection, grip, and fit decide your shortlist before price or styling enters the picture. A boot that passes those checks and matches your weather and walking needs will serve you well on mixed surfaces. Use the product table above to compare options side by side, and favor the middle spending range if unsure, since it offers the best balance of protection and value. With a careful choice, best adventure bike boots become a simple purchase, and the boots you pick will earn your trust on every ride.


